Home>Home and Garden>How To Remove Sharkbite Fitting
Home and Garden
How To Remove Sharkbite Fitting
Published: March 3, 2024
Learn how to safely and effectively remove Sharkbite fittings with our step-by-step guide. Keep your home and garden plumbing projects running smoothly.
(Many of the links in this article redirect to a specific reviewed product. Your purchase of these products through affiliate links helps to generate commission for Noodls.com, at no extra cost. Learn more)
Table of Contents
Introduction
Removing a SharkBite fitting may seem like a daunting task, but with the right guidance, it can be a straightforward process. Whether you need to replace a faulty fitting or make adjustments to your plumbing system, understanding the steps involved in removing a SharkBite fitting is essential. SharkBite fittings are popular for their ease of installation and versatility, but knowing how to safely remove them is equally important.
In this comprehensive guide, we will walk you through the step-by-step process of removing a SharkBite fitting, providing you with the knowledge and confidence to tackle this task effectively. By following these instructions, you can ensure that the process is carried out smoothly and without any unexpected complications.
From turning off the water supply to releasing the fitting and installing a new one, each step is crucial in achieving a successful outcome. Whether you're a seasoned DIY enthusiast or a homeowner looking to address a plumbing issue, mastering the art of removing SharkBite fittings will empower you to take control of your home maintenance and repairs.
So, let's dive into the details and learn how to remove a SharkBite fitting with precision and confidence. Whether you're dealing with a leaky pipe or simply need to reconfigure your plumbing setup, this guide will equip you with the knowledge and skills to tackle the task effectively.
Read more: How To Remove Blinds
Step 1: Turn Off the Water Supply
Before embarking on the process of removing a SharkBite fitting, it is crucial to start by turning off the water supply to the specific area where the fitting is located. This step is essential to prevent any water from flowing through the pipes during the removal process, minimizing the risk of leaks and ensuring a safe working environment.
To begin, locate the main water shut-off valve for your property. This valve is typically found near the water meter or where the main water line enters your home. Once you have located the shut-off valve, turn it clockwise to shut off the water supply. It's important to verify that the water has been successfully turned off by opening a faucet or valve connected to the water line and ensuring that no water flows out.
In some cases, you may need to shut off the water supply to the entire property if there isn't a dedicated shut-off valve for the specific area where the SharkBite fitting is located. This may involve accessing the main water shut-off valve and turning it off to halt the flow of water throughout the entire property.
It's worth noting that turning off the water supply is a critical safety measure that should not be overlooked. By taking this precautionary step, you can avoid potential water damage and minimize the risk of encountering pressurized water when removing the SharkBite fitting.
Once the water supply has been successfully turned off and you have confirmed that no water is flowing through the pipes, you can proceed with confidence to the next step of releasing the SharkBite fitting.
By diligently following the process of turning off the water supply, you are setting the stage for a smooth and controlled removal of the SharkBite fitting, laying the groundwork for a successful transition to the subsequent steps of the removal process.
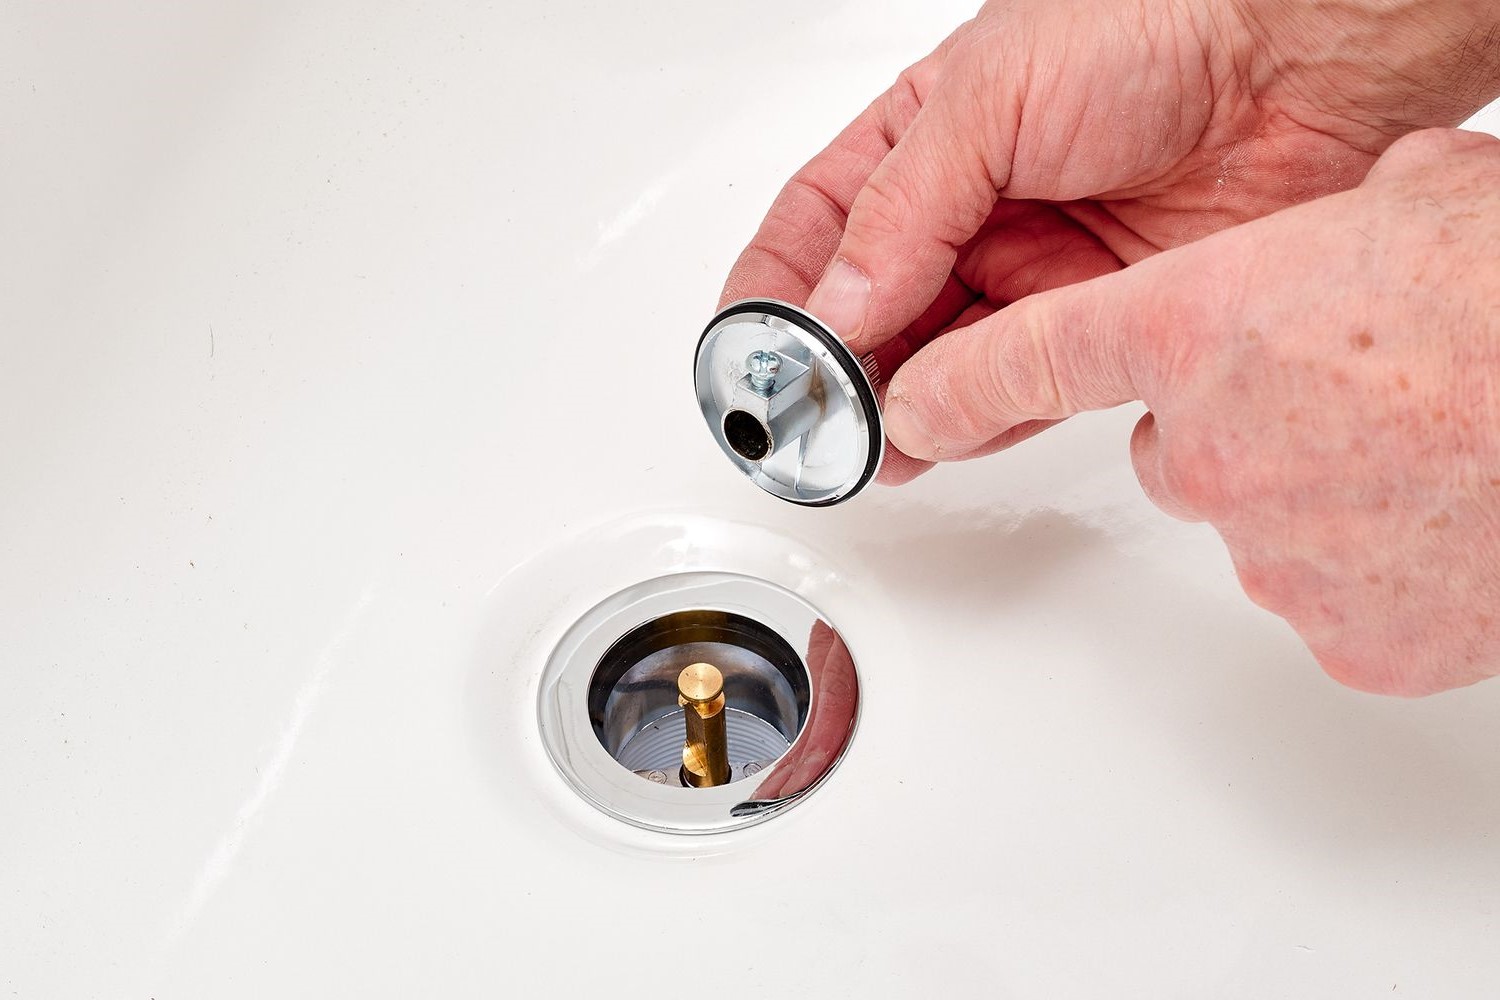
Step 2: Release the SharkBite Fitting
Releasing a SharkBite fitting requires precision and attention to detail to ensure a smooth disconnection without causing damage to the pipes or the fitting itself. The SharkBite system is designed for easy installation and removal, making it a convenient choice for various plumbing applications. To release the SharkBite fitting, follow these steps:
1. Mark the Pipe
Before releasing the SharkBite fitting, it's advisable to mark the pipe to indicate the insertion depth of the fitting. This step is particularly important if you plan to re-use the same pipe and fitting or if you need to maintain specific measurements for the replacement fitting. Using a marker or a piece of tape, make a visible mark on the pipe to denote the original insertion depth of the SharkBite fitting.
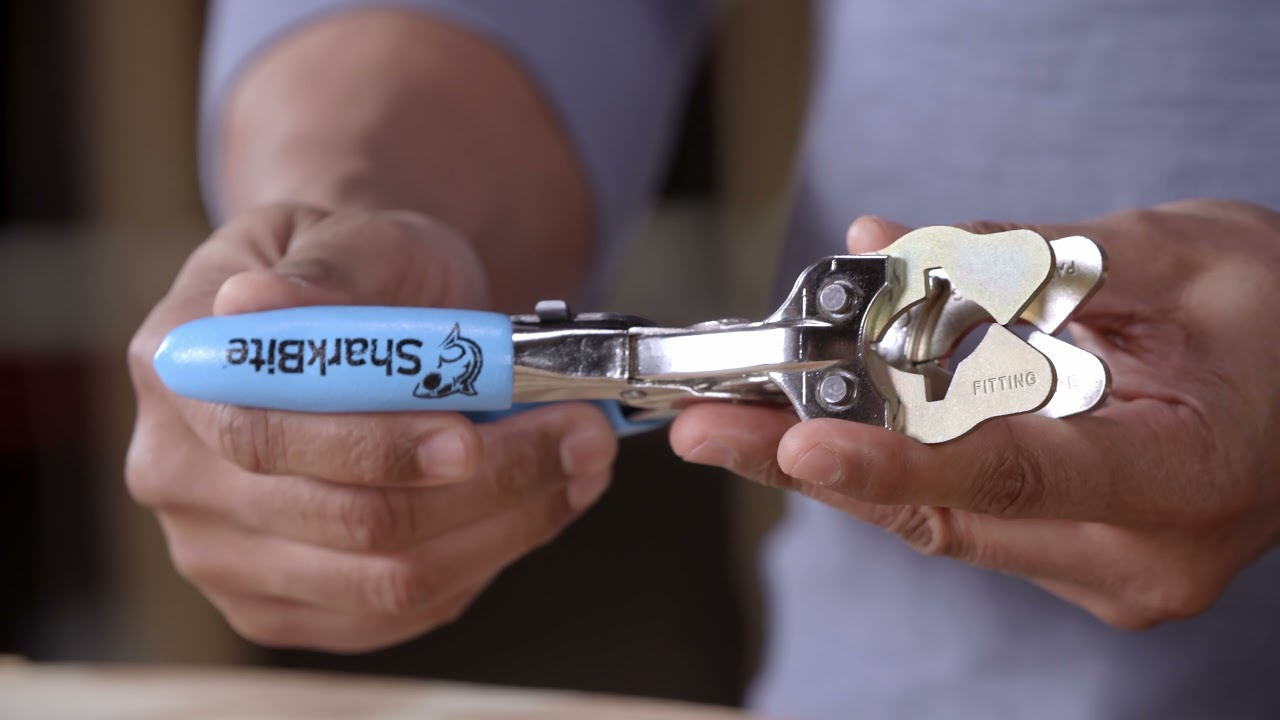
2. Depress the Release Collar
The next step involves depressing the release collar on the SharkBite fitting. This can be achieved using a specialized SharkBite release tool or a simple plastic tube, such as the plastic cap from a pen. Position the tool or tube over the release collar, ensuring that it covers the entire collar to exert even pressure.
Read more: How To Remove Tint
3. Maintain Firm Pressure
With the release collar depressed, maintain firm and steady pressure to keep it in the depressed position. This action will disengage the stainless steel teeth inside the fitting, allowing the pipe to be removed. It's important to exert consistent pressure to ensure that the release collar remains fully depressed throughout the process.
4. Remove the Pipe
While keeping the release collar depressed, gently pull the pipe out of the SharkBite fitting. It's essential to maintain a straight and steady motion to prevent any unnecessary strain on the fitting or the pipe. By pulling the pipe out smoothly, you can disengage it from the fitting without causing damage to either component.
5. Inspect the Fitting
Once the pipe has been successfully removed, take a moment to inspect the SharkBite fitting for any signs of damage or wear. This visual inspection can help you determine whether the fitting is suitable for reinstallation or if a replacement is necessary. Look for any deformities, cracks, or irregularities that may affect the fitting's performance.
By following these steps with precision and care, you can effectively release a SharkBite fitting without encountering any complications. This process allows for a seamless disconnection, providing you with the freedom to proceed with the next steps of your plumbing project confidently.
Step 3: Clean the Pipe
After successfully releasing the SharkBite fitting, it's essential to focus on cleaning the pipe to ensure that it is free from any debris, residue, or imperfections that could hinder the performance of the new fitting. Cleaning the pipe is a critical step in the process of replacing or reconfiguring plumbing components, as it sets the stage for a secure and reliable connection with the new fitting.
Read more: How To Remove Toilet Seat
1. Inspect the Pipe
Begin by inspecting the interior and exterior of the exposed pipe to identify any accumulated debris, corrosion, or irregularities that may have developed over time. It's important to conduct a thorough visual examination to assess the condition of the pipe and determine the extent of cleaning required. Look for any signs of scale buildup, oxidation, or foreign particles that could compromise the integrity of the new connection.
2. Use a Cleaning Tool
To effectively clean the pipe, utilize a suitable cleaning tool designed for plumbing applications. A pipe cleaning brush or a specialized pipe cleaning tool can be employed to remove any stubborn debris or residue from the interior surface of the pipe. Ensure that the cleaning tool is compatible with the diameter of the pipe and capable of reaching all areas that require cleaning.
3. Remove Residue and Corrosion
Carefully maneuver the cleaning tool inside the pipe, applying gentle pressure to dislodge and remove any residue, scale, or corrosion that may have accumulated. It's important to maintain a consistent and thorough cleaning motion to ensure that the interior surface of the pipe is free from obstructions and contaminants. Pay close attention to areas near the pipe end to guarantee a clean and smooth transition for the new fitting.
4. Wipe the Exterior
In addition to cleaning the interior of the pipe, it's advisable to wipe the exterior surface with a clean cloth or rag to remove any external debris or contaminants. This step contributes to ensuring that the exterior of the pipe is free from any substances that could interfere with the installation of the new fitting. By maintaining a clean exterior surface, you can facilitate a seamless and secure connection with the replacement fitting.
Read more: How To Remove Shower Drain
5. Verify Cleanliness
Once the cleaning process is complete, take a moment to verify the cleanliness of the pipe both internally and externally. Run a clean finger along the interior surface to check for any remaining debris or rough areas. Similarly, visually inspect the exterior of the pipe to confirm that it is free from any visible contaminants. This meticulous verification ensures that the pipe is prepared for the installation of the new fitting.
By meticulously cleaning the pipe and ensuring that it is free from any obstructions or contaminants, you can lay the foundation for a successful and reliable connection with the new SharkBite fitting. This proactive approach to pipe maintenance and preparation contributes to the overall integrity and performance of your plumbing system, allowing you to proceed with confidence to the next step of installing the replacement fitting.
Step 4: Install a New Fitting
With the SharkBite fitting successfully removed and the pipe meticulously cleaned, the next pivotal step is to install a new fitting. Whether you are replacing a faulty fitting or reconfiguring your plumbing setup, the installation process demands precision and attention to detail to ensure a secure and reliable connection. Here's a comprehensive guide to installing a new SharkBite fitting:
-
Select the Replacement Fitting:
Begin by selecting the appropriate replacement SharkBite fitting that aligns with the specifications and requirements of your plumbing system. Consider the type of connection needed, such as a straight coupling, elbow, tee, or any other fitting that suits your specific application. Ensure that the replacement fitting is compatible with the pipe material and size to guarantee a proper fit. -
Prepare the Pipe:
Before installing the new fitting, it's essential to prepare the pipe by verifying that it is clean, smooth, and free from any debris or imperfections. Inspect the pipe's end to ensure that it is cut squarely and uniformly to facilitate a seamless connection with the new fitting. If necessary, use a pipe deburring tool to remove any burrs or rough edges that could impede the fitting's insertion. -
Insert the Fitting:
With the pipe prepared, carefully insert the new SharkBite fitting onto the pipe until it reaches the marked insertion depth. The insertion depth is crucial for ensuring a secure and leak-free connection, as it allows the fitting's teeth to grip the pipe firmly. Apply gentle pressure and ensure that the fitting is fully seated, aligning with the marked depth to guarantee a proper installation. -
Verify the Connection:
Once the fitting is inserted to the designated depth, verify the connection by visually confirming that the pipe end is fully engaged within the fitting. Check for any gaps or misalignments that could compromise the connection's integrity. A secure and proper connection is characterized by the pipe being fully inserted into the fitting, with no visible gaps between the two components. -
Test the Connection:
After installing the new fitting, perform a thorough inspection to ensure that the connection is secure and leak-free. Conduct a visual examination of the fitting and surrounding area, checking for any signs of water leakage or irregularities. Once the connection passes the visual inspection, restore the water supply and observe the fitting for any indications of leaks or seepage.
By following these steps with precision and care, you can effectively install a new SharkBite fitting, providing your plumbing system with a reliable and durable connection. This meticulous approach to fitting installation ensures that your plumbing components function optimally, allowing you to address maintenance or repair needs with confidence and proficiency.
Conclusion
In conclusion, mastering the art of removing a SharkBite fitting is a valuable skill that empowers homeowners and DIY enthusiasts to address plumbing maintenance and repair tasks with confidence and proficiency. By following the step-by-step process outlined in this guide, individuals can navigate the removal and replacement of SharkBite fittings with precision and ease, ensuring the integrity and reliability of their plumbing systems.
The journey begins with the crucial step of turning off the water supply, a fundamental safety measure that sets the stage for a controlled and secure removal process. By shutting off the water supply, individuals create a safe working environment and minimize the risk of encountering pressurized water during the removal of the SharkBite fitting.
Moving on to the release of the fitting, the meticulous steps of marking the pipe, depressing the release collar, and removing the pipe with care ensure a smooth disconnection without causing damage to the components. This process allows for the seamless removal of the SharkBite fitting, providing individuals with the freedom to proceed confidently to the subsequent steps of their plumbing project.
The importance of cleaning the pipe cannot be overstated, as it lays the foundation for a secure and reliable connection with the new fitting. By inspecting, cleaning, and verifying the cleanliness of the pipe, individuals prepare the surface for the installation of the replacement SharkBite fitting, ensuring that it is free from any obstructions or contaminants that could compromise the integrity of the connection.
Finally, the installation of the new fitting marks the culmination of the removal and replacement process, offering individuals the opportunity to address plumbing maintenance or repair needs effectively. By selecting the appropriate replacement fitting, preparing the pipe, and verifying the connection with precision, individuals can ensure a secure and leak-free installation, allowing their plumbing system to function optimally.
In essence, mastering the process of removing a SharkBite fitting empowers individuals to take control of their home maintenance and repair needs, fostering a sense of confidence and self-sufficiency. By equipping themselves with the knowledge and skills to navigate plumbing tasks effectively, homeowners and DIY enthusiasts can tackle challenges with ease, ensuring the longevity and performance of their plumbing systems.