Home>Home and Garden>How To Remove Mold From Shower Grout

Home and Garden
How To Remove Mold From Shower Grout
Published: March 4, 2024
Learn effective methods to remove mold from shower grout in your home and garden. Keep your bathroom clean and mold-free with these simple tips and tricks.
(Many of the links in this article redirect to a specific reviewed product. Your purchase of these products through affiliate links helps to generate commission for Noodls.com, at no extra cost. Learn more)
Table of Contents
Introduction
Dealing with mold in the shower can be a frustrating and persistent issue for many homeowners. The presence of mold not only detracts from the aesthetic appeal of the bathroom but also poses potential health risks. Mold thrives in damp, humid environments, making the shower an ideal breeding ground. One of the most common areas for mold growth in the shower is the grout between tiles. Over time, the porous nature of grout can absorb moisture, providing an ideal environment for mold spores to take hold and flourish.
Fortunately, with the right tools, materials, and techniques, it is possible to effectively remove mold from shower grout and prevent its return. By understanding the nature of mold and grout, as well as implementing proactive measures, you can maintain a clean and healthy shower environment for you and your family.
In this comprehensive guide, we will delve into the intricacies of mold growth in shower grout and provide a step-by-step approach to effectively eliminating it. Additionally, we will explore preventive measures to inhibit future mold growth, empowering you to maintain a pristine shower space.
Let's embark on this journey to reclaim the cleanliness and freshness of your shower while gaining valuable insights into mold removal and prevention.
Read more: How To Remove Mold From Your Car
Understanding Mold and Grout
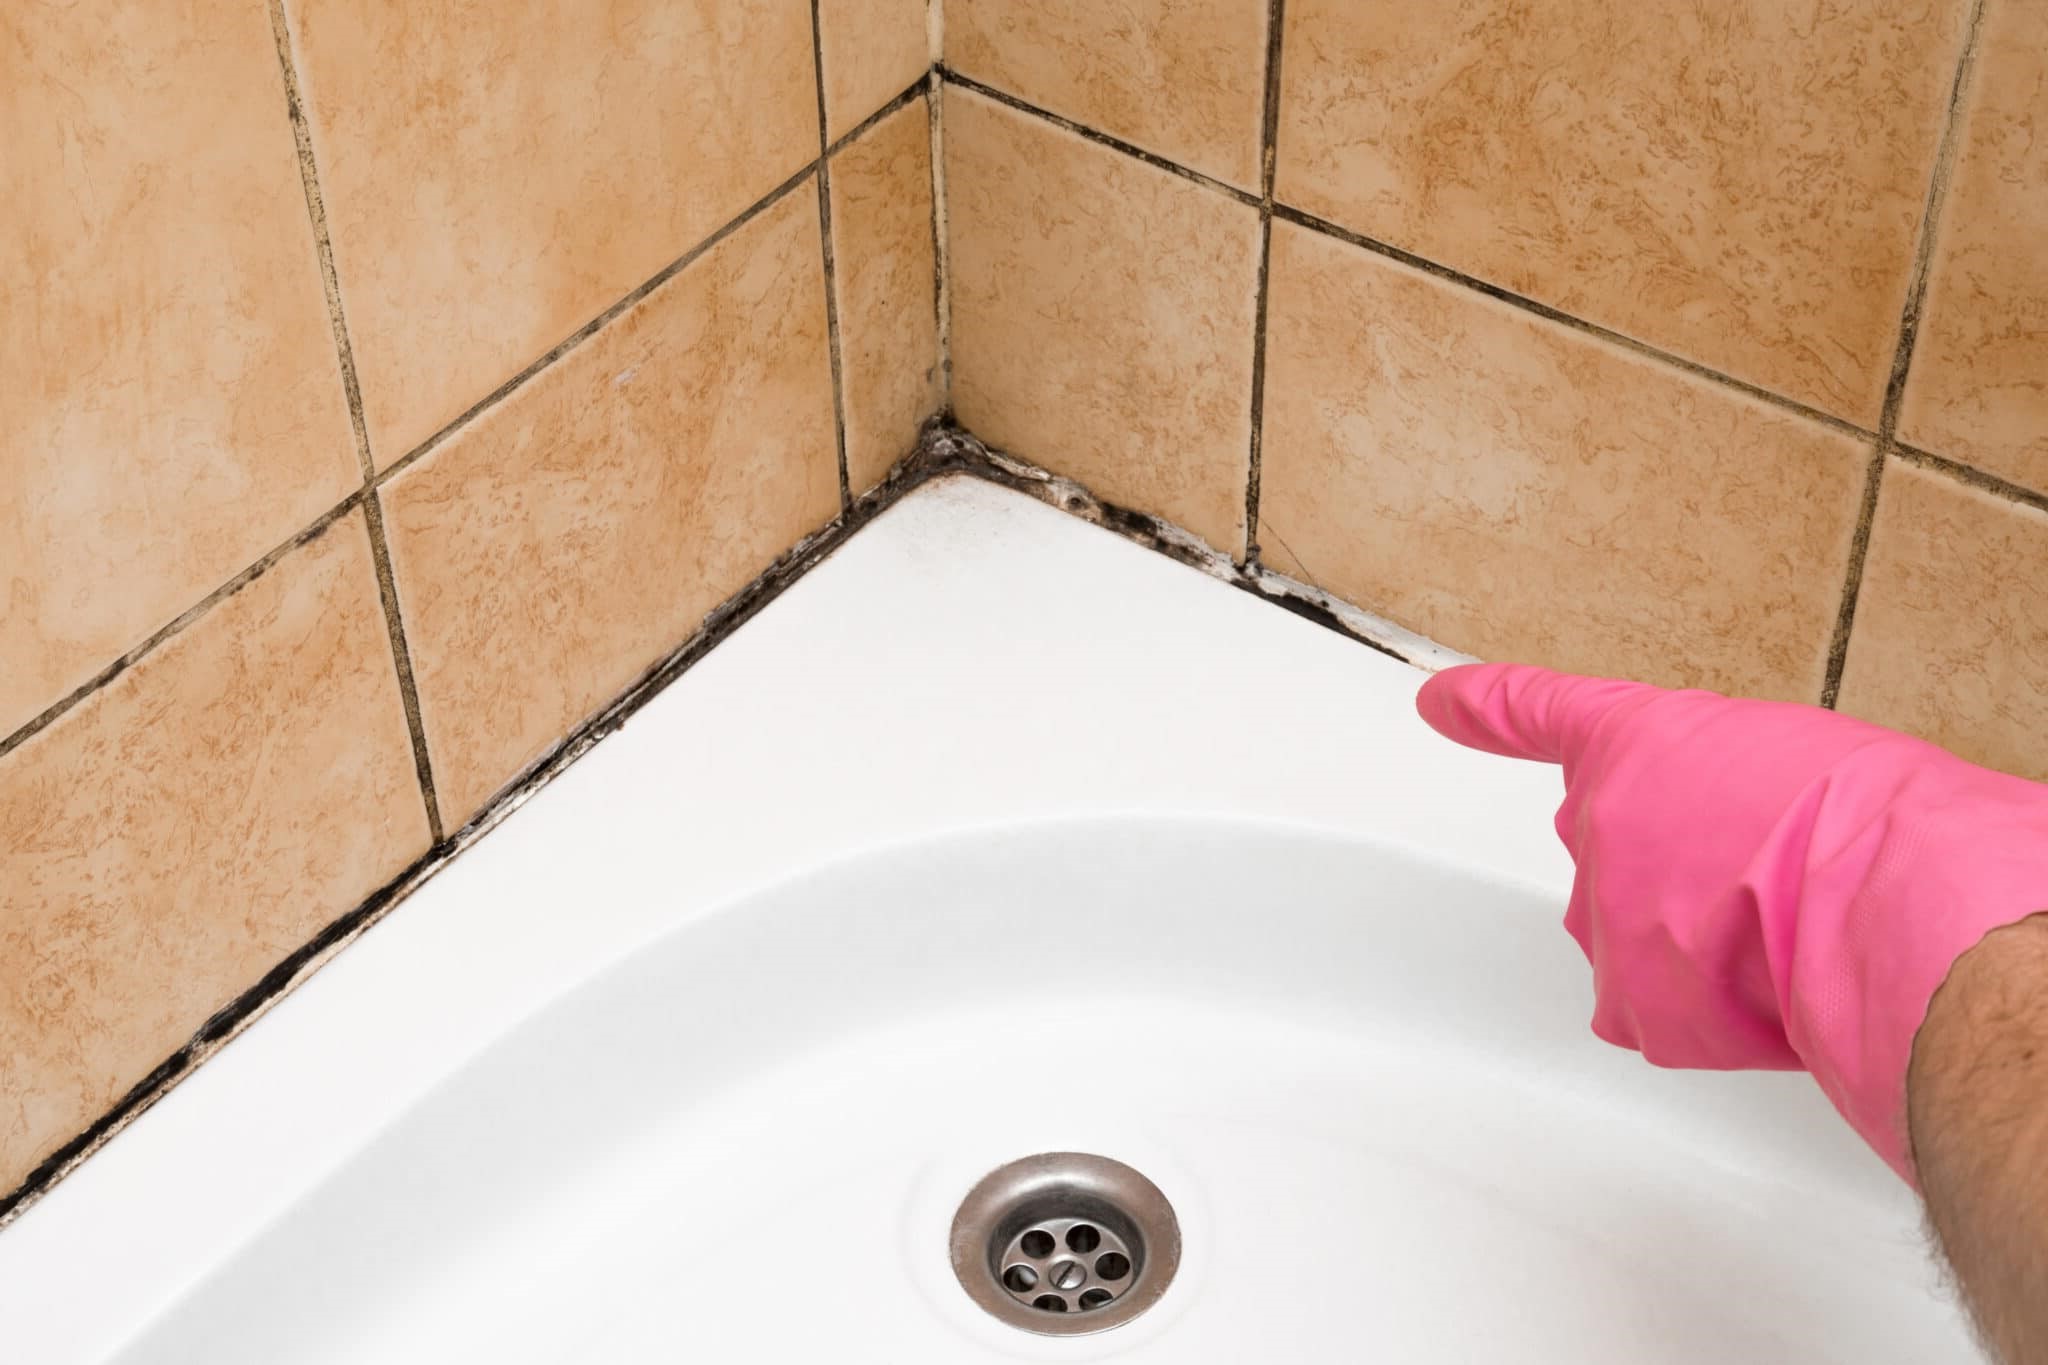
Mold is a type of fungus that thrives in moist, warm environments, making the shower an ideal breeding ground. It reproduces by releasing spores into the air, which can then settle and grow on various surfaces. When it comes to the shower, the porous nature of grout between tiles provides an inviting habitat for mold spores to take hold and proliferate.
Grout, a mixture of cement, sand, and water, is commonly used to fill the gaps between tiles. While it serves a functional purpose in securing tiles in place, its porous composition makes it susceptible to moisture absorption. When exposed to water, grout can become a prime location for mold growth. The combination of trapped moisture and organic matter present in the bathroom creates an environment conducive to mold development.
Understanding the characteristics of mold and grout is crucial in effectively addressing mold growth in the shower. Mold comes in various colors, including black, green, and even pink, and can appear as slimy patches or powdery spots. It not only poses aesthetic concerns but also presents potential health risks, particularly for individuals with respiratory conditions or allergies.
Grout, on the other hand, requires regular maintenance to prevent mold and mildew buildup. Its porous nature allows moisture and dirt to penetrate, providing an ideal foundation for mold spores to germinate and spread. Over time, neglected grout can become discolored and compromised, detracting from the overall cleanliness of the shower area.
By comprehending the interplay between mold and grout, homeowners can take proactive measures to address and prevent mold growth. This understanding serves as the foundation for implementing effective mold removal and prevention strategies, ensuring a hygienic and visually appealing shower space for years to come.
Tools and Materials Needed
To effectively remove mold from shower grout, you will need a combination of tools and materials specifically designed for this task. By assembling the right equipment, you can streamline the mold removal process and achieve optimal results. Here's a comprehensive list of the essential tools and materials required for this undertaking:
Tools:
- Protective Gear: Prioritize your safety by wearing protective gear, including rubber gloves, safety goggles, and a face mask. These items will shield you from potential exposure to mold spores and cleaning agents.
- Grout Brush: A stiff-bristled grout brush is instrumental in loosening and removing mold from the grout lines. Look for a brush with durable bristles that can effectively dislodge mold without damaging the grout.
- Old Toothbrush: For intricate or hard-to-reach areas, an old toothbrush can be invaluable in meticulously scrubbing away mold deposits.
- Spray Bottle: Fill a spray bottle with a solution of water and white vinegar or a commercial mold remover. The spray bottle facilitates targeted application of the cleaning solution to the affected grout areas.
- Squeegee or Sponge: Use a squeegee or sponge to wipe away excess water and cleaning solution from the shower walls and grout lines after scrubbing.
- Steam Cleaner (Optional): For stubborn mold infestations, a steam cleaner can be an effective tool for deep cleaning grout and eliminating mold spores.
Materials:
- White Vinegar: Known for its natural antimicrobial properties, white vinegar is an effective and eco-friendly mold removal agent. It can be used on its own or diluted with water for optimal results.
- Baking Soda: This household staple serves as a gentle abrasive cleaner and deodorizer, making it ideal for tackling mold and mildew in grout.
- Commercial Mold Remover: If the mold infestation is extensive or persistent, consider using a commercial mold remover specifically formulated for grout and tile surfaces.
- Hydrogen Peroxide: An alternative to white vinegar, hydrogen peroxide possesses strong antifungal properties and can be used to combat mold growth in grout.
- Grout Sealer: Once the mold is removed, applying a grout sealer can help prevent future mold and mildew buildup by creating a protective barrier on the grout surface.
By gathering these tools and materials, you will be well-equipped to embark on the mold removal process with confidence and efficiency. Each item plays a crucial role in the comprehensive approach to eliminating mold from shower grout and restoring the cleanliness of your shower space.
Read more: How To Remove Mold From Leather
Step-by-Step Guide to Removing Mold from Shower Grout
-
Prepare the Cleaning Solution: Begin by preparing a cleaning solution tailored for mold removal. You can opt for a mixture of equal parts water and white vinegar, or utilize a commercial mold remover according to the manufacturer's instructions. For stubborn mold infestations, hydrogen peroxide or a paste of baking soda and water can serve as effective alternatives.
-
Protective Gear: Prioritize safety by donning protective gear, including rubber gloves, safety goggles, and a face mask. These items will safeguard you from potential exposure to mold spores and cleaning agents.
-
Apply the Cleaning Solution: Using a spray bottle, apply the cleaning solution generously to the mold-infested grout lines. Ensure thorough coverage of the affected areas, allowing the solution to penetrate and loosen the mold.
-
Scrub the Grout: Armed with a stiff-bristled grout brush, vigorously scrub the mold-infested grout lines. Employ a back-and-forth motion to dislodge the mold and reveal the clean grout beneath. For intricate or hard-to-reach areas, an old toothbrush can be utilized to meticulously scrub away mold deposits.
-
Rinse and Repeat: After scrubbing, rinse the treated grout lines with water to remove residual mold and cleaning solution. If traces of mold persist, repeat the application of the cleaning solution and scrubbing process until the grout is free from mold.
-
Dry the Grout: Utilize a squeegee or sponge to remove excess water and cleaning solution from the shower walls and grout lines. Properly drying the grout prevents moisture accumulation, inhibiting the conditions conducive to mold regrowth.
-
Optional: Steam Cleaning: For persistent mold infestations, consider using a steam cleaner to deep clean the grout and eliminate any remaining mold spores. The high-temperature steam can penetrate the porous grout, providing a thorough and effective cleaning solution.
-
Apply Grout Sealer: Once the mold is successfully removed and the grout is dry, consider applying a grout sealer to create a protective barrier. This additional step helps prevent future mold and mildew buildup by sealing the porous grout surface.
By following this step-by-step guide, you can effectively remove mold from shower grout and restore the cleanliness of your shower space. These proactive measures not only eliminate existing mold but also contribute to preventing its recurrence, ensuring a hygienic and visually appealing shower environment for the long term.
Preventing Mold Growth in the Future
Preventing mold growth in the future is essential for maintaining a clean and healthy shower environment. After successfully removing mold from shower grout, implementing preventive measures can significantly reduce the likelihood of mold reinfestation. By proactively addressing the underlying factors that contribute to mold growth, you can safeguard your shower space against future mold and mildew buildup.
Ventilation and Moisture Control
Adequate ventilation is crucial in mitigating moisture accumulation, a primary catalyst for mold growth. Ensure that your bathroom is well-ventilated during and after showering to expel excess humidity. Consider installing a ventilation fan to facilitate air circulation and moisture removal. Additionally, promptly repair any leaks in plumbing fixtures to prevent water seepage into the walls and grout, which can foster mold development.
Regular Cleaning and Maintenance
Establish a routine for regular cleaning and maintenance of your shower area to prevent mold and mildew buildup. Wipe down the shower walls and grout lines after each use to remove excess moisture and deter mold spores from taking hold. Utilize a squeegee or towel to dry the surfaces thoroughly, minimizing the opportunity for mold to proliferate. Periodically inspect and clean the grout to address any early signs of mold growth before it becomes extensive.
Grout Sealing
Applying a grout sealer after removing mold can fortify the grout's resistance to moisture and mold infiltration. A quality grout sealer creates a protective barrier, reducing the porosity of the grout and inhibiting the absorption of water and organic matter. Regularly reapply the grout sealer as recommended to maintain its effectiveness in preventing mold and mildew.
Natural Remedies and Preventive Solutions
Incorporate natural remedies and preventive solutions to deter mold growth in the shower. Consider using a homemade cleaning solution of water and white vinegar for routine maintenance, as vinegar's acidic nature inhibits mold and mildew. Additionally, keep the shower area dry and clutter-free, minimizing potential hiding spots for mold spores.
Addressing Humidity Levels
Monitor and regulate the humidity levels in your bathroom to create an inhospitable environment for mold. Consider using a hygrometer to measure humidity and implement dehumidifiers if necessary to maintain optimal moisture levels. By controlling humidity, you can impede the conditions conducive to mold proliferation.
Regular Inspections
Conduct regular inspections of the shower area, paying close attention to the grout lines and potential moisture-prone areas. Promptly address any signs of mold growth or deterioration in the grout to prevent the escalation of mold infestations. Vigilance and proactive maintenance are key in preventing mold from taking root and spreading.
By integrating these preventive measures into your shower maintenance routine, you can effectively thwart mold growth and preserve a clean, inviting shower space. Consistent vigilance and proactive maintenance serve as the foundation for long-term mold prevention, ensuring that your shower remains a hygienic and enjoyable sanctuary.
Read more: How To Remove Shower Drain
Conclusion
In conclusion, the battle against mold in shower grout is a multifaceted endeavor that requires a combination of proactive measures, effective cleaning techniques, and ongoing maintenance. By understanding the dynamics of mold growth and the unique characteristics of grout, homeowners can equip themselves with the knowledge and tools necessary to combat and prevent mold infestations in the shower.
The step-by-step guide provided offers a comprehensive approach to removing mold from shower grout, emphasizing the importance of safety, thorough cleaning, and preventive measures. From preparing the cleaning solution to applying grout sealer, each step plays a pivotal role in achieving a mold-free and hygienic shower environment. Additionally, the incorporation of natural remedies, such as white vinegar and baking soda, underscores the eco-friendly and effective alternatives available for mold removal.
Furthermore, the preventive strategies outlined serve as a proactive defense against future mold growth, emphasizing the significance of ventilation, regular cleaning, grout sealing, and humidity control. By integrating these measures into a consistent maintenance routine, homeowners can significantly reduce the risk of mold reinfestation and maintain a pristine shower space for years to come.
It is essential to recognize that mold removal and prevention in the shower is not merely a one-time task but an ongoing commitment to maintaining a healthy and inviting environment. By embracing a proactive mindset and implementing the insights and techniques shared in this guide, homeowners can reclaim control over their shower spaces and enjoy the benefits of a mold-free, visually appealing, and hygienic sanctuary.
Ultimately, the journey to removing and preventing mold from shower grout is a testament to the power of knowledge, proactive maintenance, and effective cleaning practices. By leveraging these resources and strategies, homeowners can transform their shower spaces into havens of cleanliness, free from the encroachment of mold and mildew. With dedication and vigilance, the battle against mold in shower grout can be won, ensuring a refreshing and inviting shower experience for all who enter.
In embracing these principles, homeowners can embark on a journey toward a mold-free and rejuvenated shower space, where cleanliness and comfort converge to create an oasis of well-being and tranquility.
