Home>Home and Garden>The Ultimate Guide To Replacing A Pop-Up Sprinkler Head
Home and Garden
The Ultimate Guide To Replacing A Pop-Up Sprinkler Head
Published: January 20, 2024
Learn how to replace a pop-up sprinkler head with our ultimate guide. Get expert tips and step-by-step instructions for a successful replacement. Perfect for home and garden enthusiasts.
(Many of the links in this article redirect to a specific reviewed product. Your purchase of these products through affiliate links helps to generate commission for Noodls.com, at no extra cost. Learn more)
Table of Contents
Introduction
Maintaining a lush and healthy garden or lawn requires proper irrigation, and pop-up sprinkler heads play a crucial role in ensuring even and efficient watering. Over time, these essential components may succumb to wear and tear, leading to decreased performance or complete malfunction. When faced with such issues, knowing how to replace a pop-up sprinkler head can save you time and money while ensuring your landscape receives the care it deserves.
In this comprehensive guide, we will delve into the intricacies of pop-up sprinkler heads, providing step-by-step instructions on replacing them. Whether you're a seasoned DIY enthusiast or a novice homeowner looking to tackle this task for the first time, this guide will equip you with the knowledge and confidence to carry out the replacement effectively.
Understanding the anatomy and function of pop-up sprinkler heads is the first step towards successful maintenance and repair. By familiarizing yourself with the inner workings of these devices, you'll be better prepared to troubleshoot issues and implement necessary solutions. Furthermore, we will explore the essential tools and materials required for the replacement process, ensuring that you have everything you need at your disposal before commencing the task.
As we progress, we will outline a detailed, easy-to-follow set of steps for replacing a pop-up sprinkler head, complete with tips to streamline the process and avoid common pitfalls. Additionally, we will cover the crucial post-replacement phase, which involves adjusting and testing the new sprinkler head to optimize its performance and ensure uniform water distribution across your landscape.
Furthermore, to prolong the lifespan of your newly installed pop-up sprinkler head and maintain an efficient irrigation system, we will provide valuable maintenance tips and best practices. By incorporating these suggestions into your routine, you can prevent future issues and preserve the functionality of your irrigation system for years to come.
With this guide as your companion, you'll gain the expertise to tackle pop-up sprinkler head replacements with ease, empowering you to uphold the health and vibrancy of your outdoor space. So, let's embark on this journey together and equip ourselves with the knowledge and skills needed to conquer this essential aspect of home and garden maintenance.
Read more: How To Adjust Sprinkler Heads
Understanding Pop-Up Sprinkler Heads
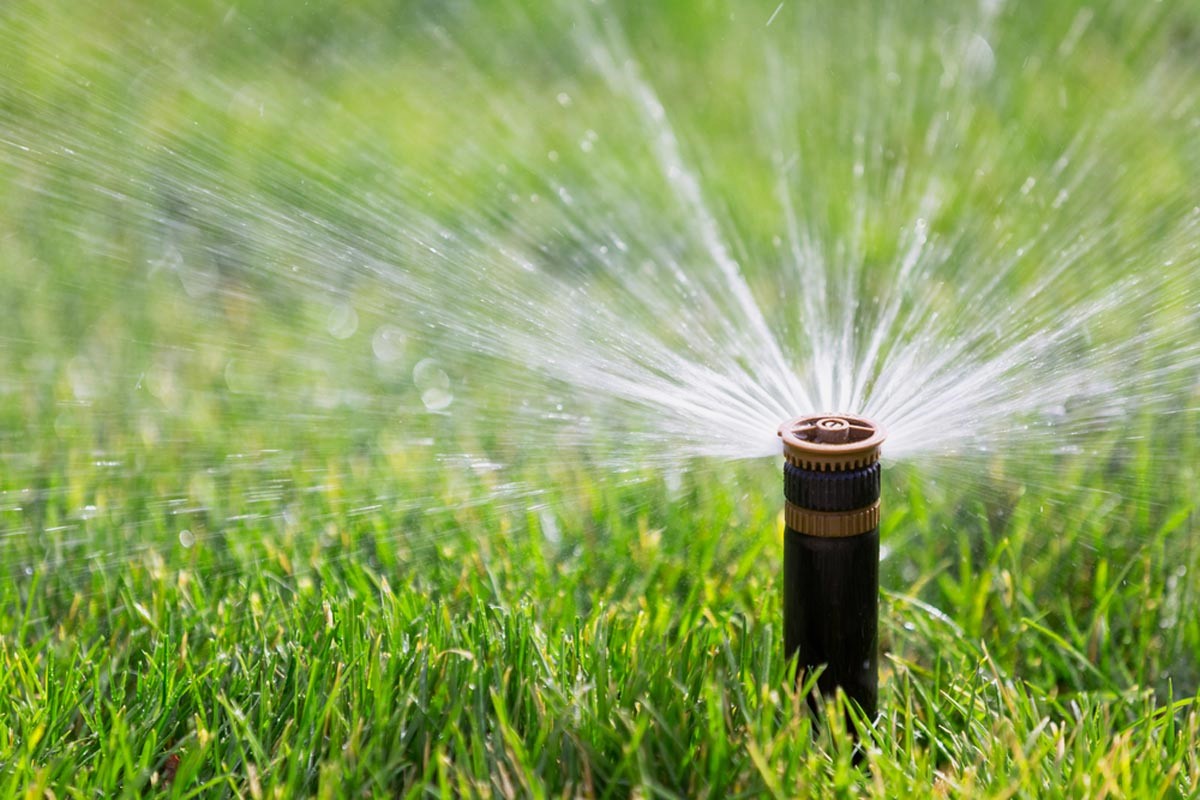
Pop-up sprinkler heads are integral components of automatic irrigation systems, designed to deliver water to specific areas of a garden or lawn with precision and efficiency. These discreet devices are engineered to retract below ground level when not in use, minimizing the risk of damage from lawn mowers or foot traffic. When activated, they emerge from their concealed position and disperse water in a controlled pattern, ensuring thorough coverage of the designated area.
These versatile sprinkler heads come in various types, including fixed spray, rotary, and adjustable nozzles, each catering to different watering needs. Fixed spray heads emit a constant spray pattern, making them ideal for small to medium-sized areas, while rotary heads rotate to disperse water over a larger radius, suitable for covering expansive lawns or gardens. Adjustable nozzles offer the flexibility to customize the spray pattern and distance, accommodating irregularly shaped or narrow areas with precision.
Furthermore, pop-up sprinkler heads are available in different heights to accommodate varying ground levels and vegetation types. The height of the sprinkler head determines the trajectory and reach of the water spray, ensuring optimal coverage and minimizing overspray onto non-targeted areas. Additionally, these heads can be equipped with filters to prevent clogging from debris, ensuring consistent performance and longevity.
Understanding the specific requirements of your landscape, such as water pressure, soil type, and plant species, is crucial in selecting the most suitable pop-up sprinkler heads for your irrigation system. By considering these factors, you can optimize water distribution, minimize wastage, and promote the healthy growth of your garden or lawn.
In essence, pop-up sprinkler heads serve as the workhorses of modern irrigation systems, offering a blend of efficiency, versatility, and durability. By comprehending their functionality and diverse applications, homeowners and garden enthusiasts can make informed decisions when it comes to installation, maintenance, and replacement, ensuring the sustained health and vitality of their outdoor spaces.
Tools and Materials Needed
When embarking on the task of replacing a pop-up sprinkler head, it is essential to gather the necessary tools and materials to ensure a smooth and efficient process. Here's a comprehensive list of items you'll need to have on hand before commencing the replacement:
Tools:
- Adjustable Wrench: A versatile tool for loosening and tightening nuts and bolts, essential for removing the old sprinkler head and installing the new one.
- Trenching Shovel: Used to excavate the soil around the existing sprinkler head, allowing access for replacement without damaging the surrounding area.
- Pipe Cutter: Required if the sprinkler head is connected to PVC piping, enabling precise cutting and removal of the old pipe section.
- Teflon Tape: Utilized to create a watertight seal when connecting the new sprinkler head to the existing piping, preventing leaks and ensuring efficient water delivery.
- Screwdriver: Depending on the type of sprinkler head, a screwdriver may be needed to detach or secure certain components during the replacement process.
- Utility Knife: Useful for cutting and trimming irrigation tubing, facilitating the connection of the new sprinkler head to the existing system.
Materials:
- New Pop-Up Sprinkler Head: Ensure the replacement head matches the specifications of the existing one, including spray pattern, reach, and height, to maintain uniform water distribution.
- PVC Pipe (if necessary): If the existing piping needs to be extended or replaced, PVC pipe of the appropriate diameter will be required to connect the new sprinkler head to the irrigation system.
- Irrigation Tubing: If the existing tubing is damaged or needs to be extended, additional irrigation tubing may be necessary to connect the new sprinkler head to the water source.
- Grass or Soil: Used to backfill the excavated area around the new sprinkler head, ensuring it is securely positioned and level with the surrounding ground.
By ensuring you have these tools and materials at your disposal, you can approach the task of replacing a pop-up sprinkler head with confidence and efficiency, setting the stage for a successful and effective maintenance endeavor.
Read more: How To Adjust A Rain Bird Sprinkler Head
Steps to Replace a Pop-Up Sprinkler Head
-
Locate the Sprinkler Head: Begin by identifying the location of the existing pop-up sprinkler head in your garden or lawn. Clear the area around the sprinkler head of any debris or overgrown vegetation to ensure unobstructed access.
-
Turn Off the Water Supply: Before initiating the replacement process, it's crucial to turn off the water supply to the irrigation system. This can typically be done by locating the main shut-off valve and closing it to prevent water flow to the sprinkler heads.
-
Excavate the Surrounding Area: Using a trenching shovel, carefully excavate the soil around the existing sprinkler head, creating enough space to access the connecting piping and the sprinkler head itself. Exercise caution to avoid damaging the surrounding irrigation components.
-
Remove the Old Sprinkler Head: Once the area is cleared, utilize an adjustable wrench to loosen the nut securing the old sprinkler head to the connecting pipe. Gently lift the old sprinkler head from the ground, exposing the connecting pipe and any additional components.
-
Prepare the Piping: If the existing piping needs to be extended or replaced to accommodate the new sprinkler head, use a pipe cutter to make precise cuts, ensuring a clean and straight section of piping for the connection.
-
Apply Teflon Tape: Wrap the threads of the connecting pipe with Teflon tape to create a secure and watertight seal when attaching the new sprinkler head. This step is essential for preventing leaks and ensuring efficient water delivery.
-
Install the New Sprinkler Head: Carefully position the new pop-up sprinkler head in place, ensuring it aligns with the surrounding terrain and is at the appropriate height for optimal water distribution. Secure the new head to the connecting pipe by tightening the nut with an adjustable wrench.
-
Connect the Irrigation Tubing: If the existing irrigation tubing needs to be extended or replaced, use a utility knife to cut the tubing to the required length and connect it to the new sprinkler head, ensuring a snug and leak-free fit.
-
Backfill and Test: Gently backfill the excavated area around the new sprinkler head with soil or grass, ensuring it is securely positioned and level with the surrounding ground. Once the backfilling is complete, turn on the water supply and test the new sprinkler head to verify its functionality and coverage.
-
Adjust as Needed: Observe the spray pattern and reach of the new sprinkler head, making any necessary adjustments to the direction and angle to achieve optimal water distribution across the designated area.
By following these systematic steps, you can seamlessly replace a pop-up sprinkler head, contributing to the efficient and reliable irrigation of your garden or lawn.
Adjusting and Testing the New Sprinkler Head
Once the new pop-up sprinkler head is installed, it's essential to perform thorough adjustments and testing to ensure optimal performance and uniform water distribution across the designated area. Proper adjustment of the sprinkler head is critical in preventing overspray, dry patches, or water wastage, while testing allows for the verification of its functionality under real operating conditions.
To begin the adjustment process, start by observing the initial spray pattern and reach of the newly installed sprinkler head. This can be done by turning on the water supply and allowing the sprinkler head to operate. Take note of the trajectory of the water spray and evaluate its coverage across the intended area. It's important to ensure that the water reaches all target areas without extending beyond the designated boundaries.
If the spray pattern needs to be adjusted, most pop-up sprinkler heads feature adjustable nozzles or settings that allow for customization. Depending on the specific type of sprinkler head, adjustments can typically be made to alter the spray distance, angle, and pattern. This flexibility enables precise tailoring of the water distribution to accommodate the unique layout of your garden or lawn, ensuring that every inch receives adequate hydration.
Additionally, some sprinkler heads may have specific controls or mechanisms for regulating the flow and direction of the water spray. These adjustments can be made using the provided tools or settings, allowing for fine-tuning of the sprinkler head's performance to align with your irrigation needs.
After making the necessary adjustments, it's crucial to test the sprinkler head under operational conditions to validate its performance. This involves running the irrigation system and observing the behavior of the newly installed sprinkler head. During testing, pay close attention to the uniformity of water distribution, ensuring that no areas are over or under-watered.
In the event that adjustments are insufficient to achieve the desired coverage, further modifications may be necessary. This could involve swapping out the nozzle for a different pattern or adjusting the water pressure to optimize the sprinkler head's performance.
Once the adjustments have been fine-tuned and the sprinkler head demonstrates consistent and efficient water distribution, the testing phase is considered successful. This signifies that the new pop-up sprinkler head is operating as intended, delivering the necessary hydration to your garden or lawn without waste or inefficiency.
By meticulously adjusting and testing the new sprinkler head, you can guarantee that your irrigation system functions optimally, promoting the health and vibrancy of your outdoor space while conserving water resources.
Maintenance Tips for Pop-Up Sprinkler Heads
Proper maintenance is essential to ensure the longevity and optimal performance of pop-up sprinkler heads. By incorporating regular maintenance into your home and garden care routine, you can prevent potential issues, extend the lifespan of your irrigation system, and promote the health of your landscape. Here are valuable maintenance tips to keep your pop-up sprinkler heads in top condition:
-
Inspect and Clean Regularly: Periodically inspect the pop-up sprinkler heads for any signs of damage, blockages, or misalignment. Remove any debris, dirt, or grass that may obstruct the water spray pattern. This simple maintenance task can prevent clogging and ensure consistent water distribution.
-
Check for Leaks: Routinely examine the connections and seals of the sprinkler heads to identify any leaks or water seepage. Addressing leaks promptly can prevent water wastage and potential damage to the surrounding area.
-
Adjust as Needed: Over time, changes in soil level or landscaping may affect the performance of the sprinkler heads. Regularly assess the spray pattern and reach, and make necessary adjustments to align with the evolving layout of your garden or lawn.
-
Monitor Water Pressure: Fluctuations in water pressure can impact the efficiency of pop-up sprinkler heads. Keep an eye on the water pressure within your irrigation system and make adjustments as needed to ensure optimal performance.
-
Winterize the System: Prior to the onset of winter, it's crucial to prepare your irrigation system for the colder months. Drain any remaining water from the system to prevent freezing and potential damage to the sprinkler heads and piping.
-
Schedule Professional Maintenance: Consider engaging professional irrigation maintenance services at least once a year. Experienced technicians can conduct comprehensive inspections, identify potential issues, and perform adjustments or repairs to keep your irrigation system in peak condition.
-
Protect from Damage: Be mindful of activities that could potentially damage the pop-up sprinkler heads, such as mowing or heavy foot traffic. Take precautions to safeguard the sprinkler heads from inadvertent harm to maintain their functionality.
By adhering to these maintenance tips, you can uphold the efficiency and reliability of your pop-up sprinkler heads, contributing to the overall health and beauty of your garden or lawn. Regular maintenance not only preserves the functionality of the irrigation system but also minimizes the need for extensive repairs, saving time and resources in the long run.
Conclusion
In conclusion, mastering the art of replacing pop-up sprinkler heads is a valuable skill that empowers homeowners to maintain a thriving and well-nourished outdoor space. By understanding the anatomy and function of these essential components, individuals can make informed decisions when selecting, installing, and maintaining pop-up sprinkler heads. The seamless replacement process, as outlined in this guide, equips homeowners with the knowledge and confidence to address issues related to malfunctioning or deteriorating sprinkler heads, ensuring the sustained health and vibrancy of their garden or lawn.
The comprehensive steps provided in this guide serve as a roadmap for executing the replacement process with precision and efficiency. From locating the existing sprinkler head to adjusting and testing the new installation, each step is designed to streamline the process and optimize the performance of the irrigation system. By following these systematic instructions, homeowners can embark on the replacement journey with confidence, knowing that they possess the necessary expertise to tackle this essential aspect of home and garden maintenance.
Furthermore, the maintenance tips offered in this guide underscore the significance of regular upkeep in preserving the functionality and longevity of pop-up sprinkler heads. By incorporating these best practices into their routine, homeowners can prevent potential issues, minimize water wastage, and promote the sustained health of their landscape. From routine inspections and cleaning to monitoring water pressure and winterizing the system, these maintenance tips are instrumental in safeguarding the efficiency of the irrigation system.
Ultimately, the knowledge and skills gained from this guide empower homeowners to take proactive measures in caring for their outdoor space, ensuring that it remains a flourishing and inviting environment for relaxation and recreation. By embracing the principles of efficient irrigation and meticulous maintenance, individuals can reap the rewards of a lush and vibrant garden or lawn, enhancing the overall appeal and value of their property.
In essence, the ability to replace and maintain pop-up sprinkler heads is a testament to a homeowner's commitment to nurturing their outdoor oasis. With the insights and guidance provided in this guide, individuals are poised to embark on this journey with confidence and proficiency, ensuring that their garden or lawn receives the care and attention it deserves for years to come.