Home>Home and Garden>How To Replace Outside Faucet
Home and Garden
How To Replace Outside Faucet
Published: March 4, 2024
Learn how to replace an outside faucet with our step-by-step guide. Keep your home and garden in top shape with our expert tips and advice.
(Many of the links in this article redirect to a specific reviewed product. Your purchase of these products through affiliate links helps to generate commission for Noodls.com, at no extra cost. Learn more)
Table of Contents
Introduction
Replacing an outside faucet, also known as a hose bib or spigot, is a crucial maintenance task that ensures the proper functioning of your outdoor water supply. Over time, outdoor faucets can deteriorate due to exposure to the elements, leading to leaks and reduced performance. By learning how to replace an outside faucet, you can safeguard your property from water damage and maintain a reliable water source for various outdoor activities.
Whether you're a seasoned DIY enthusiast or a homeowner looking to tackle a new project, understanding the process of replacing an outside faucet is valuable knowledge. This comprehensive guide will walk you through each step, providing the necessary insights and tips to complete the task successfully. From gathering the essential tools and materials to executing the replacement with precision, this article will equip you with the know-how to handle this home improvement project with confidence.
By following the steps outlined in this guide, you'll be able to upgrade your outdoor faucet efficiently, ensuring a seamless water supply for gardening, washing your car, or connecting a hose for various outdoor tasks. Additionally, mastering the art of replacing an outside faucet empowers you to address any issues promptly, preventing potential water wastage and minimizing the risk of water-related damage to your property.
As we delve into the process of replacing an outside faucet, remember that this task contributes to the overall maintenance and functionality of your home. With the right approach and attention to detail, you can enhance the efficiency of your outdoor water supply system, providing convenience and peace of mind for years to come. So, let's embark on this insightful journey and learn how to replace an outside faucet effectively.
Read more: How To Replace A Bathroom Faucet
Tools and Materials Needed
Before embarking on the task of replacing an outside faucet, it's essential to gather the necessary tools and materials to ensure a smooth and efficient process. Here's a comprehensive list of items you'll need:
Tools:
- Adjustable wrench: This versatile tool will be essential for loosening and tightening various components during the faucet replacement.
- Pipe wrench: Used for gripping and turning pipes, the pipe wrench is crucial for handling the plumbing connections securely.
- Screwdriver set: Ensure you have both flat-head and Phillips-head screwdrivers to accommodate different types of fasteners.
- Pliers: Having a pair of slip-joint pliers can aid in gripping and turning small pipes and fittings.
- Tubing cutter: If you need to cut copper pipes during the replacement, a tubing cutter will provide clean and precise cuts.
- Propane torch: In case you encounter stubborn or corroded fittings, a propane torch can help loosen them for removal.
- Teflon tape: Also known as plumber's tape, this thread sealant is crucial for creating a watertight seal on threaded connections.
Materials:
- New outdoor faucet: Select a high-quality outdoor faucet that suits your specific needs, whether it's a frost-free model for cold climates or a standard faucet for milder regions.
- Copper or PEX piping: Depending on your existing setup, you may need additional piping to connect the new faucet to the water supply.
- Pipe fittings: Gather any necessary fittings, such as couplings, elbows, or adapters, to facilitate the connection between the new faucet and the existing plumbing.
- Pipe solder and flux: If you're working with copper pipes, solder and flux are essential for securely joining the pipes and fittings.
- Pipe insulation: Consider adding insulation to the new piping to protect it from freezing temperatures, especially in regions prone to cold weather.
- Waterproof silicone caulk: This will be useful for sealing the area around the new faucet once it's installed, preventing water infiltration.
By ensuring you have these tools and materials at your disposal, you'll be well-prepared to tackle the task of replacing your outside faucet with confidence and precision. With the right equipment on hand, you can navigate each step of the replacement process effectively, ensuring a successful outcome and a reliable outdoor water supply for your home.
Step 1: Turn Off the Water Supply
Before commencing the replacement of your outside faucet, it is crucial to turn off the water supply to the outdoor plumbing. This step is essential to prevent any water flow during the removal and installation process, minimizing the risk of leaks and ensuring a safe working environment.
To begin, locate the main water shut-off valve that controls the outdoor water supply. This valve is typically situated near the point where the main water line enters your home or in close proximity to the outdoor faucet itself. In some cases, the shut-off valve may be housed in a utility room, basement, or crawl space.
Once you've identified the shut-off valve, turn it clockwise to shut off the water supply. It's important to verify that the water flow has ceased by attempting to use the outdoor faucet. If no water comes out, you have successfully turned off the water supply.
After shutting off the main water valve, open the outdoor faucet to drain any residual water from the plumbing system. This step is crucial for minimizing water spillage and pressure within the pipes, making it safer to proceed with the removal of the old faucet.
By turning off the water supply and draining the remaining water from the outdoor plumbing, you create a controlled environment for the subsequent steps of the replacement process. This precautionary measure not only safeguards your property from potential water damage but also facilitates a smoother and more efficient transition to the next phase of the project.
With the water supply successfully turned off and the outdoor faucet drained, you are now ready to proceed to the next step of removing the old faucet, bringing you one step closer to completing the replacement with confidence and precision.
Read more: How To Change Shower Faucet
Step 2: Remove the Old Faucet
With the water supply successfully turned off and the outdoor faucet drained, you are now ready to remove the old faucet. This step involves careful dismantling of the existing fixture, ensuring that all connections are detached without causing damage to the surrounding plumbing.
-
Inspect the Existing Connections: Begin by closely examining the connections between the old faucet and the outdoor plumbing. Look for any visible screws, bolts, or fasteners securing the faucet to the wall or siding. Additionally, check for any caulking or sealant around the base of the faucet that may need to be removed.
-
Loosen the Fasteners: Using an appropriate wrench or screwdriver, carefully loosen and remove any fasteners holding the old faucet in place. This may involve unscrewing mounting screws or bolts that secure the faucet to the exterior wall or siding. Exercise caution to avoid stripping the screws or damaging the surrounding surface.
-
Disconnect the Water Supply: Once the faucet is no longer secured to the wall, proceed to disconnect it from the water supply lines. Depending on the type of connection, you may need to use a wrench or pliers to loosen the fittings. If the old faucet is connected with soldered copper pipes, you may need to use a tubing cutter to carefully remove the old piping.
-
Remove the Old Faucet: With the fasteners and water supply connections detached, carefully lift the old faucet away from the wall. Take care to support any attached piping or hoses to prevent strain on the plumbing connections. If the faucet is sealed with caulking, gently pry it away from the surface to release it completely.
-
Inspect the Surrounding Area: Once the old faucet is removed, take a moment to inspect the area where it was installed. Check for any signs of water damage, corrosion, or deterioration that may require attention before installing the new faucet. Clean the surface and ensure it is free from any debris or remnants of the old fixture.
By following these steps diligently, you can effectively remove the old faucet, preparing the space for the installation of the new fixture. With the old faucet successfully dismantled and the area prepped for the next phase, you are now poised to proceed with installing the new outdoor faucet, bringing you closer to completing this essential home maintenance task.
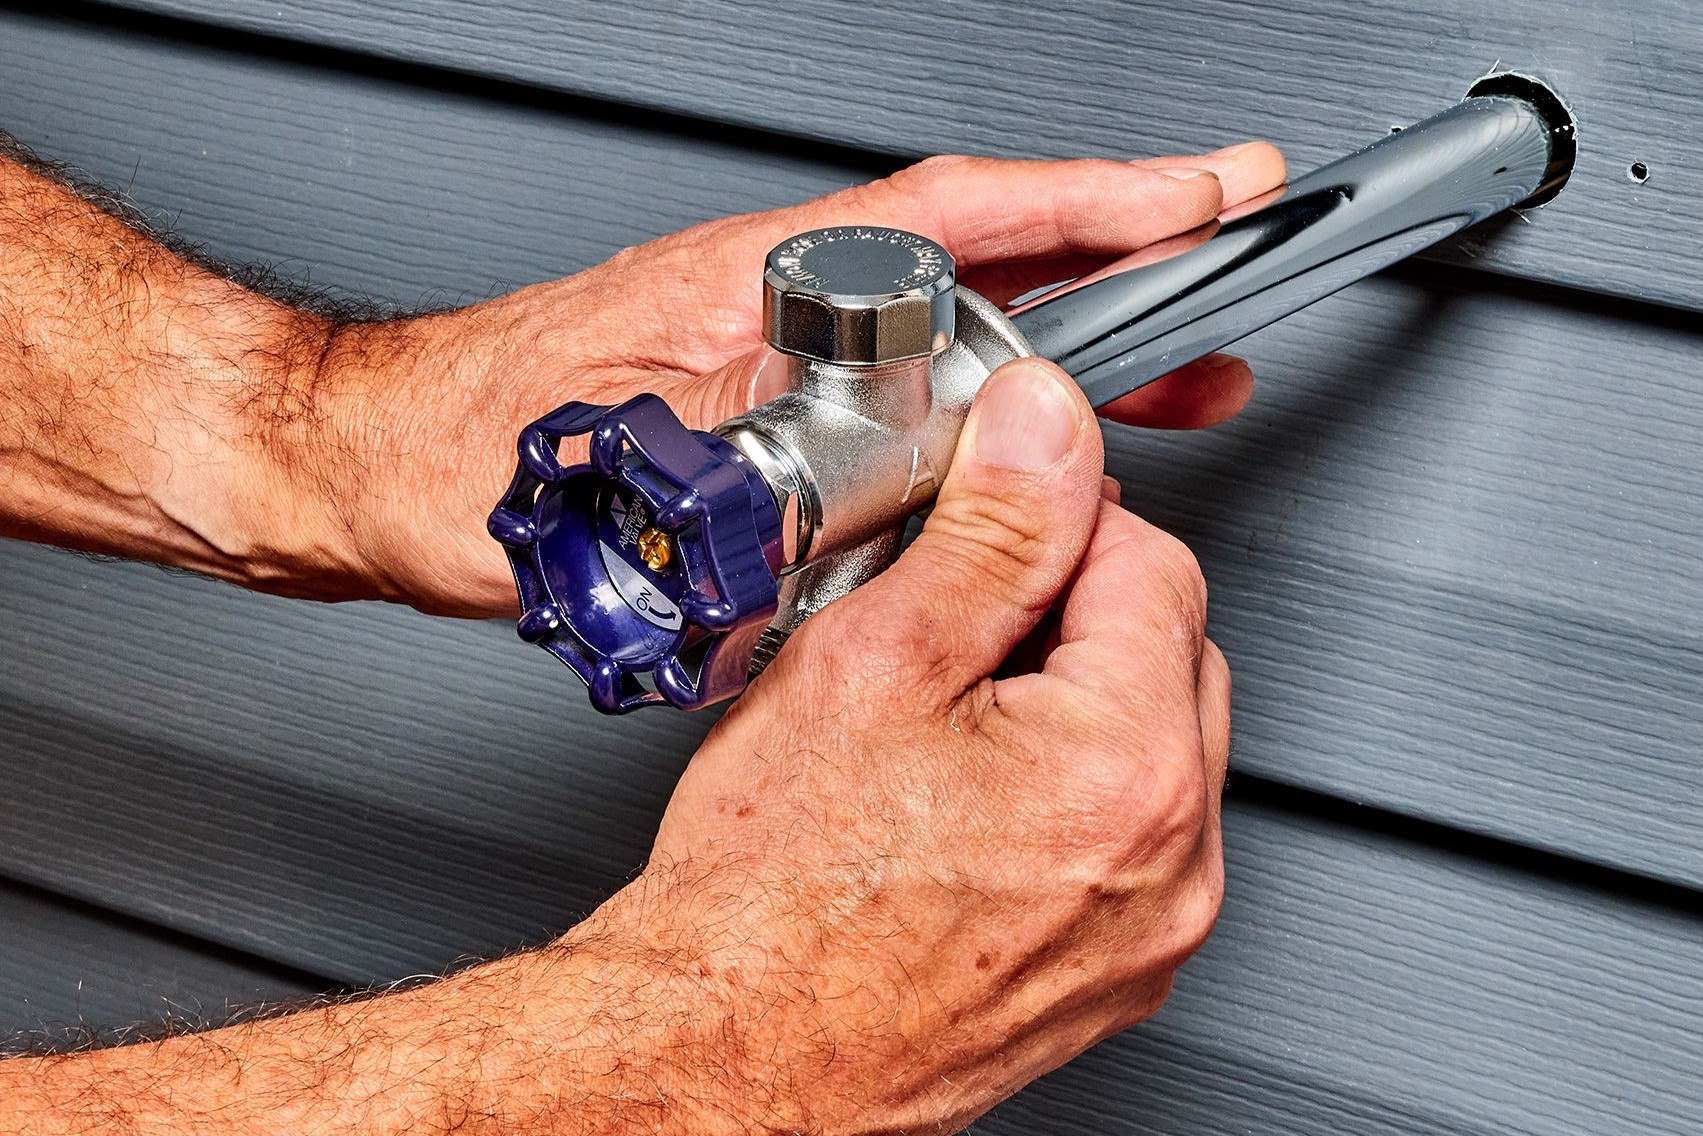
Step 3: Install the New Faucet
With the old faucet successfully removed and the area prepped for the installation of the new fixture, you are now ready to proceed with installing the new outdoor faucet. This pivotal step involves securing the new fixture in place and connecting it to the outdoor plumbing with precision and care.
Mounting the New Faucet
Begin by positioning the new outdoor faucet at the designated installation site, ensuring that it aligns with the existing plumbing connections. If the new faucet requires mounting screws or bolts, carefully secure it to the exterior wall or siding using the appropriate fasteners. Exercise caution to avoid overtightening the mounting hardware, as this can lead to damage or distortion of the faucet's base.
Connecting the Water Supply
Once the new faucet is securely mounted, proceed to connect it to the outdoor water supply lines. If the new faucet features threaded connections, use Teflon tape to seal the threads and prevent leaks. Carefully tighten the fittings using an adjustable wrench, ensuring a snug and secure connection without over-tightening, which can damage the threads.
If you are working with copper piping, use the appropriate fittings and soldering techniques to connect the new faucet to the existing plumbing. Apply flux to the cleaned pipe ends, insert them into the fittings, and use a propane torch to heat the joint before applying solder. Ensure that the solder flows evenly around the joint, creating a watertight seal.
Insulating the New Piping
To safeguard the new piping from freezing temperatures, especially in regions prone to cold weather, consider adding insulation to the exposed sections. This can help prevent potential damage caused by freezing and ensure the continued functionality of the outdoor faucet during colder months.
Sealing the Area
Once the new faucet is securely installed and connected to the water supply, apply waterproof silicone caulk around the base of the fixture. This additional sealant helps prevent water infiltration behind the faucet, enhancing its durability and protecting the surrounding wall or siding from moisture damage.
By meticulously following these steps, you can successfully install the new outdoor faucet, ensuring a secure and reliable connection to the outdoor water supply. With the new fixture in place and the necessary connections established, you are now prepared to proceed to the final step of testing the new faucet to confirm its proper functionality.
Step 4: Test the New Faucet
With the new outdoor faucet securely installed and all connections in place, it's crucial to conduct a thorough testing process to ensure its proper functionality and performance. This step involves verifying the integrity of the installation, checking for leaks, and confirming that the new faucet operates as intended.
To begin the testing process, turn the main water supply valve back on to restore water flow to the outdoor plumbing. Once the water is flowing, proceed to the newly installed faucet and open it to allow water to run freely. As the water flows, carefully inspect the following aspects to assess the performance of the new fixture:
-
Water Flow: Observe the water flow from the new faucet to ensure it is consistent and free from irregularities. Check for any signs of reduced flow or sputtering, which may indicate potential issues with the installation or water supply connection.
-
Leaks: Thoroughly examine the area around the base of the new faucet and along the connected piping for any signs of leaks. Look for dripping water, moisture accumulation, or visible water seepage, indicating a potential leak that requires immediate attention.
-
Sealant Integrity: Assess the waterproof silicone caulk applied around the base of the faucet to ensure it forms a tight seal. Verify that the caulk effectively prevents water from infiltrating behind the fixture, safeguarding the surrounding wall or siding from moisture damage.
-
Water Pressure: Evaluate the water pressure coming from the new faucet to confirm that it meets your expectations. Adequate water pressure is essential for various outdoor tasks, such as watering plants, washing vehicles, or filling buckets, and ensures the faucet's usability for diverse purposes.
-
Piping Stability: Check the stability of the newly installed piping and fittings, ensuring they remain secure and free from movement during the water flow. Any unexpected shifting or movement may indicate loose connections that require immediate adjustment.
By meticulously assessing these factors during the testing phase, you can identify and address any potential issues promptly, ensuring the optimal functionality and reliability of the new outdoor faucet. If any concerns or irregularities are detected during the testing process, take the necessary steps to rectify the issues, such as tightening connections, reapplying sealant, or addressing leaks.
Upon confirming the successful installation and proper functionality of the new faucet, you have effectively completed the replacement process, enhancing the efficiency and reliability of your outdoor water supply. With the new faucet seamlessly integrated into your outdoor plumbing system, you can enjoy the convenience of a dependable water source for various outdoor activities, from gardening and lawn maintenance to cleaning and watering tasks.
By following the comprehensive steps outlined in this guide, you have acquired the knowledge and skills to replace an outside faucet with confidence and precision, contributing to the overall maintenance and functionality of your home. With this essential home improvement task accomplished, you can take pride in your ability to handle outdoor plumbing projects effectively, ensuring the continued comfort and convenience of your property.
Conclusion
In conclusion, mastering the art of replacing an outside faucet empowers homeowners with the ability to maintain a reliable and efficient outdoor water supply. By following the comprehensive steps outlined in this guide, you have acquired the knowledge and skills necessary to tackle this essential home improvement task with confidence and precision.
The process begins with gathering the essential tools and materials, ensuring that you are well-prepared to navigate each step of the replacement process effectively. From adjustable wrenches and pipe cutters to waterproof silicone caulk and new outdoor faucets, having the right equipment at your disposal is crucial for a successful outcome.
Turning off the water supply and draining the outdoor faucet are vital initial steps that create a safe and controlled environment for the subsequent tasks. By carefully removing the old faucet and inspecting the surrounding area, you set the stage for the installation of the new fixture, ensuring a seamless transition and minimizing the risk of potential issues.
Installing the new outdoor faucet requires attention to detail, from mounting the fixture securely to connecting it to the water supply with precision. Insulating the new piping and sealing the area around the faucet contribute to its durability and resilience, safeguarding it from potential damage and ensuring its continued functionality, especially in regions prone to freezing temperatures.
The final step of testing the new faucet is a critical phase that allows you to assess its performance, integrity, and functionality. By conducting a thorough evaluation of water flow, leaks, sealant integrity, water pressure, and piping stability, you can identify and address any potential issues promptly, ensuring the optimal functionality and reliability of the new outdoor faucet.
With the successful installation and testing of the new faucet, you have effectively enhanced the efficiency and reliability of your outdoor water supply, providing a dependable water source for various outdoor activities. Whether it's watering your garden, washing your car, or connecting a hose for cleaning tasks, the new faucet ensures convenience and peace of mind for your outdoor endeavors.
By mastering the process of replacing an outside faucet, you have demonstrated your ability to handle essential home maintenance tasks effectively, contributing to the overall functionality and comfort of your property. With this newfound knowledge and skill set, you are well-equipped to address outdoor plumbing projects with confidence, ensuring the continued well-being and convenience of your home.