Home>Automotive>How To Replace A Valve Stem
Automotive
How To Replace A Valve Stem
Published: February 27, 2024
Learn how to replace a valve stem in your automotive vehicle with our step-by-step guide. Keep your car running smoothly with this essential maintenance task.
(Many of the links in this article redirect to a specific reviewed product. Your purchase of these products through affiliate links helps to generate commission for Noodls.com, at no extra cost. Learn more)
Table of Contents
Introduction
Replacing a valve stem is a crucial aspect of maintaining your vehicle's tires. Over time, valve stems can deteriorate, leading to air leaks and potential tire damage. By understanding the process of replacing a valve stem, you can ensure the safety and longevity of your tires, as well as the overall performance of your vehicle.
In this comprehensive guide, we will walk you through the step-by-step process of replacing a valve stem. Whether you are a seasoned automotive enthusiast or a novice DIYer, this guide will equip you with the knowledge and confidence to tackle this essential task.
By following these instructions, you can save time and money by performing this maintenance procedure at home, without the need for professional assistance. Additionally, by taking a proactive approach to maintaining your vehicle's tires, you can enhance safety on the road and optimize fuel efficiency.
Now, let's dive into the process of replacing a valve stem, starting with gathering the necessary tools and materials.
Step 1: Gather Necessary Tools and Materials
Before embarking on the task of replacing a valve stem, it's essential to gather the required tools and materials. By ensuring that you have everything at your disposal, you can streamline the process and minimize interruptions. Here's a comprehensive list of the necessary items:
Tools:
- Valve Core Tool: This tool is essential for removing the valve core from the valve stem. It allows for easy access to the interior of the stem, facilitating the replacement process.
- Valve Stem Puller: A valve stem puller simplifies the removal of the old valve stem from the wheel. It provides leverage and control, making the extraction process more manageable.
- Tire Irons: These are used to dismount the tire from the wheel, providing access to the valve stem. Tire irons come in various lengths and designs, offering flexibility based on the tire and wheel size.
- Lubricant: Applying lubricant to the tire bead and rim can ease the tire removal process, reducing the risk of damage to the tire or wheel.
- Air Compressor: An air compressor is necessary for inflating the tire once the new valve stem is installed. It ensures that the tire is properly pressurized before being mounted back onto the vehicle.
Materials:
- New Valve Stem: Ensure that you have a compatible valve stem for your specific tire and wheel configuration. Valve stems come in various sizes and designs, so it's crucial to select the appropriate one.
- Tire Sealant (Optional): If desired, consider having tire sealant on hand to address any minor leaks or punctures during the process. This can be a proactive measure to maintain tire integrity.
By assembling these tools and materials, you can set the stage for a smooth and efficient valve stem replacement process. With everything in place, you'll be ready to proceed to the next step: removing the old valve stem.
Step 2: Remove the Old Valve Stem
Removing the old valve stem is a critical step in the process of replacing a valve stem. This procedure requires precision and care to avoid damaging the tire or wheel. Here's a detailed walkthrough of how to effectively remove the old valve stem:
-
Prepare the Tire and Wheel: Before initiating the removal process, it's essential to ensure that the tire is safely secured and the wheel is stable. If the tire is still inflated, use an appropriate method to release the air pressure, such as using a valve core tool to depress the valve core and allow the air to escape. Once the tire is deflated, it's ready for the next steps.
-
Position the Tire for Access: With the tire deflated, position it in a way that provides convenient access to the valve stem. This may involve placing the wheel on a stable surface and ensuring that the valve stem is easily reachable. If necessary, use a jack or other support to stabilize the wheel during the removal process.
-
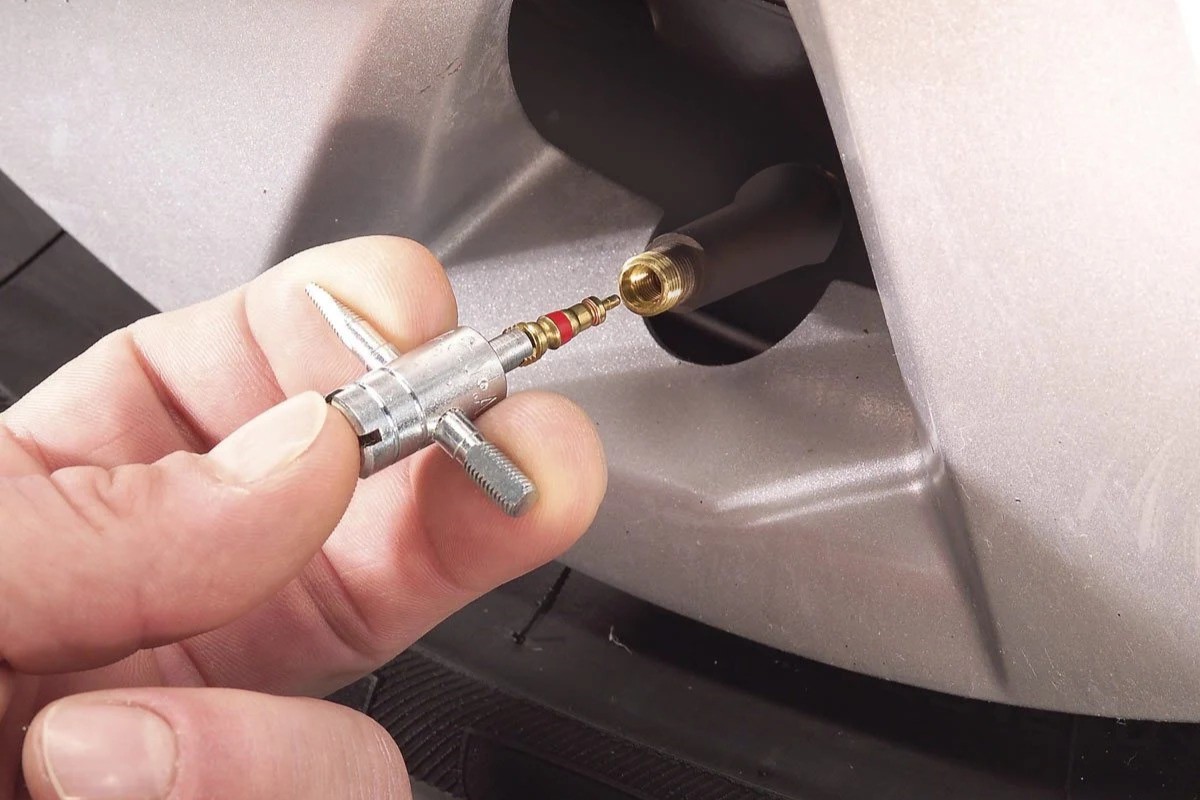
Use the Valve Stem Puller: The valve stem puller is a valuable tool for extracting the old valve stem from the wheel. Insert the puller into the valve stem opening and engage its mechanism to grip the stem securely. With controlled force, carefully pull the old valve stem out of the wheel. It's important to exercise caution to prevent any damage to the wheel or tire during this step.
-
Inspect the Valve Stem Opening: Once the old valve stem has been removed, take a moment to inspect the valve stem opening in the wheel. Ensure that there are no obstructions or debris that could impede the installation of the new valve stem. If necessary, use a clean, lint-free cloth to wipe the area and remove any foreign particles.
-
Dispose of the Old Valve Stem: Properly dispose of the old valve stem in accordance with local regulations and environmental guidelines. If the old valve stem is damaged or worn, it's important to discard it responsibly to minimize any potential environmental impact.
By following these steps with precision and attention to detail, you can successfully remove the old valve stem, paving the way for the installation of a new valve stem. With the old valve stem out of the way, the next step will focus on installing the new valve stem to restore the tire's functionality and integrity.
Read more: How To Replace A Toilet Handle
Step 3: Install the New Valve Stem
Installing a new valve stem is a pivotal stage in the process of replacing a valve stem, as it directly impacts the tire's functionality and air retention capabilities. This step demands precision and attention to detail to ensure a secure and effective installation. Here's a comprehensive guide on how to install the new valve stem:
-
Prepare the New Valve Stem: Before proceeding with the installation, it's crucial to inspect the new valve stem to ensure that it is compatible with the wheel and tire configuration. Verify that the valve stem's design and dimensions align with the specifications required for your vehicle. Additionally, check for any manufacturing defects or damage that could compromise the integrity of the valve stem.
-
Apply Lubricant (Optional): To facilitate the installation process, consider applying a small amount of lubricant to the rubber base of the new valve stem. This can ease the insertion of the valve stem into the wheel's valve stem opening, reducing friction and minimizing the risk of damage to the valve stem or the wheel.
-
Insert the New Valve Stem: With the new valve stem prepared, carefully insert it into the valve stem opening on the wheel. Ensure that the valve stem is positioned securely and aligned properly with the wheel's surface. Apply gentle pressure to seat the valve stem firmly in place, taking care not to force it or cause any distortion to the valve stem or the wheel.
-
Secure the Valve Stem: Once the new valve stem is inserted, it's essential to secure it in position. Depending on the type of valve stem, this may involve using a valve stem puller or a specialized tool to ensure that the valve stem is seated securely and does not have any play or movement within the valve stem opening.
-
Tighten the Valve Stem Nut: If the new valve stem includes a securing nut, carefully tighten it to the manufacturer's recommended torque specifications. This nut plays a crucial role in maintaining the integrity of the valve stem's connection to the wheel, preventing air leaks and ensuring a reliable seal.
-
Inspect the Valve Stem Installation: After installing the new valve stem, take a moment to visually inspect the assembly. Ensure that the valve stem is seated flush with the wheel's surface and that there are no visible gaps or misalignments. This visual inspection can provide reassurance that the valve stem has been installed correctly and is ready for the next steps in the process.
By following these detailed steps, you can effectively install the new valve stem, setting the stage for the final stages of the valve stem replacement process. With the new valve stem securely in place, the next step will focus on re-inflating the tire to the appropriate pressure and conducting a thorough leak check to validate the integrity of the installation.
Step 4: Reinflate the Tire
Reinflating the tire is a crucial step in the valve stem replacement process, as it ensures that the tire is pressurized to the manufacturer's specifications and is ready for remounting onto the vehicle. This step involves using an air compressor to introduce the appropriate air pressure into the tire, allowing it to regain its structural integrity and functionality. Here's a detailed guide on how to effectively reinflate the tire after installing a new valve stem:
-
Consult the Vehicle Manual: Before proceeding with the reinflation process, refer to the vehicle manual or the placard located on the driver's side door jamb to determine the recommended tire pressure for your specific vehicle. It's essential to adhere to the manufacturer's guidelines to ensure optimal tire performance and safety.
-
Prepare the Air Compressor: Ensure that the air compressor is in good working condition and properly connected to a reliable power source. Check the air hose and fittings for any signs of damage or leaks, as a secure and functional air delivery system is essential for accurate tire inflation.
-
Attach the Air Chuck: Securely attach the air chuck to the valve stem of the tire, ensuring a tight and leak-free connection. The air chuck facilitates the transfer of pressurized air from the compressor to the tire, allowing for precise inflation control.
-
Inflate the Tire: With the air chuck in place, activate the air compressor and begin inflating the tire. Monitor the tire pressure closely, periodically checking a tire pressure gauge to ensure that the pressure aligns with the manufacturer's specifications. Exercise caution to avoid overinflating the tire, as this can compromise tire performance and safety.
-
Verify the Pressure: Once the tire reaches the recommended pressure, promptly turn off the air compressor and remove the air chuck from the valve stem. Use a tire pressure gauge to verify the accuracy of the inflation, confirming that the tire pressure matches the specified value. Adjust the pressure if necessary to achieve the desired level of inflation.
-
Inspect for Leaks: After inflating the tire, conduct a visual and tactile inspection to check for any signs of air leaks around the valve stem area. Apply a soapy water solution to the valve stem and observe for the formation of bubbles, indicating potential leaks. Additionally, feel around the valve stem for any escaping air, addressing any leaks promptly.
By following these detailed steps, you can effectively reinflate the tire after installing a new valve stem, ensuring that the tire is pressurized to the appropriate level and free from leaks. This sets the stage for the final step in the process: conducting a comprehensive leak check to validate the integrity of the valve stem installation and the tire's overall functionality.
Step 5: Check for Leaks
After completing the installation of a new valve stem and reinflating the tire, it is crucial to conduct a thorough check for leaks to ensure the integrity of the entire process. Identifying and addressing any potential leaks is essential for maintaining optimal tire performance and safety on the road. Here's a detailed guide on how to effectively check for leaks and address any issues that may arise:
-
Visual Inspection: Begin by visually examining the valve stem area and the surrounding tire surface. Look for any signs of air bubbles or moisture, which may indicate a leak. Additionally, inspect the valve stem's connection to the wheel, ensuring that it is secure and free from any visible gaps or irregularities.
-
Soapy Water Test: Prepare a solution of mild soapy water and apply it generously to the valve stem and its immediate surroundings. Observe the area closely for the formation of bubbles, as the soapy water will react to escaping air, indicating the presence of a leak. Pay particular attention to the base of the valve stem and the valve stem nut, as these areas are common sources of leaks.
-
Tactile Examination: Run your fingers along the valve stem and the adjacent tire surface, feeling for any subtle air movement or irregularities. Even a minor leak can be detected through the sense of touch, allowing you to pinpoint the source of the issue and take corrective action.
-
Pressure Retention Test: After applying the soapy water and conducting a visual and tactile inspection, monitor the tire's pressure over a period of time. A significant drop in pressure may indicate a persistent leak, warranting further investigation and potential reinstallation of the valve stem.
-
Addressing Leaks: If a leak is detected during the inspection, it is essential to address it promptly. Depending on the severity of the leak, you may need to reinstall the valve stem, adjust the valve stem nut, or apply a sealant to the affected area. It is crucial to resolve any leaks to maintain the tire's structural integrity and air retention capabilities.
By meticulously checking for leaks and addressing any issues that arise, you can ensure that the new valve stem is installed securely and that the tire is free from air leaks. This comprehensive inspection process is a vital aspect of the valve stem replacement procedure, contributing to the overall safety and performance of your vehicle's tires.
Conclusion
In conclusion, the process of replacing a valve stem is a fundamental aspect of tire maintenance that directly impacts the safety, performance, and longevity of your vehicle's tires. By following the step-by-step guide outlined in this comprehensive article, you have gained valuable insights into the intricacies of valve stem replacement and the essential techniques required to execute this task effectively.
Throughout the process, from gathering the necessary tools and materials to conducting a thorough leak check, you have acquired the knowledge and skills to navigate each stage with confidence and precision. By understanding the importance of proper tire inflation, secure valve stem installation, and meticulous leak detection, you have empowered yourself to proactively maintain your vehicle's tires, contributing to enhanced safety and optimal performance on the road.
Furthermore, by embracing a proactive approach to tire maintenance, you have the opportunity to save time and resources by performing this essential task at home, without the need for professional assistance. This not only fosters a sense of self-reliance and accomplishment but also allows you to prioritize the well-being of your vehicle and ensure that it operates at its best.
As you reflect on the process of replacing a valve stem, remember that attention to detail, precision, and a commitment to thoroughness are key elements in achieving successful outcomes. Whether you are a seasoned automotive enthusiast or a novice DIYer, the knowledge and skills acquired through this guide equip you to tackle valve stem replacement with confidence and proficiency.
Ultimately, by embracing the principles of proactive maintenance and attention to detail, you are taking a proactive stance in safeguarding the integrity of your vehicle's tires and enhancing overall safety on the road. The ability to replace a valve stem effectively is a valuable skill that contributes to the longevity and performance of your vehicle's tires, underscoring the importance of regular maintenance and care.
In closing, the knowledge and expertise gained from this guide empower you to approach valve stem replacement with confidence and proficiency, ensuring that your vehicle's tires remain in optimal condition. By prioritizing tire maintenance and embracing a proactive mindset, you are actively contributing to the safety, performance, and longevity of your vehicle's tires, ultimately enhancing your overall driving experience.