Home>Home and Garden>How To Replace Pool Light
Home and Garden
How To Replace Pool Light
Published: March 5, 2024
Learn how to replace a pool light in your home and garden with our step-by-step guide. Ensure safety and proper installation with our expert tips.
(Many of the links in this article redirect to a specific reviewed product. Your purchase of these products through affiliate links helps to generate commission for Noodls.com, at no extra cost. Learn more)
Table of Contents
Introduction
Replacing a pool light is a crucial maintenance task for any pool owner. Whether you're upgrading to a more energy-efficient model or simply need to replace a malfunctioning light, this guide will walk you through the process step by step. A well-lit pool not only enhances the aesthetic appeal of your outdoor space but also ensures safety during evening swims and social gatherings. By following the instructions outlined in this article, you can confidently tackle the task of replacing your pool light, saving both time and money by avoiding the need for professional assistance.
A pool light replacement project may seem daunting at first, especially for those new to DIY home maintenance. However, with the right tools, materials, and a clear understanding of the process, this task can be accomplished with ease. Before diving into the steps, it's essential to gather all the necessary tools and materials. This includes items such as a screwdriver, waterproof wire connectors, and a new pool light fixture. Additionally, it's crucial to ensure that the replacement light is compatible with your pool's existing electrical system to avoid any complications during installation.
By turning off the power to the pool light and carefully removing the old fixture, you can proceed to install the new pool light with confidence. Proper installation is key to ensuring the longevity and functionality of the new light, so attention to detail is paramount. Once the new light is securely in place, testing it to verify proper functionality is the final step in the process.
With this comprehensive guide, you'll be equipped with the knowledge and confidence to successfully replace your pool light, contributing to the overall enjoyment and safety of your pool area. Let's dive into the step-by-step process of replacing a pool light and illuminate your pool with a renewed radiance.
Read more: How To Replace A Brake Light Bulb
Step 1: Gather necessary tools and materials
Before embarking on the task of replacing a pool light, it's essential to gather all the necessary tools and materials. Having the right equipment at hand will streamline the process and ensure a successful outcome. Here's a comprehensive list of items you'll need for this project:
Tools:
- Screwdriver: A Phillips or flat-head screwdriver, depending on the type of screws used to secure the pool light fixture.
- Voltage Tester: To ensure that the power to the pool light is switched off before beginning the replacement process.
- Utility Knife: Useful for cutting and stripping wires during the installation of the new pool light.
- Insulated Pliers: These will come in handy for handling electrical connections safely.
- Silicone Lubricant: To facilitate the removal and installation of the pool light fixture, especially if it's been in place for an extended period.
Materials:
- New Pool Light Fixture: Ensure that the replacement light is compatible with your pool's voltage and wiring system. LED pool lights are a popular choice for their energy efficiency and durability.
- Waterproof Wire Connectors: These connectors are essential for creating secure and watertight electrical connections, safeguarding against moisture and corrosion.
- Electrical Tape: Use high-quality electrical tape to insulate wire connections and provide an added layer of protection.
- Replacement Gasket or O-Ring: If the existing gasket or O-ring is worn or damaged, it's crucial to have a replacement on hand to maintain the waterproof seal around the pool light fixture.
- Safety Goggles and Gloves: Prioritize safety by wearing protective eyewear and gloves throughout the replacement process to prevent any potential injuries.
By ensuring that you have all the necessary tools and materials before starting the pool light replacement, you'll be well-prepared to tackle each step with confidence and efficiency. This proactive approach minimizes the risk of interruptions and allows for a smooth transition from gathering the essentials to executing the replacement process.
Step 2: Turn off power to the pool light
Before proceeding with the replacement of the pool light, it is imperative to ensure the safety of the working environment by turning off the power supply to the existing light fixture. This crucial step minimizes the risk of electrical shock and creates a secure setting for the subsequent tasks.
To begin, locate the circuit breaker or power switch that controls the electricity supply to the pool light. This is typically found in the electrical panel or control box designated for the pool area. It is essential to exercise caution and verify the correct breaker or switch to avoid inadvertently cutting power to other essential pool equipment.
Once the appropriate breaker or switch has been identified, firmly switch it to the "off" position. To provide an extra layer of safety, it is advisable to use a voltage tester to confirm that the power to the pool light has been successfully disconnected. This simple yet critical measure ensures that no electrical current is present, safeguarding against any potential hazards during the replacement process.
After confirming that the power supply has been effectively turned off, it is recommended to wait for a few minutes to allow any residual electrical charge to dissipate. This precautionary waiting period further reduces the risk of accidental contact with live wires or components.
By diligently following these steps to deactivate the power supply to the pool light, you create a secure environment for the subsequent stages of the replacement process. This proactive approach prioritizes safety and sets the stage for a smooth and efficient transition to the next step: removing the old pool light fixture.
Ensuring that the power is completely turned off is a fundamental safety measure that cannot be overlooked. By taking the time to perform this critical step with care and attention to detail, you pave the way for a successful and secure pool light replacement process.
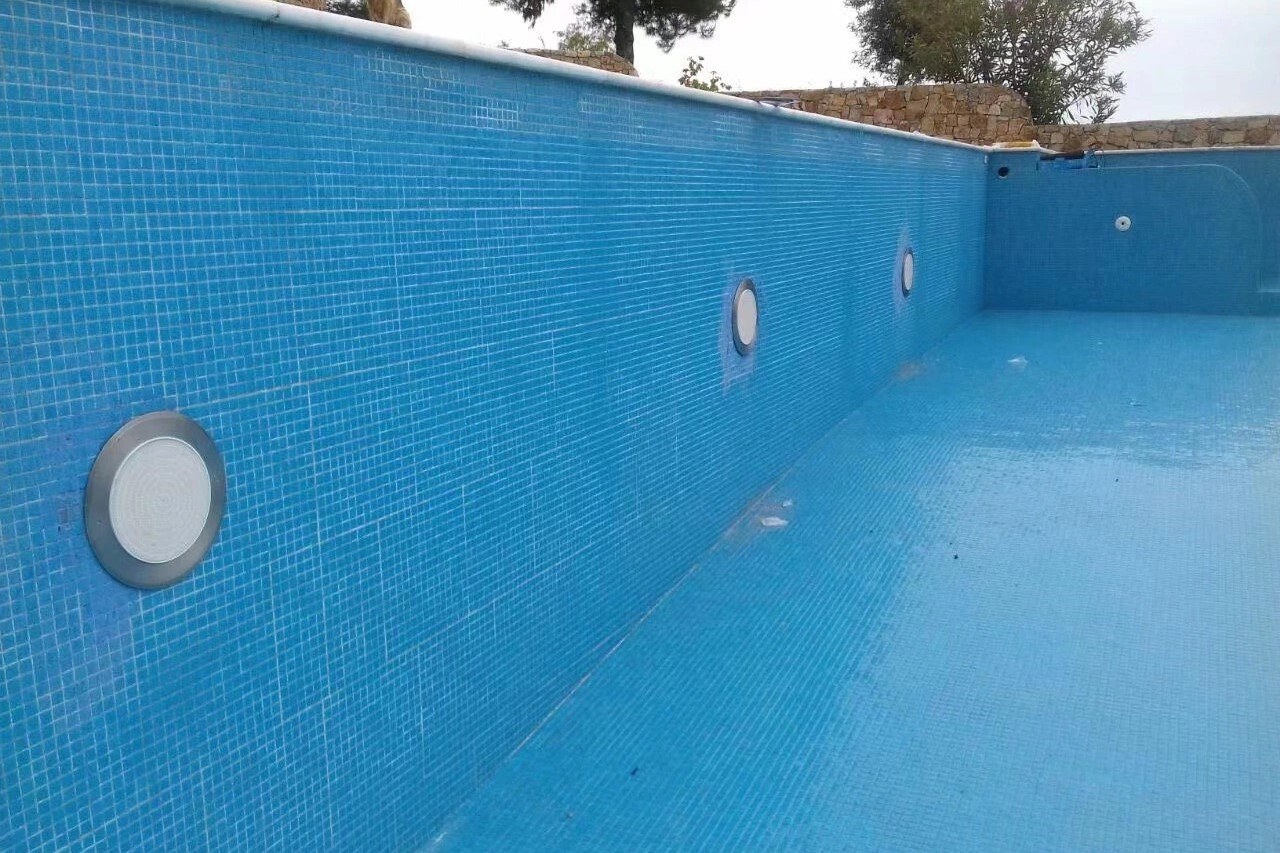
Step 3: Remove the old pool light
With the power supply to the pool light safely turned off, the next step in the replacement process is to remove the old pool light fixture. This task requires careful attention to detail and a methodical approach to ensure a smooth transition to the installation of the new light.
-
Drain the Pool Light Niche: If your pool light is installed in a niche, it's essential to drain any water that may have accumulated around the fixture. This can be achieved by using a sponge or towel to soak up any residual water, ensuring a dry working environment for the removal process.
-
Loosen the Fixture Screws: Using the appropriate screwdriver, carefully loosen and remove the screws securing the old pool light fixture in place. It's important to keep track of the screws and any accompanying hardware to facilitate the installation of the new light later on.
-
Disconnect the Electrical Connections: With the screws removed, gently pull the old light fixture out of the niche, taking care not to damage the surrounding area. Once the fixture is accessible, identify and disconnect the electrical connections. This typically involves removing the wire nuts or waterproof connectors joining the light's wiring to the pool's electrical system.
-
Inspect and Clean the Niche: With the old light fixture removed, take a moment to inspect the pool light niche for any signs of damage, corrosion, or debris. Clear away any accumulated dirt or debris, and inspect the niche for any potential issues that may need to be addressed before installing the new light.
-
Remove the Old Gasket or O-Ring: If the old gasket or O-ring is still in place, carefully remove it from the niche. Inspect the gasket for signs of wear or damage, as a deteriorated gasket can compromise the waterproof seal of the new light fixture.
By following these steps with precision and care, you can effectively remove the old pool light fixture, preparing the space for the seamless installation of the new light. Attention to detail during this phase sets the stage for a successful transition to the subsequent step of installing the replacement pool light.
Removing the old pool light is a critical phase in the replacement process, and by approaching it methodically and attentively, you pave the way for a smooth and efficient installation of the new light fixture.
Step 4: Install the new pool light
With the old pool light successfully removed and the working area prepared, it's time to proceed with the installation of the new pool light. This phase of the replacement process requires attention to detail and precision to ensure the proper functioning and longevity of the new fixture.
-
Prepare the New Light Fixture: Before installing the new pool light, it's essential to prepare the fixture for installation. This involves ensuring that the electrical connections are secure and that the gasket or O-ring is in place to create a watertight seal. Additionally, applying a thin layer of silicone lubricant to the gasket or O-ring can facilitate the installation process and enhance the seal's effectiveness.
-
Position the New Light in the Niche: Carefully place the new pool light fixture into the niche, ensuring that it is positioned securely and aligns properly with the screw holes. Take care to avoid damaging the electrical connections or the gasket during this process, as a secure and intact installation is crucial for the fixture's performance and safety.
-
Secure the Fixture with Screws: Once the new light is positioned correctly, use the screws and hardware that were removed during the old light's disassembly to secure the new fixture in place. Tighten the screws evenly to ensure a snug fit, taking care not to over-tighten and potentially damage the fixture or the niche.
-
Connect the Electrical Wires: With the new light securely in place, proceed to connect the electrical wires to the pool's electrical system. Use waterproof wire connectors to create secure and watertight connections, minimizing the risk of moisture infiltration and corrosion. It's crucial to follow the manufacturer's instructions and ensure that the connections are insulated with high-quality electrical tape for added protection.
-
Test the New Light: Once the electrical connections are secure, it's time to test the new pool light to verify its functionality. Turn the power supply back on and observe the light to ensure that it illuminates as expected. This step allows for immediate identification of any potential issues with the installation or the fixture itself, enabling prompt resolution before completing the replacement process.
By meticulously following these steps and exercising care throughout the installation process, you can successfully install the new pool light, ensuring its proper functionality and longevity. Attention to detail and precision are paramount during this phase, setting the stage for a well-illuminated and safe pool area for enjoyment and relaxation.
Step 5: Test the new pool light
After the meticulous installation of the new pool light, the final step in the replacement process is to test the functionality of the fixture. This critical phase ensures that the new light is operating as intended, providing both illumination and safety for your pool area. The testing process involves verifying the electrical connections, assessing the quality of the light output, and confirming that the installation has been executed successfully.
To begin the testing phase, switch the power supply back on, allowing electricity to flow to the newly installed pool light. As the light illuminates, carefully observe its performance, paying attention to the following key aspects:
-
Light Output: Assess the brightness and consistency of the light emitted by the new fixture. Ensure that the illumination adequately covers the pool area, providing sufficient visibility for evening swims and outdoor gatherings. A well-functioning pool light enhances both the aesthetic appeal and safety of the pool environment.
-
Color and Clarity: Observe the color and clarity of the light emitted by the new pool light. Modern LED pool lights, in particular, offer a range of vibrant colors and clear, crisp illumination, enhancing the ambiance of the pool area. Confirm that the light's color and clarity align with your expectations and preferences.
-
Electrical Connections: While the light is operational, inspect the electrical connections to ensure that they remain secure and free from any signs of overheating or malfunction. Verify that the waterproof wire connectors and electrical tape have effectively insulated the connections, safeguarding against moisture and corrosion.
-
Seal Integrity: Monitor the area around the pool light fixture for any signs of water infiltration. The testing phase provides an opportunity to confirm that the gasket or O-ring, along with the silicone lubricant, has created a watertight seal, preventing any water from entering the niche and compromising the fixture's functionality.
-
Functionality: Activate any additional features or settings that may be present in the new pool light, such as color-changing modes or programmable lighting effects. Confirm that these features operate as intended, adding versatility and customization to the pool's lighting capabilities.
By meticulously assessing these aspects during the testing phase, you can ensure that the new pool light meets your expectations in terms of performance, safety, and visual appeal. Any issues or discrepancies identified during testing can be promptly addressed, ensuring that the replacement process culminates in the successful installation of a fully functional and reliable pool light.
The testing phase serves as the final quality check, providing peace of mind and assurance that the new pool light will contribute to the enjoyment and safety of your pool area for years to come.
Conclusion
In conclusion, the process of replacing a pool light is a manageable and rewarding endeavor that enhances both the functionality and aesthetics of your pool area. By following the step-by-step guide outlined in this article, you have gained the knowledge and confidence to undertake this maintenance task with ease. From gathering the necessary tools and materials to testing the functionality of the new pool light, each phase of the replacement process contributes to the overall safety and enjoyment of your pool environment.
The careful preparation and attention to detail during the initial steps, including turning off the power supply and removing the old pool light, set the stage for a seamless transition to the installation of the new fixture. By ensuring that the electrical connections are secure, the gasket or O-ring creates a watertight seal, and the fixture illuminates as expected, you have successfully completed the replacement process.
The installation of a new pool light not only improves the visibility and safety of your pool area but also contributes to the ambiance and visual appeal of your outdoor space. Modern LED pool lights, in particular, offer energy efficiency, vibrant color options, and long-lasting performance, enhancing the overall experience of your pool environment.
By embracing this DIY maintenance task, you have not only saved time and resources but also gained a sense of accomplishment and empowerment in caring for your pool. The successful replacement of the pool light underscores your dedication to maintaining a safe, inviting, and well-illuminated pool area for yourself, your family, and your guests to enjoy.
As you reflect on the completion of this project, take pride in the knowledge that your pool area is now equipped with a reliable and visually appealing lighting solution. The renewed radiance of your pool serves as a testament to your proactive approach to home maintenance and your commitment to creating a welcoming and secure outdoor space.
With the completion of the pool light replacement, you can look forward to many evenings of relaxation, social gatherings, and aquatic enjoyment in a well-lit and inviting pool environment. Your proactive approach to pool maintenance and the successful replacement of the pool light exemplify your dedication to creating a safe, enjoyable, and visually captivating outdoor oasis for all to appreciate.