Sports
How To Set Up Pool Balls
Published: February 25, 2024
Learn how to set up pool balls with our step-by-step guide. Get ready for a game of pool and improve your sports skills today!
(Many of the links in this article redirect to a specific reviewed product. Your purchase of these products through affiliate links helps to generate commission for Noodls.com, at no extra cost. Learn more)
Table of Contents
Introduction
Setting up pool balls is an essential aspect of preparing for a game of pool. The arrangement of the balls not only impacts the initial break but also influences the flow and strategy of the entire game. Whether you are a seasoned player or a novice, understanding the proper setup of pool balls is crucial for a fair and enjoyable game.
The process of setting up pool balls involves several key steps, each of which contributes to the overall integrity of the game. From gathering the necessary equipment to arranging the triangle rack and positioning the cue ball, each stage plays a vital role in ensuring a balanced and competitive game of pool.
In this comprehensive guide, we will walk through the step-by-step process of setting up pool balls, providing valuable insights and tips to help you achieve a precise and professional arrangement. By following these instructions, you can elevate your pool-playing experience and set the stage for an engaging and rewarding game.
Now, let's delve into the intricacies of setting up pool balls, exploring the equipment needed, the techniques for arranging the balls, and the finer details that can make a significant difference in the outcome of your game. Whether you are preparing for a friendly match with friends or a competitive tournament, mastering the art of setting up pool balls is a fundamental skill that can enhance your overall enjoyment and performance on the pool table.
Read more: How To Rack Pool Balls
Step 1: Gather the Necessary Equipment
Before embarking on the process of setting up pool balls, it is essential to gather the necessary equipment to ensure a smooth and efficient preparation. Having the right tools at hand not only streamlines the setup process but also contributes to the overall quality of the game. Here's a detailed look at the essential equipment required for setting up pool balls:
-
Pool Table: The foundation of any game of pool, the pool table provides the playing surface for arranging the pool balls. It is crucial to ensure that the table is clean, level, and free from any obstructions to facilitate an accurate setup.
-
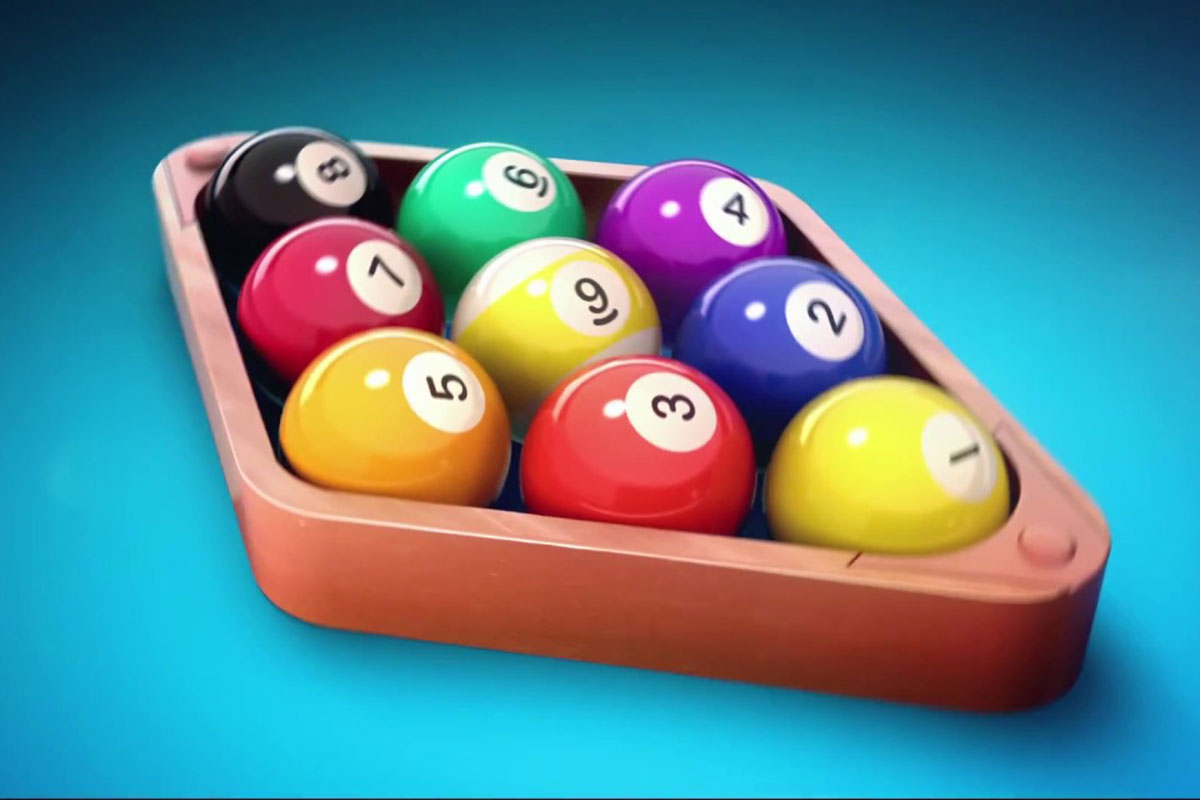
Pool Balls: A complete set of pool balls, typically comprising 15 numbered object balls and a cue ball, is indispensable for setting up the game. The object balls are solid or striped, numbered 1 through 15, while the cue ball is typically white. It is important to inspect the pool balls for any signs of damage or wear that could affect their performance during the game.
-
Triangle Rack: Also known as the "racking triangle" or "rack," this triangular-shaped tool is used to arrange the pool balls in the initial formation for the break. The triangle rack should be sturdy and of the appropriate size to accommodate the standard 2.25-inch pool balls.
-
Pool Cue: A high-quality pool cue is essential for accurately positioning the cue ball during the setup process. The cue should have a straight shaft, a well-maintained tip, and a comfortable grip to facilitate precise movements on the table.
-
Chalk: Chalk is used to enhance the friction between the cue tip and the cue ball, reducing the risk of miscues and ensuring better control during the setup and subsequent gameplay.
-
Table Brush: Keeping the pool table clean is crucial for maintaining the integrity of the game. A table brush helps remove dust, chalk residue, and other debris from the table surface, ensuring a smooth and consistent playing area.
-
Lighting: Adequate lighting over the pool table is essential for clear visibility and accurate judgment of angles and distances during the setup process. Proper lighting minimizes shadows and glare, creating an optimal environment for setting up the pool balls with precision.
By ensuring that these essential pieces of equipment are readily available and in good condition, you can lay the groundwork for a successful and enjoyable game of pool. With the necessary tools at hand, you are well-equipped to proceed to the next steps of the setup process, setting the stage for a rewarding and competitive gameplay experience.
Step 2: Clean the Pool Balls
Ensuring that the pool balls are clean is a critical step in the setup process, as it directly impacts the performance and integrity of the game. Over time, pool balls can accumulate dirt, chalk residue, and oils from players' hands, affecting their appearance and, more importantly, their behavior on the table. To maintain the optimal condition of the pool balls and promote fair gameplay, thorough cleaning is essential.
Begin by inspecting each pool ball for any visible signs of dirt, stains, or marks. Using a microfiber cloth or a soft, lint-free towel, gently wipe the surface of each ball to remove any surface-level debris. For more stubborn stains or marks, a mild mixture of water and dish soap can be used to gently scrub the affected areas. It is important to avoid abrasive cleaners or harsh chemicals, as these can damage the surface of the pool balls.
Once the visible dirt and stains have been addressed, it is time to focus on removing any accumulated oils and chalk residue. This can be achieved by using a specialized pool ball cleaner or polish, applied with a clean cloth in a circular motion. The cleaner helps to lift and dissolve oils and residue, restoring the shine and smoothness of the pool balls' surface.
After cleaning each ball, it is crucial to thoroughly dry them with a separate, dry cloth to remove any remaining moisture or cleaning solution. Proper drying prevents water spots and ensures that the balls are ready for the next stage of the setup process.
In addition to the individual cleaning of each pool ball, it is advisable to periodically deep clean the entire set. This involves placing the pool balls in a cleaning solution specifically designed for this purpose and allowing them to soak for a recommended duration. Following the soaking, the balls should be thoroughly rinsed and dried to remove any residue from the cleaning solution.
By meticulously cleaning the pool balls, players can uphold the standards of the game, minimize the risk of inconsistent ball behavior, and prolong the lifespan of the pool balls. This attention to detail not only contributes to the overall aesthetics of the game but also ensures a level playing field for all participants. With the pool balls now clean and pristine, the stage is set for the next phase of the setup process, as the focus shifts to arranging the triangle rack and positioning the cue ball.
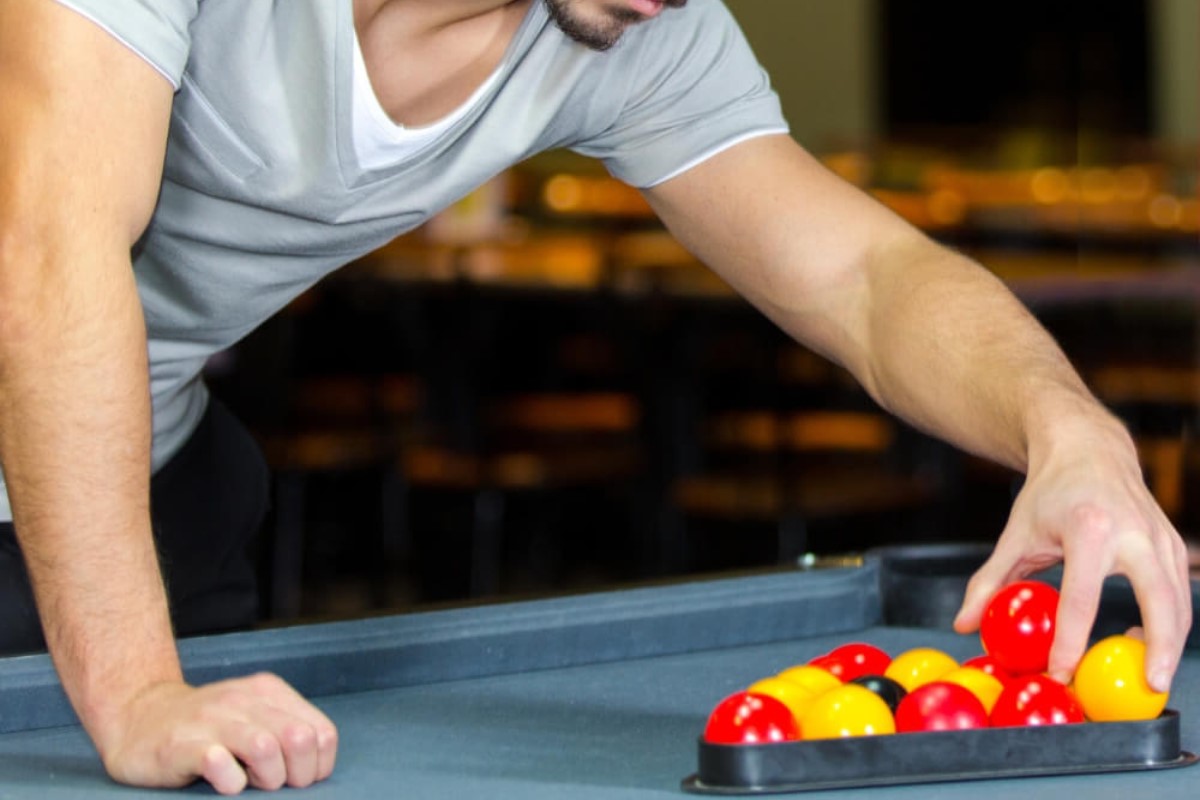
Step 3: Arrange the Triangle Rack
Arranging the triangle rack is a pivotal step in setting up pool balls, as it establishes the initial formation for the break and sets the tone for the ensuing gameplay. The precision and care applied in this stage directly influence the dynamics of the game, making it essential to approach the arrangement with attention to detail and accuracy.
To begin, place the triangle rack at the foot spot of the pool table, ensuring that it is centered and aligned with the table's head string. The head string marks the boundary behind which the cue ball must be positioned for the break, and aligning the rack with this reference point is crucial for a consistent and fair setup.
Next, carefully position the pool balls within the triangle rack, adhering to the standard arrangement for a game of 8-ball or 9-ball. For an 8-ball game, the balls should be organized with the 8-ball situated in the center of the triangle, flanked by a solid and a striped ball on each side. The remaining balls are then filled in, with the 1-ball positioned at the apex of the triangle. In a 9-ball game, the balls are arranged in numerical order within the rack, with the 1-ball at the front and the 9-ball at the center.
As you place the balls within the rack, ensure that they are snugly fitted, with minimal gaps or overlaps between the balls. This promotes a tight and uniform formation, optimizing the impact of the break and minimizing the likelihood of balls moving out of place prematurely.
Once the balls are positioned within the rack, gently press the rack downward to secure the balls in place, taking care to maintain the alignment and tightness of the formation. The goal is to create a compact and stable arrangement that will hold the balls securely until the break is initiated.
After confirming the stability of the arrangement, carefully lift the triangle rack off the pool balls, leaving them in place on the table. Inspect the formation to ensure that the balls are evenly distributed and that the rack has not left any imprints or disturbances on the balls' positions.
With the triangle rack removed, the pool balls are now poised for the next phase of the setup process, as the focus shifts to placing the cue ball and fine-tuning the position of the balls in preparation for the break. The precise and methodical arrangement of the triangle rack lays the groundwork for a fair and competitive game, setting the stage for an engaging and strategic gameplay experience.
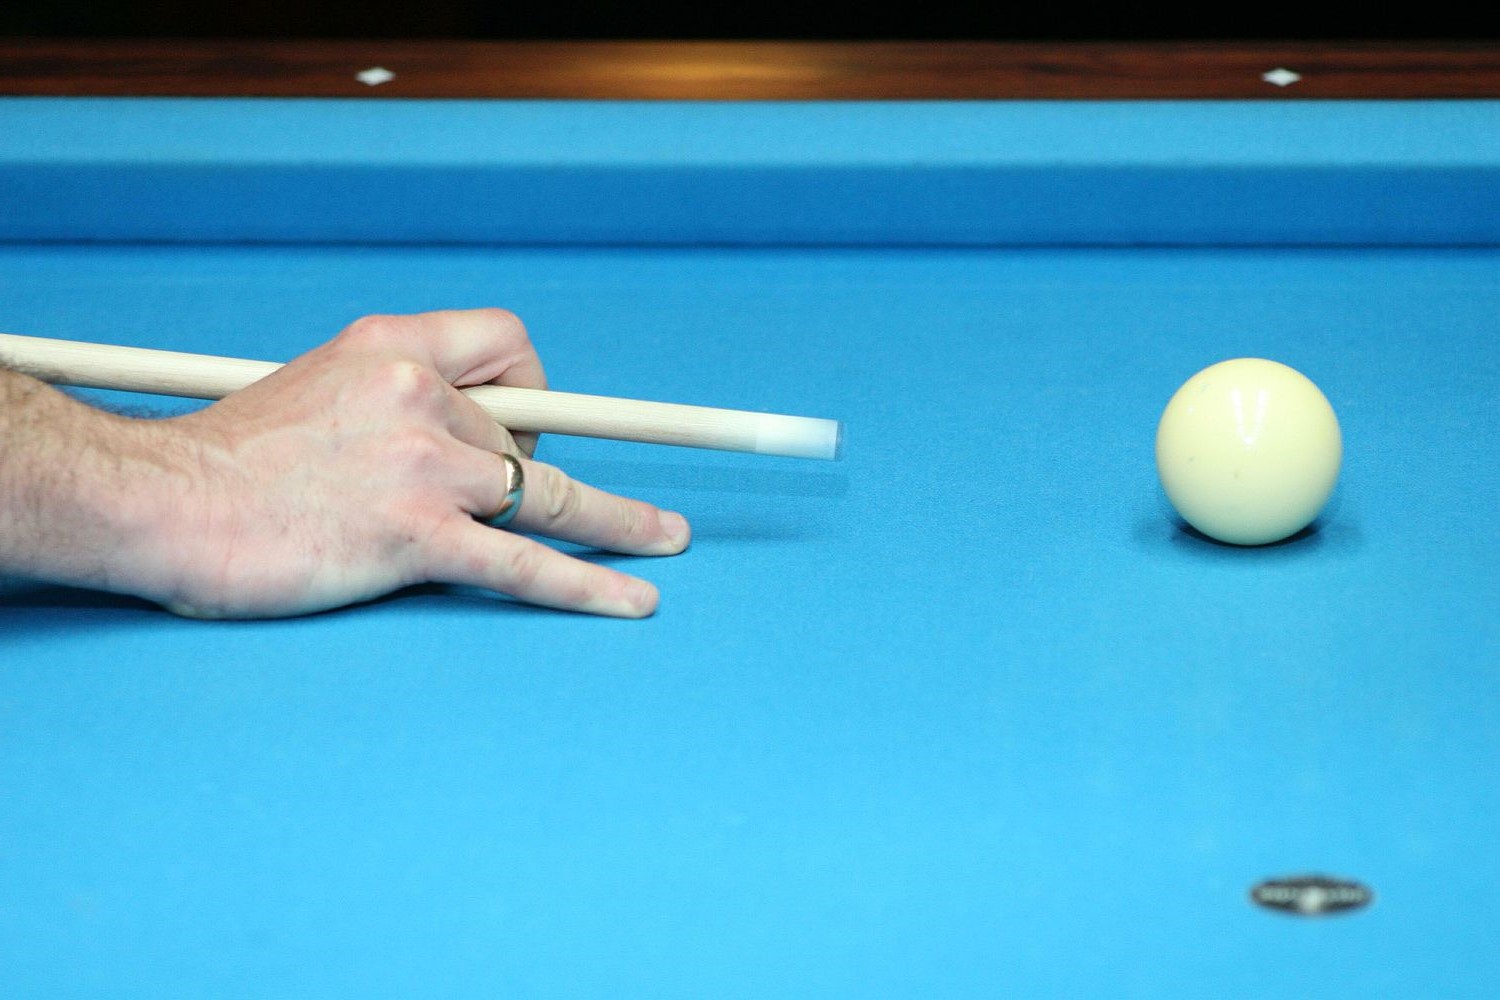
Step 4: Place the Cue Ball
Placing the cue ball is a crucial aspect of setting up pool balls, as it directly influences the dynamics of the initial break and sets the stage for the subsequent gameplay. The precise positioning of the cue ball demands careful consideration of both strategic and technical factors, ensuring that it is optimally placed to facilitate a fair and effective break.
To begin, position the cue ball behind the head string, within the "kitchen" area of the pool table. The kitchen, also known as the "cue ball area," encompasses the space between the head string and the head rail, providing ample room for the cue ball to be maneuvered and struck without obstruction. Placing the cue ball within this designated area is essential for adhering to the standard rules of play and promoting a consistent setup for all players.
Once the cue ball is within the kitchen, it is time to consider its precise placement in relation to the arranged pool balls. For an 8-ball game, the cue ball should be positioned behind the head string, directly in line with the center of the table. This central alignment ensures equal access to both solid and striped balls, allowing for a balanced and impartial break. In a 9-ball game, the cue ball is typically placed slightly off-center, offering a strategic advantage for initiating the break and targeting specific numbered balls.
As you position the cue ball, it is important to assess the angle and distance in relation to the arranged pool balls, considering the potential trajectories and impacts of the break. The optimal placement of the cue ball can vary based on individual playing styles and strategies, with some players favoring a direct head-on break and others opting for angled or deflected approaches to maximize the spread and dispersion of the balls.
Furthermore, the placement of the cue ball can be influenced by the specific rules or variations of the game being played, such as alternate break formats or specific requirements for the cue ball's initial position. It is essential to familiarize oneself with the applicable rules and guidelines to ensure a consistent and fair setup for all participants.
By thoughtfully placing the cue ball within the designated area and considering its alignment and positioning in relation to the arranged pool balls, players can establish a balanced and strategic foundation for the initial break. This meticulous attention to detail sets the stage for an engaging and competitive game, laying the groundwork for a dynamic and skillful display of pool prowess.
Read more: How To Set Up A Graco Pack And Play
Step 5: Adjust the Position of the Balls
With the cue ball in place and the triangle rack removed, the next critical step in setting up pool balls involves fine-tuning the position of the arranged balls to ensure a balanced and optimal formation for the break. This adjustment phase is essential for mitigating any potential irregularities or imbalances in the initial setup, setting the stage for a fair and dynamic break that maximizes the potential for strategic gameplay.
Begin by carefully inspecting the arrangement of the pool balls, paying close attention to their alignment and spacing. It is not uncommon for minor shifts or discrepancies to occur during the removal of the triangle rack, and addressing these nuances is crucial for achieving a uniform and stable formation. Gently nudge any misaligned balls into position, ensuring that they are snugly nestled against neighboring balls without overlapping or creating gaps.
As you adjust the position of the balls, consider the overall symmetry and distribution of solids and stripes across the table. A balanced spread of both solid and striped balls promotes an equitable distribution of opportunities for both players, setting the stage for a competitive and engaging game. Additionally, ensuring that the balls are evenly dispersed across the table minimizes the likelihood of clustered or congested areas that could impede the effectiveness of the break.
Pay particular attention to the positioning of the 8-ball, the focal point of an 8-ball game and a pivotal element in determining the sequence of play. The 8-ball should be situated in the center of the formation, flanked by a solid and a striped ball on each side, creating a visually symmetrical and strategically balanced arrangement. Adjust the surrounding balls as needed to achieve this harmonious configuration, optimizing the potential for a dynamic and strategic gameplay experience.
Furthermore, consider the potential trajectories and interactions of the balls during the break, assessing the angles and distances between neighboring balls. Fine-tuning the positions of the balls to minimize potential collisions or obstructions can enhance the fluidity and unpredictability of the break, contributing to the excitement and strategic depth of the game.
By meticulously adjusting the position of the arranged pool balls, players can ensure a fair and balanced setup that sets the stage for an exhilarating and skillful game of pool. This attention to detail underscores the commitment to upholding the integrity and dynamics of the game, laying the groundwork for a competitive and rewarding gameplay experience.
Step 6: Double Check the Setup
After completing the meticulous process of arranging the pool balls, it is imperative to double-check the setup to ensure that every element is in place for a fair and balanced game. This final step serves as a critical quality assurance measure, allowing players to identify and rectify any potential discrepancies or irregularities before commencing the game.
Begin by visually inspecting the entire setup, taking note of the alignment, spacing, and distribution of the pool balls across the table. Verify that the balls are uniformly arranged, with no significant deviations or imbalances that could favor one player over the other. Pay particular attention to the positioning of the 8-ball and the cue ball, ensuring that they are situated in accordance with the standard rules and guidelines for the specific game being played.
In addition to the visual assessment, it is advisable to physically test the stability and tightness of the arranged pool balls. Gently tap each ball with the cue stick to confirm that they are securely positioned and unlikely to shift or move prematurely during the break. This tactile verification helps to identify any loose or misaligned balls that may require further adjustment to achieve a stable and uniform formation.
Furthermore, consider the overall aesthetics and presentation of the setup, aiming for a visually appealing and symmetrical arrangement that enhances the ambiance of the game. A well-organized and balanced setup not only contributes to the integrity of the game but also sets the stage for an immersive and enjoyable gameplay experience for all participants.
As a final check, review the setup in the context of the specific rules and variations of the game being played, ensuring that it aligns with the prescribed standards and requirements. This comprehensive evaluation helps to uphold the fairness and consistency of the setup, fostering a level playing field for all players and promoting a competitive and engaging game.
By diligently double-checking the setup, players demonstrate their commitment to maintaining the integrity and quality of the game, setting the stage for a rewarding and competitive gameplay experience. This meticulous attention to detail underscores the dedication to upholding the standards of fair play and ensuring an enjoyable and skillful display of pool prowess.
Conclusion
In conclusion, the process of setting up pool balls is a fundamental and intricate aspect of preparing for a game of pool. Each step, from gathering the necessary equipment to fine-tuning the position of the balls, contributes to the overall integrity and dynamics of the game. By meticulously following the step-by-step guide outlined in this comprehensive article, players can ensure a fair, balanced, and engaging setup that sets the stage for a rewarding and competitive gameplay experience.
The initial step of gathering the necessary equipment underscores the importance of having the right tools at hand to facilitate a smooth and efficient setup. From the pool table and pool balls to the triangle rack and cue ball, each piece of equipment plays a vital role in creating the optimal conditions for a game of pool. By ensuring that the equipment is in good condition and readily available, players can lay the groundwork for a successful and enjoyable game.
Thoroughly cleaning the pool balls emerges as a critical step in maintaining the integrity and performance of the game. By addressing visible dirt, stains, oils, and chalk residue, players can uphold the standards of fair play and promote consistent ball behavior throughout the game. The meticulous cleaning process not only enhances the aesthetics of the pool balls but also contributes to a level playing field for all participants.
Arranging the triangle rack and positioning the cue ball demand precision and attention to detail, setting the stage for the initial break and influencing the strategic dynamics of the game. The careful alignment and placement of the pool balls within the rack, along with the strategic positioning of the cue ball, create a balanced and strategic foundation for the ensuing gameplay.
Fine-tuning the position of the arranged pool balls serves to mitigate any potential irregularities and imbalances, ensuring a uniform and stable formation for the break. By adjusting the positions of the balls and considering their potential interactions, players can optimize the potential for a dynamic and strategic gameplay experience.
Finally, double-checking the setup provides a critical quality assurance measure, allowing players to identify and rectify any potential discrepancies or irregularities before commencing the game. This comprehensive evaluation underscores the commitment to upholding the integrity and fairness of the game, setting the stage for an immersive and enjoyable gameplay experience for all participants.
In essence, the process of setting up pool balls is not merely a technical requirement but a foundational element that shapes the entire gameplay experience. By approaching each step with care and attention to detail, players can establish a fair, balanced, and engaging setup that sets the stage for a rewarding and competitive game of pool.