Lifestyle
How To Cut A Mullet
Published: March 2, 2024
Learn the step-by-step process of cutting a mullet and embrace this trendy hairstyle to elevate your lifestyle. Discover the best techniques and tips for achieving the perfect mullet look.
(Many of the links in this article redirect to a specific reviewed product. Your purchase of these products through affiliate links helps to generate commission for Noodls.com, at no extra cost. Learn more)
Table of Contents
Introduction
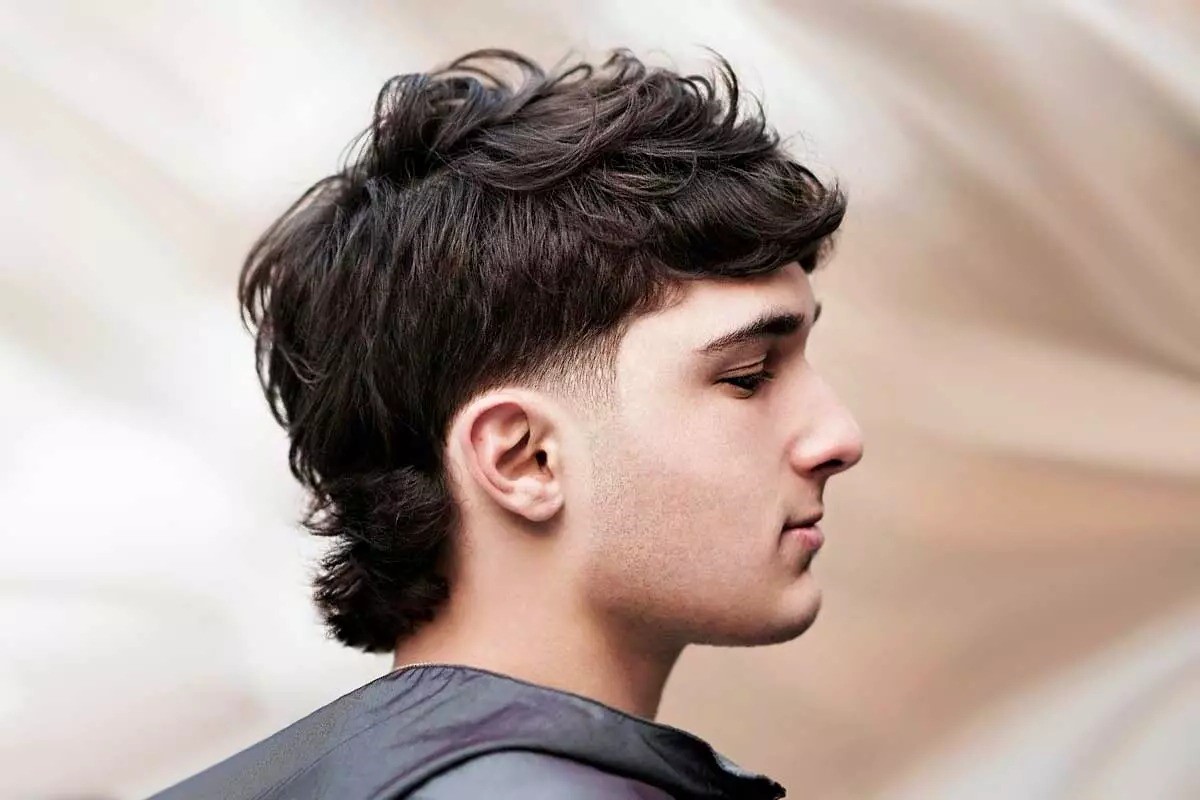
The mullet, a hairstyle that has made a remarkable comeback in recent years, is characterized by its short length at the front and sides, and long length at the back. This iconic hairstyle, popularized in the 1980s, has evolved into a modern, trendy look that exudes confidence and individuality. Whether you're a professional hairstylist or someone looking to experiment with a new style at home, mastering the art of cutting a mullet is a valuable skill.
In this comprehensive guide, we will delve into the step-by-step process of cutting a mullet, providing you with the knowledge and techniques needed to achieve a stylish and well-executed result. From gathering the necessary tools to blending and styling, each stage of the process will be carefully outlined to ensure a thorough understanding of the haircutting procedure.
Embarking on the journey of mastering the mullet haircut opens up a world of creativity and self-expression. By following the techniques and tips presented in this guide, you will gain the confidence to create a mullet that perfectly complements the unique features and personality of the individual. Whether you're aiming for a classic mullet or a contemporary variation, this guide will equip you with the expertise to bring your vision to life.
As we venture into the intricacies of cutting a mullet, it's essential to approach the process with an open mind and a willingness to embrace the artistry of hairstyling. With the right guidance and a touch of creativity, you'll discover the joy of transforming a simple haircut into a statement of personal style. So, let's embark on this exciting journey and unlock the secrets to mastering the art of cutting a mullet.
Read more: How To Cut A Cantaloupe
Step 1: Gather the necessary tools
Before embarking on the journey of cutting a mullet, it's crucial to gather the essential tools that will facilitate a precise and seamless haircutting process. The following tools are indispensable for achieving a professional-looking mullet:
-
Clippers: Invest in a high-quality pair of clippers with adjustable guards to effectively trim the hair to the desired length. Clippers with various guard sizes enable versatility in creating different lengths for the mullet's top, sides, and back sections.
-
Shears: Sharp, professional-grade shears are essential for refining the details of the mullet haircut. They allow for precise trimming and shaping, particularly when working on the top section to achieve the desired length and texture.
-
Fine-tooth Comb: A fine-tooth comb aids in sectioning the hair and ensuring uniformity in the cutting process. It also assists in creating clean partings and guiding the clippers or shears along the hair for accurate cutting.
-
Water Spray Bottle: Keeping a spray bottle filled with water handy is beneficial for dampening the hair, making it more manageable and easier to cut. It also helps in maintaining control over the hair's length and texture during the cutting process.
-
Mirror: A large, well-lit mirror is essential for assessing the haircut from different angles and ensuring precision. It allows for a clear view of the hair's length and shape, enabling adjustments as needed to achieve the desired mullet style.
-
Hairdressing Cape or Towel: To prevent hair clippings from getting on the skin and clothes, a hairdressing cape or a towel can be used to drape around the shoulders of the individual receiving the haircut.
-
Cleaning Brush: A small cleaning brush or a soft cloth is useful for removing hair clippings from the neck, shoulders, and around the ears during and after the haircut.
By ensuring that these tools are readily available before commencing the haircutting process, you set the stage for a smooth and efficient experience. With the right tools at your disposal, you'll be well-prepared to embark on the subsequent steps of cutting a stylish and well-executed mullet.
Step 2: Sectioning the hair
Sectioning the hair is a critical initial step in the process of cutting a mullet. Properly dividing the hair into distinct sections ensures precision and uniformity throughout the haircutting process. This step sets the foundation for achieving a well-balanced and stylish mullet hairstyle. Here's a detailed guide on how to effectively section the hair for a mullet haircut:
-
Preparation: Begin by ensuring that the hair is clean and free of any tangles or knots. If the hair is dry, lightly mist it with water using a spray bottle to make it more manageable. This step facilitates easier sectioning and cutting, allowing for greater control and accuracy.
-
Create a Center Part: Using a fine-tooth comb, create a clean center part that extends from the forehead to the nape of the neck. This parting serves as a guideline for separating the top section of the hair from the sides and back, enabling a clear distinction between the different areas of the mullet hairstyle.
-
Divide the Top Section: Once the center part is established, use the fine-tooth comb to separate the top section of the hair from the sides and back. Part the hair horizontally from ear to ear, ensuring that the division is straight and even. Secure the top section with hair clips or hair ties to keep it separate from the rest of the hair.
-
Section the Sides and Back: With the top section secured, focus on dividing the remaining hair into the sides and back sections. Use the fine-tooth comb to create a clean parting that extends from the top of the head to the base of the skull, separating the sides from the back. Secure each section with clips or ties to maintain clarity and prevent any overlap during the cutting process.
-
Adjust and Refine: Take a moment to review the sectioning and make any necessary adjustments to ensure that the divisions are symmetrical and well-defined. Double-check the partings to confirm that the top, sides, and back sections are clearly separated and ready for the subsequent cutting stages.
By meticulously sectioning the hair according to these guidelines, you establish a structured framework for executing the mullet haircut with precision and accuracy. This methodical approach lays the groundwork for seamless transitions between the different sections of the hairstyle, ultimately contributing to the creation of a well-crafted and stylish mullet.
Step 3: Cutting the top section
Once the hair is properly sectioned, the focus shifts to the top section, where the length and texture of the mullet hairstyle are predominantly defined. Cutting the top section requires precision and attention to detail to achieve the desired length and shape. Here's a comprehensive guide on how to effectively cut the top section of the mullet:
-
Establishing the Desired Length: Begin by assessing the individual's preferred length for the top section of the mullet. Using sharp shears, carefully trim the hair to the desired length, keeping in mind that the front should be shorter than the back to maintain the classic mullet silhouette. It's essential to approach the cutting process gradually, making small adjustments to achieve the perfect length while maintaining symmetry.
-
Creating Texture and Layers: To enhance the overall look of the mullet, consider incorporating texture and layers into the top section. Using point cutting or slide cutting techniques, add subtle layers to the hair, focusing on the crown and top areas. This technique creates movement and dimension, contributing to a modern and dynamic interpretation of the traditional mullet hairstyle.
-
Blending the Front and Back: Pay close attention to blending the front and back sections of the top hair to ensure a seamless transition. Utilize the shears to carefully blend the lengths, creating a harmonious flow from the shorter front to the longer back. This blending process is crucial in achieving a balanced and well-integrated mullet style.
-
Refining the Shape: As the top section nears its final shape, refine the outline and edges to ensure a clean and polished appearance. Use the shears to trim any stray hairs and create a defined outline that complements the individual's facial features. This step adds a professional touch to the haircut, elevating the overall aesthetic of the mullet hairstyle.
-
Assessing Symmetry and Balance: Throughout the cutting process, continuously assess the symmetry and balance of the top section. Regularly step back and evaluate the haircut from different angles, ensuring that the length and shape align with the desired mullet style. Making subtle adjustments as needed contributes to achieving a well-proportioned and visually appealing top section.
By following these detailed steps and techniques, you can effectively cut the top section of the mullet, laying the foundation for a stylish and meticulously crafted hairstyle. The careful attention to length, texture, and blending results in a top section that seamlessly complements the overall mullet look, setting the stage for the subsequent cutting stages.
Step 4: Cutting the sides and back
With the top section expertly trimmed and styled, the focus now shifts to the sides and back of the mullet hairstyle. This stage of the haircutting process plays a pivotal role in defining the distinct contrast between the shorter front and the longer back, a hallmark characteristic of the mullet. Here's a comprehensive guide on how to effectively cut the sides and back of the mullet, ensuring a seamless and well-balanced transition from the top section:
-
Establishing the Length Disparity: Begin by visualizing the desired contrast between the shorter sides and the longer back. Using the clippers with an appropriate guard size, carefully trim the sides to the intended length, ensuring a noticeable disparity in length compared to the top section. This deliberate difference in length contributes to the iconic mullet silhouette, emphasizing the bold and distinctive nature of the hairstyle.
-
Defining the Nape and Sides: Pay close attention to the nape and sides, as they play a crucial role in shaping the overall look of the mullet. With precision, use the clippers and shears to refine the edges and contours, creating a clean and well-defined outline. This step is essential in achieving a polished and professional appearance, elevating the visual impact of the mullet hairstyle.
-
Gradual Blending and Tapering: To ensure a seamless transition from the shorter sides to the longer back, employ gradual blending and tapering techniques. Utilize the clippers and shears to carefully blend the lengths, focusing on creating a gradual transition that maintains the distinct length contrast. This meticulous blending process contributes to a harmonious and well-integrated mullet style, enhancing the overall aesthetic appeal.
-
Emphasizing Texture and Detail: Consider incorporating texture and detail into the sides and back to add depth and dimension to the hairstyle. Utilize the shears to introduce subtle layers and texture, particularly in the back section, creating a dynamic and modern interpretation of the traditional mullet. This attention to detail enhances the visual interest of the hairstyle, infusing it with a contemporary flair.
-
Refining and Perfecting: As the cutting process nears completion, take the time to refine and perfect the sides and back. Assess the symmetry and balance, making any necessary adjustments to ensure uniformity and precision. Regularly step back and evaluate the haircut from various angles, ensuring that the sides and back align with the desired mullet style.
By meticulously following these steps and techniques, you can effectively cut the sides and back of the mullet, achieving a well-defined and stylish contrast that complements the top section. This stage of the haircutting process contributes significantly to the overall visual impact of the mullet, culminating in a meticulously crafted hairstyle that exudes confidence and individuality.
Read more: How To Cut A Watermelon
Step 5: Blending and styling
As the individual sections of the mullet hairstyle have been meticulously trimmed and shaped, the final step involves blending and styling to achieve a cohesive and polished look. This critical stage focuses on seamlessly integrating the different lengths and textures, refining the overall silhouette, and adding personalized touches to enhance the hairstyle's visual impact.
Blending the Transitions
The process of blending the transitions between the top, sides, and back is essential in creating a harmonious and well-integrated mullet hairstyle. Utilizing both shears and clippers, carefully refine the connections between the distinct sections, ensuring a smooth and gradual transition. Pay close attention to the areas where the lengths meet, employing precise cutting techniques to achieve a seamless blend. This meticulous approach results in a balanced and visually appealing flow from the shorter front to the longer back, capturing the essence of the classic mullet while infusing it with modern sophistication.
Adding Personalized Touches
Incorporating personalized touches into the mullet hairstyle allows for creative expression and individuality. Consider tailoring the haircut to suit the individual's unique preferences and facial features. This may involve refining the fringe to frame the face elegantly, incorporating subtle texturizing techniques to enhance the overall look, or customizing the length and layers to reflect the individual's personal style. By infusing the mullet with personalized details, the hairstyle becomes a true reflection of the wearer's personality and aesthetic sensibilities.
Styling and Finishing
Once the blending process is complete, styling the mullet to perfection elevates the overall presentation. Utilize styling products such as texturizing pomades, volumizing mousses, or lightweight hair sprays to enhance the texture and hold of the hairstyle. Emphasize the dynamic contrast between the shorter front and the longer back by creating definition and movement. Experiment with different styling techniques to achieve the desired look, whether it's a sleek and polished finish or a more tousled and textured appearance. By meticulously styling the mullet, the haircut is brought to life, exuding confidence and charisma.
Read more: How To Cut A Kiwi
Final Assessment
After blending and styling the mullet, take a moment to conduct a final assessment of the hairstyle. Step back and evaluate the overall look, ensuring that the transitions are seamless, the personalized touches are integrated harmoniously, and the styling enhances the hairstyle's visual impact. Make any necessary adjustments to refine the mullet to perfection, ensuring that it embodies the desired aesthetic and complements the individual's features.
By meticulously following the blending and styling process, the mullet hairstyle is transformed into a statement of personal style and confidence. The attention to detail, personalized touches, and meticulous styling culminate in a well-crafted and visually striking mullet that captures the essence of individuality and modern flair.
Conclusion
In conclusion, mastering the art of cutting a mullet is a journey that encompasses precision, creativity, and a deep understanding of hairstyling techniques. Throughout this comprehensive guide, we have delved into the step-by-step process of transforming a simple haircut into a stylish and well-executed mullet. From gathering the necessary tools to blending and styling, each stage of the process has been carefully outlined to provide a thorough understanding of the haircutting procedure.
Embarking on the journey of cutting a mullet opens up a world of creativity and self-expression. It is a testament to the evolution of hairstyling, where classic trends are reimagined and revitalized to reflect modern sensibilities. The resurgence of the mullet as a contemporary and trendy hairstyle has sparked a renewed interest in its versatile and dynamic appeal. By following the techniques and tips presented in this guide, individuals, whether professional hairstylists or enthusiasts, gain the confidence to create a mullet that perfectly complements unique features and personalities.
The meticulous approach to sectioning the hair, cutting the top section, refining the sides and back, and blending and styling has equipped individuals with the expertise to bring their vision of the mullet to life. The careful attention to length, texture, and blending results in a hairstyle that seamlessly integrates the distinct lengths and transitions, culminating in a well-crafted and visually striking mullet that captures the essence of individuality and modern flair.
As we conclude this guide, it is essential to emphasize the transformative power of hairstyling. The mullet, once a symbol of a bygone era, has emerged as a symbol of confidence and individuality in the contemporary landscape of fashion and self-expression. By mastering the art of cutting a mullet, individuals not only gain a valuable skill but also unlock the potential to create hairstyles that transcend trends and embody personal style.
In the world of hairstyling, the mullet stands as a testament to the enduring nature of iconic trends, reimagined for a new generation. By embracing the techniques and insights shared in this guide, individuals are empowered to embark on their own creative journey, shaping and refining the mullet hairstyle to reflect their unique vision and personality. With the right guidance and a touch of creativity, the art of cutting a mullet becomes a celebration of individuality and self-expression, where a simple haircut transforms into a statement of style and confidence.