Home>Home and Garden>How To Cut Cement Board
Home and Garden
How To Cut Cement Board
Published: March 5, 2024
Learn the best techniques for cutting cement board in your home and garden projects. Get expert tips and advice for a smooth and precise cut.
(Many of the links in this article redirect to a specific reviewed product. Your purchase of these products through affiliate links helps to generate commission for Noodls.com, at no extra cost. Learn more)
Table of Contents
Introduction
Cutting cement board is an essential skill for anyone undertaking home improvement projects, particularly those involving tiling or bathroom renovations. Cement board, also known as backer board, is a durable and moisture-resistant material commonly used as a base for ceramic tiles. While it offers numerous benefits, such as mold resistance and stability, working with cement board requires precision and the right tools to achieve clean and accurate cuts.
In this guide, we will walk you through the step-by-step process of cutting cement board effectively and safely. By following these instructions, you will be able to tackle your home improvement projects with confidence and precision. Whether you are a seasoned DIY enthusiast or a novice homeowner looking to enhance your living space, mastering the art of cutting cement board will undoubtedly elevate the quality and aesthetics of your home.
Understanding the nuances of cutting cement board is crucial for ensuring the success of your project. From measuring and marking the board to executing clean cuts, each step plays a pivotal role in the overall outcome. By familiarizing yourself with the techniques outlined in this guide, you will be equipped with the knowledge and skills necessary to achieve professional-looking results.
So, let's dive into the world of cement board cutting and equip ourselves with the expertise needed to elevate our home improvement endeavors. With the right approach and attention to detail, you can transform your living spaces and create a lasting impact that reflects your unique style and vision.
Read more: How To Cut Hardie Board
Safety Precautions
When working with cement board, prioritizing safety is paramount to prevent accidents and ensure a smooth, hassle-free cutting process. The nature of cement board, with its composition of cement and reinforcing fibers, necessitates careful handling and adherence to specific safety measures. By following these precautions, you can safeguard yourself and others while achieving precise cuts and successful project outcomes.
-
Protective Gear: Before commencing any cutting activities, it is crucial to don appropriate protective gear. This includes safety goggles to shield your eyes from dust and debris, as well as a dust mask to prevent inhalation of fine particles. Additionally, wearing work gloves will safeguard your hands from potential abrasions and splinters.
-
Ventilation: Cutting cement board generates a significant amount of dust, which can pose respiratory hazards if inhaled. Therefore, it is advisable to work in a well-ventilated area or utilize a dust extraction system to minimize airborne particles. This precaution not only promotes a healthier work environment but also contributes to a more efficient cutting process.
-
Stable Work Surface: Ensure that the cement board is placed on a stable and level work surface before initiating any cutting procedures. This stability is essential for maintaining control and precision during the cutting process, reducing the risk of slips or uneven cuts.
-
Proper Handling of Tools: Familiarize yourself with the correct handling and operation of cutting tools, such as utility knives or power saws, before use. Always follow the manufacturer's guidelines and recommendations for the specific tools being utilized. Additionally, exercise caution when handling sharp blades and power tools to prevent accidental injuries.
-
Mindful Movement: When transporting or maneuvering large sheets of cement board, be mindful of your movements to avoid strain or injury. Enlist the help of a partner if necessary, and use proper lifting techniques to minimize the risk of muscle strain or back injuries.
By adhering to these safety precautions, you can create a secure and controlled environment for cutting cement board, mitigating potential risks and ensuring a smooth and successful project experience. Prioritizing safety not only protects you and those around you but also contributes to the overall quality and efficiency of your home improvement endeavors.
Tools and Materials Needed
To embark on the journey of cutting cement board with precision and efficiency, it is essential to gather the requisite tools and materials. Equipping yourself with the following items will not only streamline the cutting process but also ensure that you have the necessary resources at your disposal to achieve professional-grade results.
Tools:
-
Utility Knife: A high-quality utility knife with a sharp blade is indispensable for scoring and cutting cement board. Opt for a retractable knife that allows for easy blade replacement, ensuring continuous sharpness throughout the cutting process.
-
Tape Measure: Accurate measurements are fundamental to achieving precise cuts. A durable tape measure will enable you to mark the cement board accurately, laying the foundation for clean and symmetrical cuts.
-
Straight Edge: A sturdy straight edge, such as a metal ruler or T-square, is essential for guiding the utility knife during the scoring process. This ensures straight and uniform cuts, contributing to the overall quality of the project.
-
Circular Saw with Carbide-Tipped Blade: When dealing with larger or thicker cement board panels, a circular saw equipped with a carbide-tipped blade offers efficient cutting capabilities. The sharpness and durability of the blade are crucial for achieving smooth and accurate cuts.
-
Safety Gear: As mentioned in the safety precautions section, protective gear, including safety goggles, a dust mask, and work gloves, is vital for safeguarding yourself during the cutting process. Prioritize safety by wearing these items throughout the project.
Materials:
-
Cement Board: The primary material to be cut, cement board serves as the durable substrate for tile installation. Ensure that the cement board is of the appropriate thickness and dimensions for your specific project requirements.
-
Pencil or Marker: A reliable pencil or marker is essential for marking measurements and cut lines on the cement board. Opt for a tool with a fine tip for precision.
-
Supporting Surface: A stable and level work surface, such as sawhorses or a workbench, provides the necessary support for cutting the cement board. This surface should be capable of accommodating the size of the board and facilitating smooth cutting motions.
-
Dust Extraction System (Optional): To minimize airborne dust particles and maintain a cleaner work environment, consider utilizing a dust extraction system or a shop vacuum with a fine dust filter.
By assembling these tools and materials, you will establish a well-equipped workspace and set the stage for a successful cutting process. Each item plays a crucial role in ensuring precision, safety, and efficiency, ultimately contributing to the overall quality of your home improvement project.
Read more: How To Clean Wooden Cutting Board
Step 1: Measure and Mark
Before delving into the physical act of cutting cement board, it is imperative to commence with precision and accuracy by measuring and marking the board. This foundational step lays the groundwork for achieving clean and symmetrical cuts, ensuring that the cement board aligns seamlessly with the project requirements.
To initiate the process, begin by carefully measuring the dimensions required for the specific cuts on the cement board. Utilize a reliable tape measure to ascertain the precise length and width needed, taking into account any allowances for overlaps or fittings. It is essential to double-check the measurements to avoid errors that could compromise the overall fit and finish of the project.
Once the measurements are determined, proceed to mark the cement board accordingly. Using a pencil or marker with a fine tip, transfer the measurements onto the surface of the board, clearly delineating the cut lines. Employing a straight edge, such as a metal ruler or T-square, can aid in ensuring straight and uniform lines, contributing to the accuracy of the markings.
In scenarios where intricate or non-linear cuts are required, such as curves or notches, employ a flexible measuring tape or template to outline the specific contours onto the cement board. Precision and attention to detail during this marking phase are crucial, as they directly influence the quality and functionality of the final cuts.
Furthermore, it is advisable to label the marked sections of the cement board to indicate their intended placement or orientation within the project. This simple yet effective practice can prevent confusion during the cutting process and streamline the subsequent installation or assembly stages.
By meticulously measuring and marking the cement board, you establish a solid foundation for the cutting process, setting the stage for precise and seamless cuts that align with the project's specifications. This methodical approach not only enhances the overall quality of the project but also instills confidence in the subsequent cutting and installation phases.
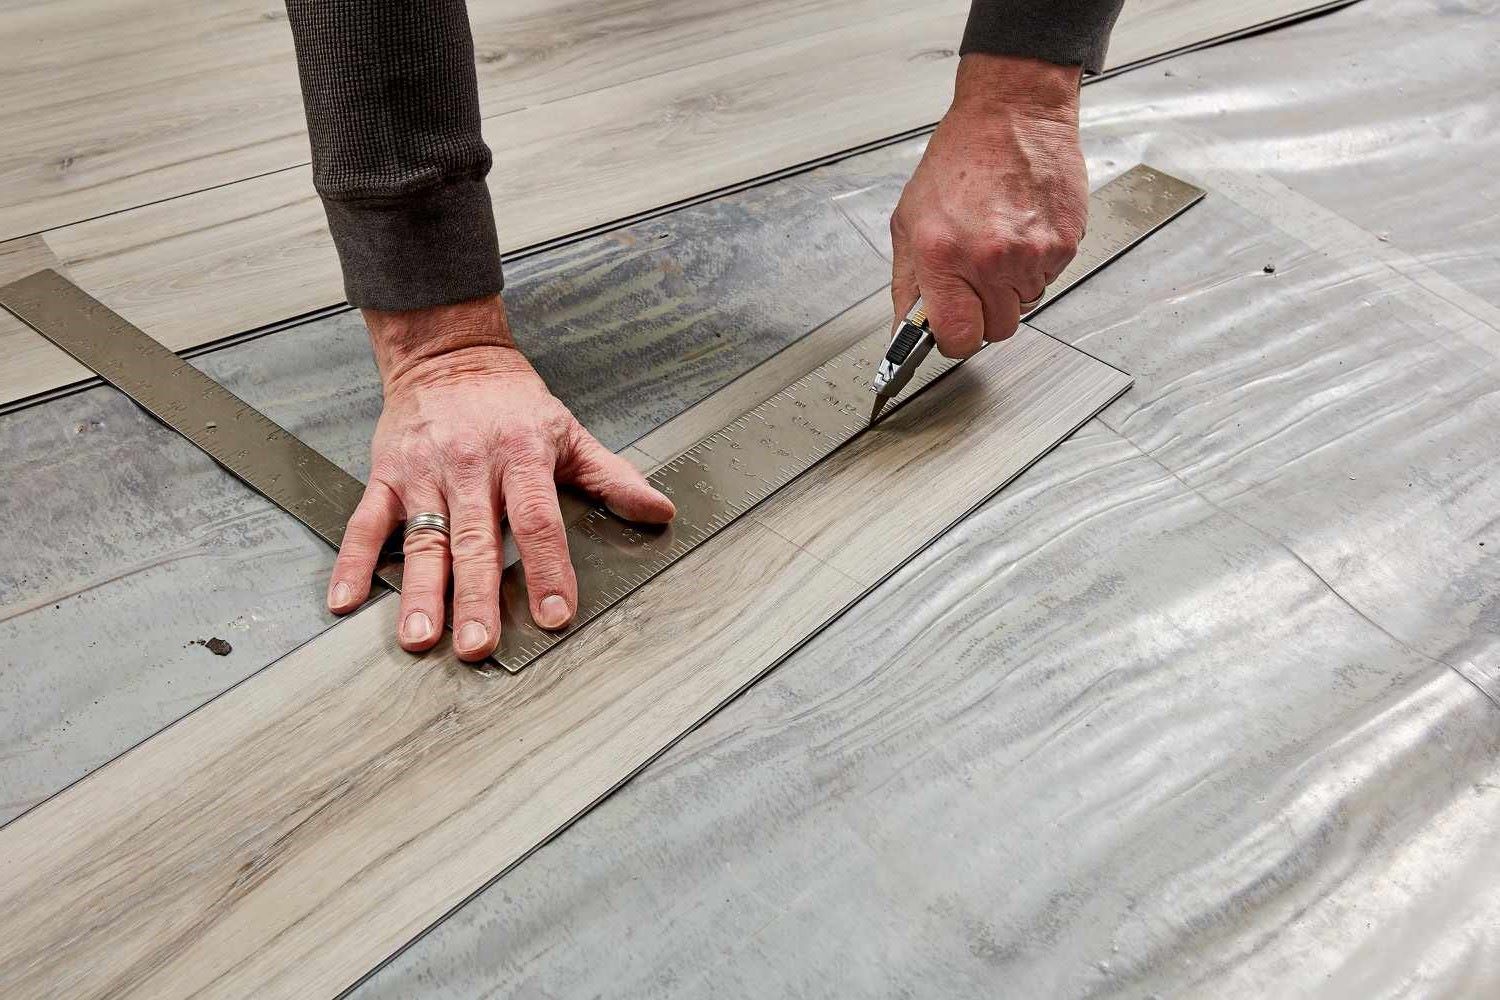
Step 2: Score the Cement Board
Scoring the cement board is a critical step that sets the stage for clean and controlled cuts. This process involves creating a shallow groove along the marked cut lines, effectively weakening the board at the intended cutting points. By scoring the surface, you establish a guide for the subsequent cutting action, ensuring precise and controlled separation of the cement board.
To initiate the scoring process, equip yourself with a high-quality utility knife featuring a sharp and durable blade. Ensure that the blade is sufficiently sharp to facilitate smooth and effortless scoring. Position the straight edge, such as a metal ruler or T-square, firmly along the marked cut line, providing a stable guide for the utility knife.
With the straight edge securely in place, apply firm and consistent pressure to the utility knife as you run it along the marked cut line. The goal is to create a shallow groove in the cement board, penetrating the surface without exerting excessive force. It is essential to maintain a steady hand and a controlled motion throughout the scoring process to achieve uniformity and precision.
When scoring the cement board, prioritize accuracy and attention to detail, ensuring that the groove aligns precisely with the marked cut line. Take your time to execute the scoring process methodically, as this initial step lays the foundation for the subsequent cutting actions. Additionally, be mindful of maintaining a consistent depth across the entire length of the marked line, as this uniformity contributes to the overall quality of the cuts.
As you complete the scoring process, inspect the groove to verify its depth and alignment with the marked cut line. This visual assessment allows you to confirm the accuracy of the scoring and make any necessary adjustments before proceeding to the subsequent cutting phase. By scoring the cement board with precision and care, you establish a clear guide for the subsequent cutting actions, setting the stage for achieving clean, accurate, and professional-grade cuts.
By scoring the cement board with precision and care, you establish a clear guide for the subsequent cutting actions, setting the stage for achieving clean, accurate, and professional-grade cuts.
Step 3: Snap the Board
After scoring the cement board along the marked cut lines, the next crucial step involves snapping the board along the scored groove. This method of controlled separation leverages the weakened groove to facilitate a clean and precise break, resulting in two distinct pieces of cement board with smooth edges.
To initiate the snapping process, position the scored cement board on a stable and level surface, ensuring that the marked cut line aligns with the edge of the surface. This alignment is essential for providing support and stability during the snapping action, minimizing the risk of uneven breaks or jagged edges.
With the scored line positioned at the edge of the surface, apply gentle and even pressure to the waste side of the board, exerting force in a downward motion. The goal is to encourage the cement board to break along the scored groove, utilizing the inherent weakness created by the scoring process.
As you apply pressure, maintain a steady and controlled motion, allowing the board to yield along the scored line. It is essential to exercise caution and avoid excessive force, as this can lead to unpredictable breaks or damage to the board. By applying gradual pressure and monitoring the snapping action, you can ensure a clean and precise separation of the cement board.
Upon successful snapping, inspect the resulting edges to verify the cleanliness and uniformity of the break. Smooth and even edges indicate a successful snap, signifying that the scoring process effectively guided the separation of the board. In cases where minor imperfections or rough edges are present, utilize a utility knife to trim and refine the edges, ensuring a professional and seamless finish.
By mastering the art of snapping the cement board, you harness the controlled separation facilitated by the scoring process, resulting in clean and precise breaks that align with the project's specifications. This methodical approach to snapping ensures that the cement board is transformed into distinct pieces with smooth and uniform edges, laying the groundwork for seamless integration into your home improvement project.
Step 4: Cut the Board
With the cement board scored and snapped along the intended cut lines, the final step involves refining the edges and making any additional cuts as needed to accommodate the project's requirements. This phase of the process focuses on achieving precision and uniformity in the cuts, ensuring that the cement board seamlessly integrates into the designated space.
To commence the cutting process, assess the edges of the snapped board to identify any irregularities or excess material that requires trimming. Utilize a high-quality utility knife with a sharp blade to carefully trim and refine the edges, ensuring that they align with the project's specifications. Employing a controlled and deliberate motion, gradually remove any protrusions or rough areas, resulting in smooth and uniform edges that are ready for installation.
In scenarios where intricate or non-linear cuts are necessary, such as notches or curves, employ the utility knife to carefully carve out the designated shapes from the cement board. Exercise patience and precision during this phase, as meticulous attention to detail is crucial for achieving clean and accurate cuts that seamlessly integrate with the surrounding elements of the project.
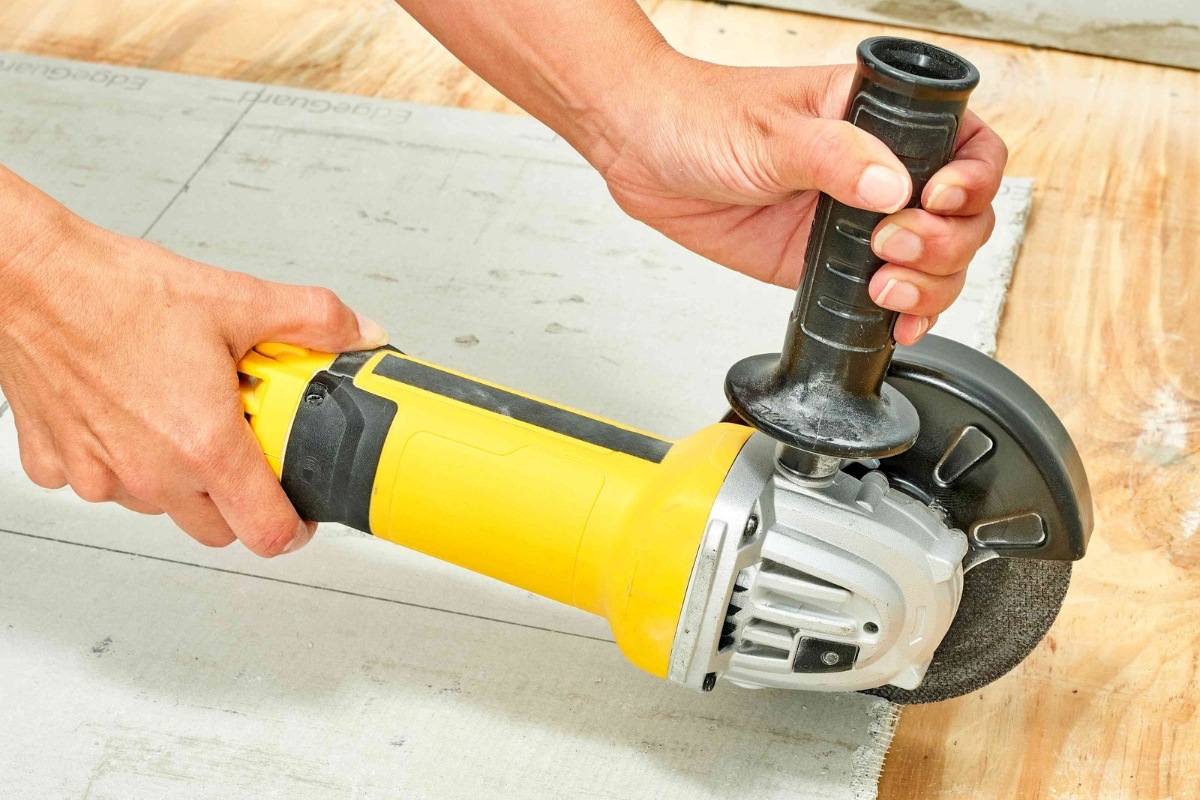
For larger or more complex cutting requirements, such as creating multiple smaller pieces from a larger board, a circular saw equipped with a carbide-tipped blade offers efficient and precise cutting capabilities. When utilizing a circular saw, prioritize safety by following the manufacturer's guidelines and recommendations for the specific tool. Ensure that the saw is equipped with a sharp and durable blade, and maintain a stable grip and controlled motion throughout the cutting process to achieve clean and accurate results.
Throughout the cutting phase, periodically assess the progress and verify the accuracy and quality of the cuts. This proactive approach allows for timely adjustments and refinements, ensuring that the final pieces of cement board align with the project's specifications and seamlessly integrate into the overall design.
By meticulously cutting and refining the cement board, you elevate the quality and precision of the project, setting the stage for successful installation and long-lasting results. This methodical approach to cutting ensures that the cement board is tailored to fit the project's requirements with precision and finesse, ultimately contributing to the overall success and visual appeal of your home improvement endeavor.
Conclusion
Mastering the art of cutting cement board is a valuable skill that empowers homeowners and DIY enthusiasts to elevate their home improvement projects with precision and finesse. By following the step-by-step process outlined in this guide, individuals can confidently tackle tiling and renovation endeavors, knowing that they possess the knowledge and expertise needed to achieve professional-grade results.
Throughout the cutting process, from measuring and marking to scoring, snapping, and refining the board, attention to detail and precision are paramount. Each step contributes to the overall quality and functionality of the cuts, ensuring that the cement board seamlessly integrates into the designated space, whether it's a bathroom, kitchen, or any other area requiring durable and moisture-resistant tiling solutions.
By prioritizing safety precautions and equipping oneself with the necessary tools and materials, individuals can create a secure and well-equipped workspace, setting the stage for a successful cutting process. The utilization of protective gear, stable work surfaces, and high-quality cutting tools not only safeguards individuals from potential hazards but also enhances the efficiency and precision of the cutting actions.
Furthermore, the meticulous approach to measuring, marking, and scoring the cement board establishes a solid foundation for achieving clean and accurate cuts. This methodical preparation ensures that the subsequent cutting and snapping actions unfold smoothly, resulting in distinct pieces of cement board with smooth and uniform edges, ready for installation.
The cutting phase, encompassing refining edges and making additional cuts as needed, demands patience, precision, and a keen eye for detail. Whether utilizing a utility knife for intricate cuts or a circular saw for larger and more complex requirements, individuals must maintain a controlled and deliberate approach to achieve the desired results.
Ultimately, mastering the art of cutting cement board empowers individuals to transform their living spaces with confidence and creativity. By embracing the techniques and principles outlined in this guide, homeowners and DIY enthusiasts can embark on their home improvement journeys, knowing that they possess the expertise needed to achieve professional-grade results and create lasting impacts within their homes.
As individuals apply the knowledge and skills acquired from this guide, they can embark on their home improvement projects with a newfound sense of confidence and capability, knowing that they possess the expertise needed to achieve professional-grade results. Whether it's a bathroom renovation, kitchen upgrade, or any other tiling endeavor, the ability to cut cement board with precision and finesse opens the door to endless possibilities for enhancing and personalizing living spaces.