Home>Home and Garden>How To Cut 45 Degree Angles
Home and Garden
How To Cut 45 Degree Angles
Published: March 1, 2024
Learn how to cut 45-degree angles with our step-by-step guide for your home and garden projects. Master the technique and create professional-looking results.
(Many of the links in this article redirect to a specific reviewed product. Your purchase of these products through affiliate links helps to generate commission for Noodls.com, at no extra cost. Learn more)
Table of Contents
Introduction
Understanding how to cut 45-degree angles is a fundamental skill for anyone involved in home improvement or woodworking projects. Whether you're constructing furniture, installing trim, or building a deck, the ability to create precise 45-degree cuts is essential for achieving professional-looking results. In this comprehensive guide, we will explore the various methods and techniques for cutting 45-degree angles using different tools, providing you with the knowledge and confidence to tackle a wide range of projects with precision and finesse.
Mastering the art of cutting 45-degree angles opens up a world of possibilities in the realm of DIY and construction. From creating seamless joints for picture frames to crafting intricate crown molding, the ability to execute clean and accurate 45-degree cuts is a hallmark of craftsmanship. By understanding the principles behind this essential technique and learning how to apply it effectively, you can elevate the quality and aesthetics of your woodworking and home improvement endeavors.
Throughout this guide, we will delve into the nuances of working with various tools, including miter saws, table saws, and circular saws, to achieve perfect 45-degree angles. We will also provide valuable tips and insights to help you overcome common challenges and ensure that your cuts are precise and seamless. Whether you're a seasoned woodworker looking to refine your skills or a novice DIY enthusiast eager to embark on new projects, this guide will equip you with the knowledge and expertise needed to master the art of cutting 45-degree angles.
With a solid understanding of the principles and techniques involved, you will be well-prepared to tackle a wide array of projects with confidence and precision. So, let's embark on this journey together and unlock the secrets to achieving flawless 45-degree angles in your woodworking and home improvement endeavors.
Read more: How To Cut A Watermelon
Understanding 45 Degree Angles
In the realm of woodworking and construction, the 45-degree angle holds a special significance, serving as a cornerstone for creating strong and visually appealing joints. Understanding the principles behind 45-degree angles is essential for anyone seeking to achieve precision and finesse in their projects.
A 45-degree angle is formed when two lines intersect, creating equal angles on each side. In the context of woodworking, this angle is commonly used to create miter joints, where two pieces of material are joined together at a 90-degree angle, such as in the corners of a picture frame or the edges of a decorative trim. The resulting joint not only offers structural integrity but also presents a seamless and professional appearance.
The concept of a 45-degree angle extends beyond its application in miter joints. It is also integral to the creation of beveled edges, chamfers, and other decorative features that add depth and visual interest to woodworking projects. By mastering the art of cutting and working with 45-degree angles, craftsmen can elevate the quality and aesthetics of their creations, whether it's a custom-built bookshelf, a meticulously crafted cabinet, or an ornate window frame.
Furthermore, understanding the geometric properties of 45-degree angles is crucial for achieving symmetry and balance in design. When used in conjunction with complementary angles and other geometric principles, 45-degree angles enable craftsmen to create harmonious and visually striking compositions, enhancing the overall appeal of their work.
In essence, comprehending the significance of 45-degree angles goes beyond mere technical knowledge; it is about embracing the artistry and precision that underpin the world of woodworking and construction. By delving into the intricacies of this fundamental angle, craftsmen can unlock a world of creative possibilities and elevate their projects to new heights of craftsmanship and sophistication.
Tools and Materials Needed
To embark on the journey of cutting 45-degree angles with precision and finesse, it is essential to have the right tools and materials at your disposal. Whether you're a seasoned woodworker or a DIY enthusiast, equipping yourself with the following items will set the stage for successful and satisfying projects:
Miter Saw:
A miter saw is a versatile and indispensable tool for achieving precise 45-degree cuts. Its ability to pivot and lock at various angles makes it ideal for creating miter joints and beveled edges. Look for a miter saw with a sharp and durable blade, a sturdy base, and a reliable angle adjustment mechanism.
Table Saw:
For larger woodworking projects and tasks that require exceptional accuracy, a table saw equipped with a miter gauge or a precision crosscut sled is invaluable. The table saw's robust cutting power and stable platform enable craftsmen to tackle a wide range of materials with confidence, ensuring clean and consistent 45-degree cuts.
Read more: How To Cut A Cantaloupe
Circular Saw:
When portability and maneuverability are paramount, a circular saw becomes the tool of choice for cutting 45-degree angles on the go. Paired with a quality guide or fence, a circular saw can deliver precise bevel cuts and mitered edges, making it a valuable addition to any woodworking arsenal.
Clamps:
Securing workpieces firmly in place is crucial for achieving accurate 45-degree cuts. A selection of sturdy clamps, including bar clamps, spring clamps, and corner clamps, will provide the stability and support needed to ensure that your cuts are clean and precise.
Measuring and Marking Tools:
Accurate measurements and clear markings are the foundation of successful angle cutting. Equip yourself with a reliable combination square, a precision protractor, and a sharp marking knife or pencil to delineate your 45-degree angles with confidence and accuracy.
Safety Gear:
Prioritizing safety is paramount when working with power tools and sharp implements. Invest in a quality pair of safety goggles, hearing protection, and a dust mask to safeguard yourself against potential hazards and ensure a secure and comfortable working environment.
Read more: How To Cut Cement Board
Quality Materials:
In addition to the right tools, using high-quality materials is essential for achieving flawless 45-degree cuts. Whether you're working with hardwood, softwood, or engineered wood products, selecting premium-grade materials will enhance the precision and longevity of your woodworking projects.
By assembling a comprehensive array of tools and materials, you will be well-equipped to embark on a wide range of woodworking and home improvement projects, confident in your ability to achieve immaculate 45-degree angles with finesse and precision.
Cutting 45 Degree Angles with a Miter Saw
A miter saw is an indispensable tool for achieving precise 45-degree angles with efficiency and accuracy. Its ability to pivot and lock at specific angles, coupled with a sharp and robust blade, makes it the go-to choice for creating clean miter joints, beveled edges, and angled cuts in various woodworking projects.
To cut a 45-degree angle with a miter saw, begin by setting the saw to the desired angle. Most miter saws feature positive stops at common angles, including 45 degrees, allowing for quick and precise adjustments. Ensure that the workpiece is securely clamped to the saw's base or fence, maintaining stability throughout the cutting process.
Once the workpiece is positioned and secured, activate the saw and carefully lower the blade onto the material, making a smooth and steady cut through the designated angle. It is crucial to maintain a firm grip on the workpiece and exercise caution to achieve a clean and accurate 45-degree cut.
When cutting 45-degree angles for miter joints, it is essential to consider the orientation of the material and the direction of the cut to ensure a seamless fit. By aligning the workpiece against the saw's fence and adjusting the miter angle accordingly, craftsmen can create precise cuts that facilitate seamless joints and strong connections.
Furthermore, utilizing a high-quality miter saw equipped with a laser guide or integrated workpiece clamp can enhance the precision and repeatability of 45-degree angle cuts, streamlining the workflow and ensuring consistent results across multiple pieces.
In summary, cutting 45-degree angles with a miter saw is a straightforward yet crucial skill for woodworking and home improvement projects. By leveraging the capabilities of this versatile tool and adhering to best practices for setup and operation, craftsmen can achieve immaculate 45-degree cuts with confidence and precision, laying the foundation for professional-quality results in a wide range of applications.
Cutting 45 Degree Angles with a Table Saw
When it comes to cutting 45-degree angles with precision and control, a table saw emerges as a powerhouse tool in the woodworking arsenal. Its robust cutting capacity and stable platform make it an ideal choice for achieving clean and accurate bevel cuts, miter joints, and angled edges.
To cut a 45-degree angle with a table saw, begin by configuring the saw's blade to the desired angle. Many modern table saws are equipped with a miter gauge that allows for precise angle adjustments, ensuring that craftsmen can achieve the perfect 45-degree cut with ease. It is essential to verify the accuracy of the angle setting before proceeding with the cut to guarantee the desired results.
Once the table saw is set to the appropriate angle, secure the workpiece against the miter gauge or use a precision crosscut sled for enhanced stability and control. Position the material with the designated cut line aligned with the blade, ensuring that it is firmly supported and free from any obstructions that may impede the cutting process.
Activate the table saw and guide the workpiece steadily through the blade, maintaining a firm grip and exercising caution throughout the cutting operation. The smooth and continuous motion, coupled with a steady feed rate, is crucial for achieving a clean and precise 45-degree cut, free from tear-out or irregularities.
When cutting 45-degree angles for miter joints or beveled edges, attention to detail is paramount. Ensuring that the material is oriented correctly and that the angle of the cut aligns perfectly with the intended joint or edge is essential for achieving seamless and structurally sound connections.
Furthermore, incorporating accessories such as a precision miter gauge with adjustable stops or a dedicated crosscut sled equipped with angle indicators can elevate the accuracy and repeatability of 45-degree angle cuts on a table saw, streamlining the workflow and ensuring consistent results across multiple workpieces.
In summary, cutting 45-degree angles with a table saw empowers craftsmen to achieve precise and flawless angled cuts, laying the groundwork for seamless joints, beveled edges, and intricate woodworking details. By leveraging the capabilities of this versatile tool and adhering to best practices for setup and operation, woodworkers can elevate the quality and craftsmanship of their projects, confident in their ability to achieve immaculate 45-degree angles with finesse and precision.
Cutting 45 Degree Angles with a Circular Saw
When it comes to versatility and portability, the circular saw emerges as a valuable tool for cutting 45-degree angles with precision and efficiency. Whether tackling on-site construction tasks or working in a confined workshop space, the circular saw offers woodworkers and DIY enthusiasts the flexibility to achieve clean bevel cuts, miter joints, and angled edges with ease.
To cut a 45-degree angle with a circular saw, begin by preparing the workpiece and ensuring that it is firmly secured in place. Utilizing clamps or a sturdy workbench, stabilize the material to prevent movement during the cutting process, thereby enhancing safety and accuracy.
Next, mark the designated 45-degree angle on the workpiece using a reliable measuring tool and a sharp pencil or marking knife. Clear and precise markings are essential for guiding the saw blade and ensuring that the cut aligns perfectly with the intended angle.
Before initiating the cut, it is crucial to align a straightedge or cutting guide along the marked line, serving as a visual reference and a guide for the circular saw. This step enhances control and accuracy, allowing craftsmen to execute the 45-degree cut with confidence and precision.
Activate the circular saw and guide the blade steadily along the marked line, maintaining a steady and controlled motion throughout the cutting process. It is essential to exercise caution and focus on maintaining a consistent cutting angle to achieve a clean and precise 45-degree cut.
When cutting 45-degree angles with a circular saw, attention to detail and a steady hand are paramount. By following best practices for setup and operation, woodworkers can achieve immaculate bevel cuts and mitered edges, laying the foundation for seamless joints and precise angled connections in their projects.
In summary, cutting 45-degree angles with a circular saw empowers craftsmen to achieve precise and flawless angled cuts, whether working on-site or in a workshop setting. By leveraging the portability and maneuverability of this versatile tool and adhering to best practices for setup and operation, woodworkers and DIY enthusiasts can confidently achieve immaculate 45-degree angles with finesse and precision, enhancing the quality and craftsmanship of their projects.
Read more: How To Cut Hardie Board
Tips for Achieving Accurate 45 Degree Angles
Achieving precise 45-degree angles is a hallmark of craftsmanship in woodworking and home improvement projects. To elevate the quality and finesse of angled cuts, craftsmen can benefit from a range of valuable tips and best practices. By integrating these insights into their workflow, woodworkers and DIY enthusiasts can ensure that their 45-degree angle cuts are immaculate, seamless, and structurally sound.
1. Quality Tools and Materials
Investing in high-quality tools, including sharp blades for miter saws, stable miter gauges for table saws, and reliable cutting guides for circular saws, is essential for achieving accurate 45-degree angles. Additionally, using premium-grade materials, such as hardwood or engineered wood products, enhances the precision and longevity of angled cuts.
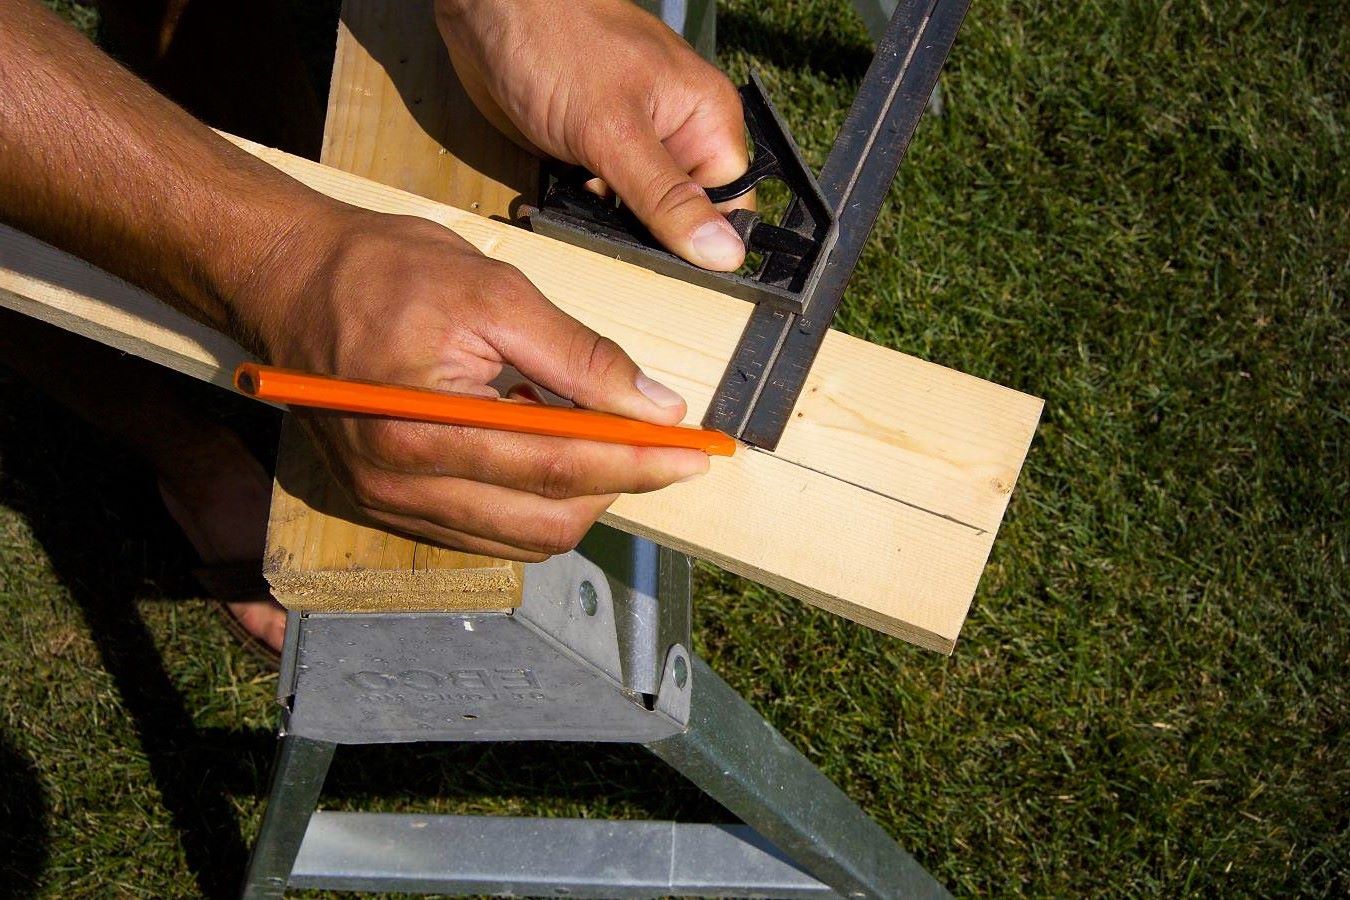
2. Precise Measurements and Markings
Accurate measurements and clear markings are the foundation of achieving flawless 45-degree angles. Leveraging precision measuring tools, such as combination squares and protractors, and using sharp marking knives or pencils to delineate cut lines, ensures that craftsmen can execute angled cuts with confidence and accuracy.
3. Secure Workpiece Positioning
Stability and support are crucial for achieving accurate 45-degree cuts. Whether using clamps, workbench stops, or integrated workpiece clamps on power tools, ensuring that the material is firmly secured and free from movement during the cutting process is essential for precision and safety.
Read more: How To Cut Leeks
4. Test Cuts and Adjustments
Before committing to the final cuts, conducting test cuts on scrap material allows craftsmen to verify the accuracy of their setup and make any necessary adjustments. This practice minimizes the risk of errors and ensures that the actual 45-degree angle cuts yield the desired results.
5. Attention to Blade Alignment
Ensuring that the saw blade is aligned precisely with the designated cut line is crucial for achieving clean and accurate 45-degree angles. Whether using a miter saw, table saw, or circular saw, verifying the blade alignment and making micro-adjustments as needed enhances the precision of angled cuts.
6. Consistent Cutting Techniques
Maintaining a steady feed rate and a controlled cutting motion is essential for achieving clean and precise 45-degree angles. Whether pushing material through a table saw or guiding a circular saw along a cutting guide, consistency in cutting techniques minimizes the risk of tear-out and irregularities.
7. Post-Cut Inspection
After completing the 45-degree angle cuts, conducting a thorough inspection of the results ensures that the cuts are clean, accurate, and free from imperfections. This step allows craftsmen to identify any potential issues and make adjustments as needed to achieve the desired quality of angled cuts.
By integrating these tips and best practices into their woodworking and home improvement endeavors, craftsmen can elevate the quality and precision of their 45-degree angle cuts, ensuring that their projects exhibit a level of craftsmanship and finesse that sets them apart.
Conclusion
Mastering the art of cutting 45-degree angles is a transformative skill that empowers craftsmen to elevate the quality and finesse of their woodworking and home improvement projects. Whether creating seamless miter joints for picture frames, crafting beveled edges for furniture, or installing decorative trim with precision, the ability to execute flawless 45-degree angle cuts is a hallmark of craftsmanship.
Throughout this comprehensive guide, we have delved into the nuances of cutting 45-degree angles using a range of essential tools, including miter saws, table saws, and circular saws. By understanding the principles behind 45-degree angles and learning how to apply them effectively, woodworkers and DIY enthusiasts can unlock a world of creative possibilities and achieve professional-quality results in their projects.
The journey of cutting 45-degree angles has revealed the significance of precision, attention to detail, and the integration of best practices. From the importance of using high-quality tools and materials to the value of precise measurements, secure workpiece positioning, and consistent cutting techniques, every aspect of achieving accurate 45-degree angles contributes to the overall quality and finesse of woodworking projects.
By embracing the tips and insights shared in this guide, craftsmen can approach their projects with confidence, knowing that they have the knowledge and expertise to achieve immaculate 45-degree angle cuts. Whether embarking on new woodworking endeavors or refining existing skills, the ability to create precise and seamless angled connections opens up a world of creative opportunities and sets the stage for projects that exude craftsmanship and sophistication.
In conclusion, the journey of mastering 45-degree angles is not merely a technical pursuit; it is an exploration of artistry, precision, and the pursuit of excellence. By honing this fundamental skill, craftsmen can infuse their projects with a level of quality and finesse that sets them apart, leaving a lasting impression of craftsmanship and attention to detail in every angled cut they create. With the knowledge and insights gained from this guide, woodworkers and DIY enthusiasts are well-equipped to embark on their woodworking journeys, confident in their ability to achieve flawless 45-degree angles with finesse and precision.