Lifestyle
How To Dermaplane At Home
Published: February 26, 2024
Learn how to dermaplane at home and achieve smooth, radiant skin with our easy lifestyle tips and techniques. Discover the benefits of dermaplaning for your skincare routine.
(Many of the links in this article redirect to a specific reviewed product. Your purchase of these products through affiliate links helps to generate commission for Noodls.com, at no extra cost. Learn more)
Table of Contents
Introduction
Dermaplaning has become a popular skincare technique for achieving smooth, radiant skin. This gentle exfoliation method involves using a sharp blade to remove dead skin cells and fine vellus hair, commonly known as peach fuzz, from the face. While traditionally performed in professional spa settings, dermaplaning can also be effectively carried out at home with the right tools and techniques.
Dermaplaning at home offers individuals the opportunity to enhance their skincare routine, improve the absorption of skincare products, and achieve a brighter complexion without the need for expensive salon visits. By understanding the process and benefits of dermaplaning, individuals can confidently incorporate this method into their regular skincare regimen, leading to a more youthful and revitalized appearance.
In the following sections, we will delve into the intricacies of dermaplaning, exploring its benefits, the necessary preparations, a step-by-step guide for at-home dermaplaning, as well as aftercare and maintenance tips. Whether you are new to dermaplaning or seeking to refine your technique, this comprehensive guide will equip you with the knowledge and confidence to embark on your dermaplaning journey from the comfort of your own home.
Read more: How To Unlock A Door With A Hole
What is Dermaplaning?
Dermaplaning is a non-invasive skincare technique that involves the use of a sharp surgical scalpel to gently exfoliate the outer layer of the skin. This process effectively removes dead skin cells, built-up debris, and fine vellus hair, commonly referred to as peach fuzz. The result is a smoother, brighter complexion with a more even skin tone.
This method is renowned for its ability to deliver immediate and noticeable results, making it a popular choice for individuals seeking to rejuvenate their skin. Dermaplaning is often performed on the face, particularly the cheeks, chin, and forehead, but can also be applied to the neck in some cases.
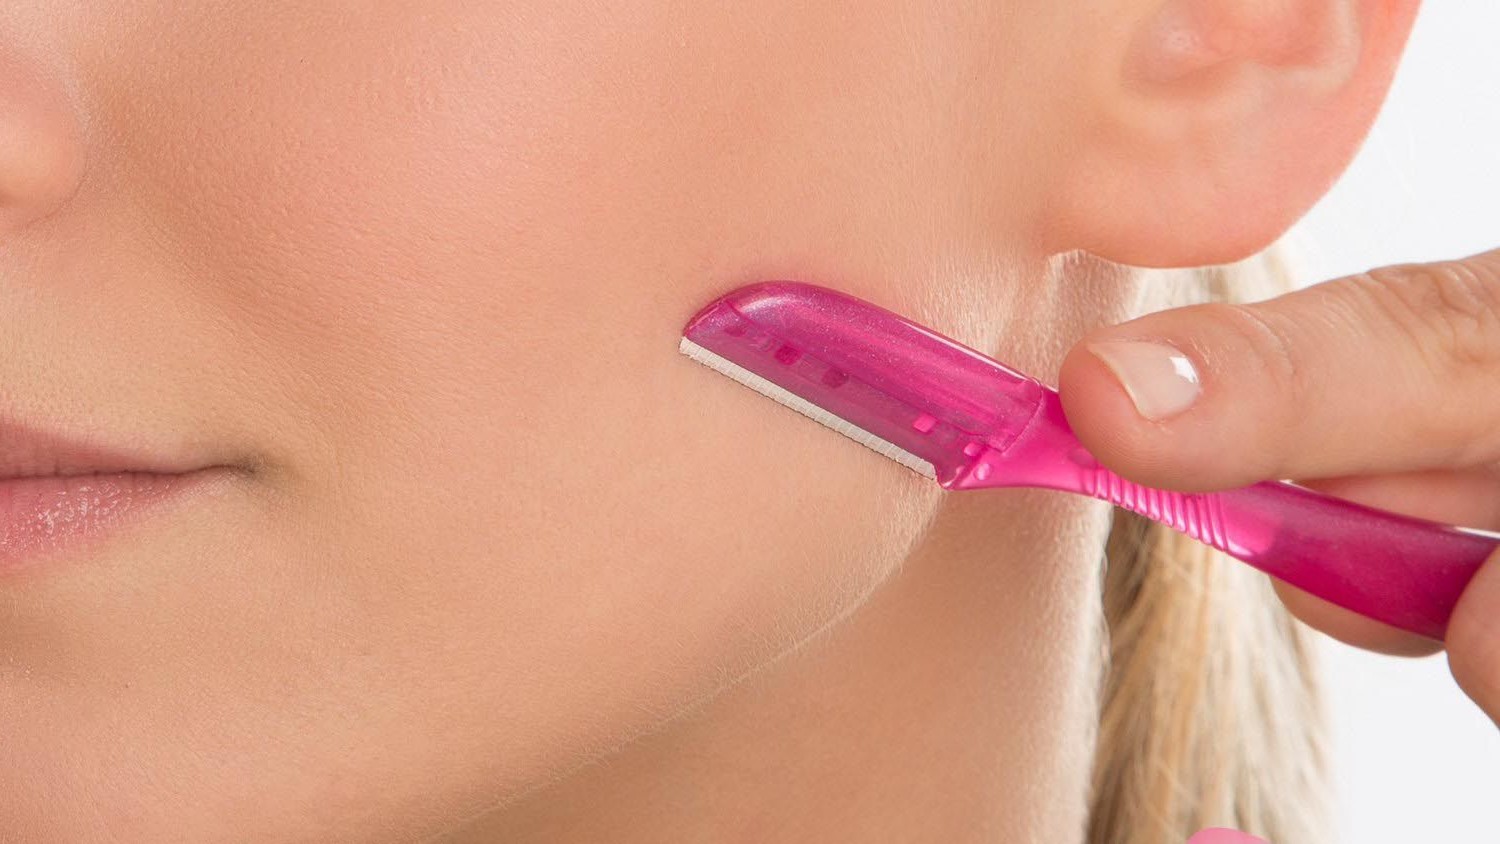
The process of dermaplaning is meticulously executed, requiring precision and a delicate touch. A trained professional or an individual well-versed in the technique carefully glides the surgical blade across the skin at a 45-degree angle. This meticulous approach ensures the removal of the outermost layer of dead skin cells and fine hair, revealing the fresh, radiant skin beneath.
Dermaplaning is distinct from shaving or traditional exfoliation methods. While shaving involves cutting the hair at the surface of the skin, dermaplaning targets the removal of the vellus hair and the superficial layer of dead skin cells. This precise exfoliation process not only enhances the skin's texture but also facilitates better absorption of skincare products, allowing them to penetrate more effectively.
The benefits of dermaplaning extend beyond the immediate improvement in skin texture and appearance. By effectively removing the barrier of dead skin cells and peach fuzz, dermaplaning can also aid in reducing the visibility of acne scars and fine lines, as well as promoting a more youthful and radiant complexion.
In essence, dermaplaning offers a gentle yet effective approach to exfoliation, providing individuals with a non-invasive method to achieve smoother, more radiant skin. Whether performed by a professional or as part of an at-home skincare routine, dermaplaning has garnered widespread acclaim for its ability to unveil a fresh, glowing complexion, making it a sought-after practice in the realm of skincare.
Benefits of Dermaplaning at Home
Dermaplaning at home offers a myriad of benefits that cater to the diverse skincare needs of individuals. By incorporating this gentle exfoliation technique into a regular skincare regimen, individuals can experience a range of advantages, from improved skin texture to enhanced product absorption. Here are the key benefits of dermaplaning at home:
-
Smooth and Radiant Skin: Dermaplaning effectively removes the outer layer of dead skin cells and fine vellus hair, revealing a smoother and more radiant complexion. By eliminating the barrier of accumulated debris, the skin appears revitalized and rejuvenated, imparting a healthy glow.
-
Enhanced Product Absorption: The removal of dead skin cells and peach fuzz through dermaplaning facilitates better absorption of skincare products. With the outer layer of skin effectively exfoliated, serums, moisturizers, and other skincare treatments can penetrate more deeply, maximizing their efficacy.
-
Improved Makeup Application: Dermaplaning creates a smooth canvas for makeup application. With the removal of vellus hair and dead skin cells, makeup glides on more seamlessly, resulting in a flawless finish. Additionally, the absence of peach fuzz minimizes the likelihood of makeup settling into fine facial hair, ensuring a more polished look.
-
Reduced Appearance of Fine Lines and Wrinkles: Regular dermaplaning can contribute to reducing the visibility of fine lines and wrinkles. By exfoliating the skin and stimulating cell turnover, dermaplaning promotes a more youthful complexion, diminishing the appearance of fine lines and wrinkles over time.
-
Diminished Acne Scarring: Dermaplaning can aid in reducing the visibility of acne scars. By effectively exfoliating the skin's surface, dermaplaning helps to minimize the appearance of acne scars, promoting a smoother and more even skin texture.
-
Non-Invasive and Painless: Dermaplaning is a non-invasive and painless method of exfoliation. Unlike certain skincare treatments that may cause discomfort or require downtime, dermaplaning offers a gentle yet effective approach to achieving smoother, more radiant skin.
-
Customizable and Cost-Effective: Dermaplaning at home provides individuals with the flexibility to personalize their skincare routine. By incorporating dermaplaning into their regimen, individuals can tailor the frequency of the treatment to suit their specific needs. Moreover, the cost-effectiveness of at-home dermaplaning eliminates the need for frequent salon visits, making it an accessible option for skincare enthusiasts.
In essence, dermaplaning at home presents a wealth of benefits, ranging from immediate improvements in skin texture and radiance to long-term enhancements in the skin's overall appearance. By harnessing the advantages of dermaplaning, individuals can elevate their skincare routine, achieving a smoother, more youthful complexion from the comfort of their own home.
How to Prepare for Dermaplaning
Before embarking on the dermaplaning process, it is essential to prepare both the skin and the necessary tools to ensure a safe and effective experience. Adequate preparation not only optimizes the results of dermaplaning but also minimizes the risk of potential discomfort or adverse effects. Here's a comprehensive guide on how to prepare for dermaplaning at home:
1. Cleanse the Skin:
Begin by thoroughly cleansing the skin to remove any makeup, dirt, or impurities. Use a gentle cleanser suited to your skin type, and ensure that the skin is completely free of residue. Cleansing the skin sets the stage for an optimal dermaplaning experience, allowing the blade to glide smoothly across the skin's surface.
Read more: How To Change Brita Filter
2. Gather the Necessary Tools:
Ensure that you have the appropriate dermaplaning tools readily available. This typically includes a high-quality dermaplaning blade or tool specifically designed for at-home use. Additionally, have alcohol wipes or a suitable disinfectant to sterilize the dermaplaning tool before and after use, minimizing the risk of infection.
3. Choose a Suitable Environment:
Select a well-lit and clean environment for the dermaplaning procedure. Adequate lighting is crucial for precision, allowing you to clearly observe the skin's surface during the process. Opting for a clean and organized space minimizes the risk of contamination and ensures a hygienic dermaplaning experience.
4. Perform a Patch Test (Optional):
If you are new to dermaplaning or using a new dermaplaning tool, consider performing a patch test on a small, inconspicuous area of the skin. This step allows you to assess how your skin responds to the dermaplaning process and helps identify any potential sensitivity or adverse reactions.
5. Consider Skin Sensitivity:
Take into account any existing skin sensitivities or conditions. If you have particularly sensitive or reactive skin, it is advisable to approach dermaplaning with caution. Consider consulting with a dermatologist or skincare professional to determine whether dermaplaning is suitable for your skin type and condition.
Read more: How To Balance A Ceiling Fan
6. Familiarize Yourself with the Technique:
Prior to commencing the dermaplaning process, familiarize yourself with the proper technique. This may involve watching instructional videos or reading detailed guides to understand the correct angle and pressure for using the dermaplaning tool. A thorough understanding of the technique is essential for a safe and effective dermaplaning experience.
By diligently preparing for the dermaplaning process, individuals can set the stage for a successful and rewarding experience. Taking the time to cleanse the skin, gather the necessary tools, and create a suitable environment lays the foundation for a seamless at-home dermaplaning session, ultimately contributing to the achievement of smoother, more radiant skin.
Step-by-Step Guide to Dermaplaning at Home
Dermaplaning at home requires a methodical approach to ensure a safe and effective experience. By following a step-by-step guide, individuals can confidently navigate the dermaplaning process, achieving smoother, more radiant skin from the comfort of their own home. Here's a comprehensive breakdown of the essential steps for at-home dermaplaning:
1. Prepare the Skin:
Begin by thoroughly cleansing the skin with a gentle cleanser, ensuring that it is free of makeup, dirt, and impurities. Pat the skin dry with a clean towel, and avoid applying any skincare products before dermaplaning.
2. Sterilize the Dermaplaning Tool:
If using a reusable dermaplaning tool, sterilize the blade with alcohol wipes or a suitable disinfectant. This crucial step minimizes the risk of infection and ensures the hygienic use of the dermaplaning tool.
Read more: How To Replace A Bathroom Faucet
3. Hold the Skin Taut:
Using one hand, gently stretch the skin to create a taut surface for dermaplaning. This helps to facilitate a smooth and controlled gliding motion of the dermaplaning tool across the skin.
4. Angle the Blade:
Hold the dermaplaning tool at a 45-degree angle to the skin. With light, feathering strokes, carefully glide the blade across the skin, moving in the direction of hair growth. Exercise caution and maintain a gentle touch throughout the process.
5. Focus on Each Facial Area:
Work methodically across the face, focusing on one area at a time. Avoid dermaplaning over active acne, raised moles, or any areas of skin irritation. Pay particular attention to the cheeks, chin, and forehead, where vellus hair and dead skin cells are commonly present.
6. Avoid Sensitive Areas:
Exercise caution around sensitive areas such as the delicate skin around the eyes and the lips. Refrain from dermaplaning these areas to prevent potential discomfort or irritation.
Read more: How To Unlock A Bedroom Door
7. Complete the Process:
Once the dermaplaning process is complete, gently cleanse the skin to remove any residual debris. Follow up with a soothing, hydrating serum or moisturizer to nourish the freshly exfoliated skin.
8. Clean and Store the Tool:
Thoroughly clean the dermaplaning tool after use, ensuring that it is free of any residual skin cells or debris. Store the tool in a clean, dry environment, ready for future use.
By meticulously following these step-by-step instructions, individuals can navigate the dermaplaning process with confidence and precision. This methodical approach ensures a safe and effective at-home dermaplaning experience, ultimately leading to the attainment of smoother, more radiant skin.
Aftercare and Maintenance
After completing the dermaplaning process, proper aftercare and maintenance are essential to optimize the results and promote the long-term health and radiance of the skin. The following guidelines outline the crucial steps for aftercare and maintenance following at-home dermaplaning:
1. Hydration and Protection:
After dermaplaning, it is imperative to prioritize hydration and sun protection. Apply a gentle, hydrating serum or moisturizer to replenish the skin's moisture barrier. Opt for products containing nourishing ingredients such as hyaluronic acid or ceramides to support the skin's recovery process. Additionally, apply a broad-spectrum sunscreen with an SPF of 30 or higher to shield the skin from harmful UV rays, safeguarding the freshly exfoliated skin from potential sun damage.
Read more: How To Remove Vinyl Flooring
2. Avoid Harsh Exfoliation:
In the days following dermaplaning, refrain from using harsh exfoliants or abrasive skincare products. The skin is in a delicate state post-dermaplaning, and aggressive exfoliation can lead to irritation or sensitivity. Opt for gentle, non-abrasive skincare formulations to support the skin's healing process and maintain its newfound smoothness.
3. Maintain Cleanliness:
Maintain a clean and hygienic skincare routine to prevent potential complications post-dermaplaning. Regularly cleanse the skin with a mild, non-irritating cleanser to remove impurities and maintain a healthy skin environment. Additionally, ensure that any skincare tools or devices used post-dermaplaning are thoroughly cleaned and sanitized to minimize the risk of infection.
4. Monitor Skin Sensitivity:
Be mindful of any changes in skin sensitivity or reactivity following dermaplaning. While the skin typically recovers swiftly from at-home dermaplaning, it is essential to monitor for any signs of irritation or discomfort. If unusual sensitivity or adverse reactions occur, consult a dermatologist or skincare professional for guidance.
5. Schedule Maintenance Sessions:
To sustain the benefits of dermaplaning, consider incorporating regular maintenance sessions into your skincare routine. The frequency of at-home dermaplaning sessions may vary depending on individual skin needs and sensitivity. By establishing a consistent maintenance schedule, individuals can continually enjoy the rejuvenating effects of dermaplaning, promoting a smoother, more radiant complexion over time.
Read more: How To Hang A Tapestry
6. Professional Consultation:
For individuals new to dermaplaning or those with specific skin concerns, seeking a professional consultation is advisable. A skincare professional can provide personalized guidance on at-home dermaplaning, recommend suitable products for post-treatment care, and address any questions or concerns related to the process.
By adhering to these aftercare and maintenance practices, individuals can prolong the benefits of at-home dermaplaning, ensuring the sustained health, smoothness, and radiance of their skin. With a diligent approach to aftercare and maintenance, the results of dermaplaning can be maximized, contributing to a consistently revitalized and luminous complexion.
Conclusion
In conclusion, the practice of dermaplaning at home presents a transformative opportunity for individuals to elevate their skincare routine and achieve a smoother, more radiant complexion. By embracing this gentle yet effective exfoliation method, individuals can unlock a myriad of benefits, ranging from immediate improvements in skin texture to long-term enhancements in the skin's overall appearance.
Dermaplaning at home empowers individuals to take control of their skincare journey, offering a customizable and cost-effective approach to achieving revitalized skin. The process of dermaplaning, characterized by the meticulous removal of dead skin cells and fine vellus hair, not only imparts a healthy glow but also enhances the skin's receptiveness to skincare products, allowing for deeper penetration and heightened efficacy.
The step-by-step guide to at-home dermaplaning equips individuals with the knowledge and confidence to navigate the process with precision and care. From preparing the skin to executing the dermaplaning technique, each stage is designed to ensure a safe and effective experience, ultimately leading to the attainment of smoother, more radiant skin.
Furthermore, the significance of aftercare and maintenance following dermaplaning cannot be overstated. Prioritizing hydration, sun protection, and gentle skincare formulations post-dermaplaning is essential to support the skin's recovery and maintain its newfound smoothness and radiance. By adhering to these practices, individuals can prolong the benefits of dermaplaning, fostering a consistently revitalized and luminous complexion.
Ultimately, dermaplaning at home transcends the traditional boundaries of skincare, offering individuals the opportunity to unveil their best skin from the comfort of their own home. With a commitment to proper preparation, meticulous execution, and diligent aftercare, individuals can harness the transformative potential of dermaplaning, embracing a skincare journey characterized by smooth, radiant, and revitalized skin.
In essence, the journey of at-home dermaplaning is a testament to the power of self-care and the remarkable impact of a well-crafted skincare routine. By integrating dermaplaning into their regimen, individuals can embark on a path towards sustained skin health and radiance, reaping the rewards of a revitalized complexion and newfound confidence in their skin's natural beauty.