Home>Automotive>How To Remove Stripped Lug Nut
Automotive
How To Remove Stripped Lug Nut
Published: February 27, 2024
Learn how to remove a stripped lug nut with our step-by-step guide. Get expert tips and tricks for automotive maintenance. Keep your vehicle running smoothly!
(Many of the links in this article redirect to a specific reviewed product. Your purchase of these products through affiliate links helps to generate commission for Noodls.com, at no extra cost. Learn more)
Table of Contents
Introduction
Dealing with a stripped lug nut can be a frustrating and challenging task for any vehicle owner or mechanic. A stripped lug nut occurs when the nut's threads become damaged or worn, making it difficult to remove using conventional methods. This issue can arise due to over-tightening, corrosion, or using the wrong tools during previous tire changes. However, with the right approach and tools, it is possible to successfully remove a stripped lug nut without causing further damage to the wheel or the surrounding components.
In this comprehensive guide, we will explore the step-by-step process of removing a stripped lug nut, providing valuable insights and practical tips to address this common automotive challenge. By following these instructions, you can effectively tackle this issue and restore the functionality of your vehicle's wheel assembly. Whether you are a seasoned mechanic or a DIY enthusiast, mastering the art of removing stripped lug nuts is a valuable skill that can save time, money, and frustration in the long run.
Throughout this guide, we will cover essential techniques such as applying lubricant, utilizing specialized lug nut remover tools, applying heat to loosen the nut, and using a chisel and hammer to carefully free the stripped lug nut. Additionally, we will emphasize the importance of knowing when to seek professional assistance, especially if the lug nut proves exceptionally stubborn or if there is a risk of causing damage to the wheel or surrounding components.
By the end of this guide, you will have a clear understanding of the necessary steps and precautions to take when faced with a stripped lug nut, empowering you to confidently address this issue and maintain the optimal condition of your vehicle's wheel assembly. Let's dive into the process of removing a stripped lug nut and equip ourselves with the knowledge and skills needed to overcome this common automotive challenge.
Read more: How To Remove A Stripped Allen Screw
Step 1: Gather Necessary Tools
Before embarking on the task of removing a stripped lug nut, it is essential to gather the necessary tools to ensure a smooth and efficient process. Having the right tools at your disposal can significantly impact the success of this endeavor. Here are the essential tools required for this task:
-
Lug Nut Remover Set: Invest in a high-quality lug nut remover set that includes various socket sizes and types designed specifically for removing stripped or damaged lug nuts. These specialized tools are engineered to grip onto the damaged nut securely, providing the necessary leverage to loosen and extract it without causing further damage to the wheel or surrounding components.
-
Lubricant: A reliable penetrating lubricant, such as WD-40 or PB Blaster, is crucial for loosening the grip of the stripped lug nut. Apply the lubricant generously to the affected area and allow it to penetrate the threads, making the removal process more manageable.
-
Heat Source: A heat source, such as a propane torch or heat gun, can be instrumental in expanding the metal around the lug nut, aiding in its removal. Heat helps to break the bond between the nut and the wheel stud, facilitating easier extraction.
-
Protective Gear: Prioritize safety by wearing protective gear, including gloves and safety goggles, to shield yourself from any potential debris or hazards during the lug nut removal process.
-
Chisel and Hammer: In some cases, a chisel and hammer may be necessary to carefully chisel away at the damaged lug nut, creating small fractures that can help release its grip on the wheel stud.
-
Impact Wrench: An impact wrench can be a valuable asset for applying controlled bursts of torque to the lug nut, potentially aiding in its removal. However, it is essential to exercise caution and use the impact wrench judiciously to avoid causing further damage.
By ensuring that these essential tools are readily available, you can approach the task of removing a stripped lug nut with confidence and preparedness. Each tool plays a crucial role in the removal process, and having them at your disposal can streamline the task and contribute to a successful outcome. With the necessary tools in hand, you are ready to proceed to the next steps of addressing the stripped lug nut effectively.
Step 2: Apply Lubricant
When faced with a stripped lug nut, the application of a high-quality lubricant is a crucial step in the removal process. Lubricants such as WD-40, PB Blaster, or Liquid Wrench are designed to penetrate and loosen the corroded or seized threads of the lug nut, significantly easing its extraction. The lubricant works by seeping into the microscopic gaps between the nut and the wheel stud, effectively breaking down rust and corrosion that may be impeding the nut's removal.
To apply the lubricant effectively, start by generously spraying or applying it directly onto the stripped lug nut and the surrounding area. It is advisable to allow the lubricant to sit for a significant period, ideally several hours or overnight, to maximize its penetrating effect. During this time, the lubricant works its way into the threads, gradually loosening the bond between the nut and the wheel stud.
In some instances, it may be beneficial to reapply the lubricant multiple times, especially if the lug nut shows signs of gradual loosening. Patience is key during this process, as the lubricant requires time to effectively break down the rust and corrosion, ultimately facilitating the removal of the stripped lug nut.
It is important to exercise caution when applying the lubricant, ensuring that it does not come into contact with brake components or other sensitive parts of the wheel assembly. Additionally, wearing protective gloves is advisable to prevent direct skin contact with the lubricant and any potential debris that may be dislodged during the removal process.
By diligently applying a high-quality lubricant and allowing it sufficient time to penetrate and loosen the stripped lug nut, you set the stage for a smoother and more manageable removal process. This crucial step prepares the nut for subsequent extraction methods, increasing the likelihood of a successful outcome while minimizing the risk of causing damage to the wheel or surrounding components.
With the application of the lubricant complete, you are now ready to proceed to the next steps in the process of removing the stripped lug nut, equipped with the advantage of a well-lubricated and more cooperative nut.
Step 3: Use a Lug Nut Remover Tool
Utilizing a lug nut remover tool is a pivotal step in the process of removing a stripped lug nut. These specialized tools are specifically designed to grip onto damaged or rounded lug nuts, providing the necessary leverage and torque to facilitate their extraction without causing further harm to the wheel or surrounding components.
When selecting a lug nut remover tool, it is essential to choose a set that offers a variety of socket sizes and types to accommodate different lug nut dimensions and conditions. These sets often include twist sockets, spline sockets, and other innovative designs engineered to effectively grip onto damaged nuts, ensuring a secure and reliable connection for the removal process.
To use a lug nut remover tool effectively, follow these steps:
-
Select the Appropriate Socket: Choose a socket from the lug nut remover set that best matches the size and type of the stripped lug nut. Ensure a snug fit to maximize the gripping capability of the tool.
-
Secure the Socket: Attach the selected socket to a ratchet or breaker bar, ensuring a secure and stable connection. The tool should be firmly in place to exert controlled force during the removal process.
-
Apply Torque: With the lug nut remover tool in position, apply gradual and steady torque in the counterclockwise direction to loosen the stripped lug nut. Exercise patience and avoid excessive force, as this can lead to further damage or distortion of the nut.
-
Monitor Progress: As torque is applied, monitor the progress of the nut's movement. If the nut begins to loosen, continue the extraction process with deliberate and controlled movements. If the nut remains stubborn, consider repositioning the tool or exploring alternative removal methods.
-
Inspect the Wheel Stud: Once the stripped lug nut is successfully removed, inspect the wheel stud for any signs of damage or wear. Address any issues promptly to ensure the integrity of the wheel assembly.
By employing a lug nut remover tool with precision and care, you can effectively tackle the challenge of a stripped lug nut, leveraging the tool's gripping capabilities to facilitate the nut's extraction. This methodical approach minimizes the risk of causing further damage while maximizing the likelihood of a successful outcome.
With the stripped lug nut successfully removed using the lug nut remover tool, you are now prepared to proceed to the subsequent steps in the process, equipped with the confidence and expertise needed to address this common automotive issue effectively.
Step 4: Apply Heat
Applying heat to a stripped lug nut is a highly effective method for loosening its grip on the wheel stud, especially when dealing with stubborn or corroded nuts. Heat serves as a powerful catalyst in expanding the metal surrounding the nut, breaking the bond formed by rust and corrosion and making the removal process more manageable.
To apply heat to the stripped lug nut, follow these steps:
-
Prepare the Heat Source: Utilize a propane torch or heat gun as the heat source for this method. Ensure that the selected heat source is in good working condition and positioned safely to avoid any unintended damage to surrounding components.
-
Direct the Heat: Direct the heat source towards the stripped lug nut, focusing on evenly heating the area around the nut. It is essential to apply the heat consistently for a sufficient duration to allow the metal to expand and the bond between the nut and the wheel stud to weaken.
-
Exercise Caution: Exercise caution when applying heat, especially in close proximity to other components such as brake parts or wheel bearings. It is crucial to avoid overheating or causing damage to these sensitive elements during the process.
-
Monitor the Nut: As heat is applied, monitor the stripped lug nut for any signs of movement or loosening. The expansion of the metal due to the heat should gradually weaken the nut's grip, potentially facilitating its extraction.
-
Use Protective Gear: Wear protective gloves and safety goggles to shield yourself from any potential debris or heat-related hazards during the application of heat.
By applying heat strategically and with precision, you can effectively harness its transformative properties to aid in the removal of a stripped lug nut. This method, when combined with other removal techniques, can significantly increase the likelihood of a successful outcome while minimizing the risk of causing damage to the wheel or surrounding components.
With the application of heat complete, you are now prepared to proceed to the subsequent steps in the process, equipped with the advantage of a thermally assisted approach to addressing the challenge of a stripped lug nut.
Read more: How To Fix Stripped Screw Hole
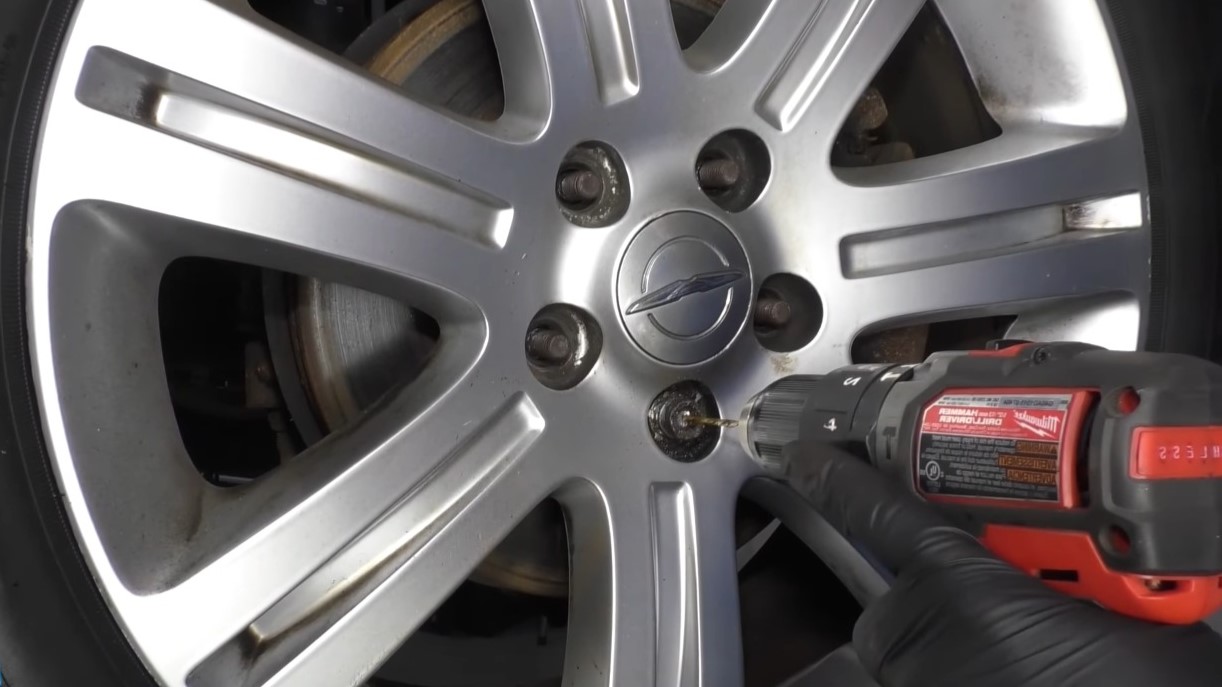
Step 5: Use a Chisel and Hammer
When confronted with a particularly stubborn stripped lug nut, employing a chisel and hammer can serve as a valuable technique to aid in its removal. This method involves carefully chiseling away at the damaged nut, creating small fractures that can help release its grip on the wheel stud. It is important to approach this method with precision and caution to avoid causing damage to the wheel or surrounding components.
To use a chisel and hammer effectively in the removal process, follow these steps:
-
Assess the Nut: Begin by assessing the condition of the stripped lug nut. Identify areas of vulnerability or existing fractures that may indicate potential weak points for chiseling.
-
Positioning: Position the chisel at a strategic angle against the damaged nut, ensuring that it is aligned to target specific areas for chiseling. The goal is to create controlled fractures that can aid in loosening the nut's grip.
-
Apply Controlled Force: With the chisel in place, carefully strike it with a hammer to create small, deliberate fractures in the nut. Exercise patience and precision, as excessive force can lead to unintended damage to the wheel or surrounding components.
-
Monitor Progress: As the chiseling process unfolds, monitor the nut for any signs of movement or loosening. The controlled fractures created by the chisel can gradually weaken the nut's grip, potentially facilitating its extraction.
-
Inspect the Wheel Stud: Once the stripped lug nut is successfully removed, inspect the wheel stud for any signs of damage or wear. Address any issues promptly to ensure the integrity of the wheel assembly.
Employing a chisel and hammer in the removal process requires a meticulous and deliberate approach. By leveraging this method with care and precision, you can effectively target the damaged nut's weak points, potentially loosening its grip and enhancing the overall removal process.
With the careful application of the chisel and hammer complete, you are now prepared to proceed to the subsequent steps in the process, equipped with the advantage of a methodical and multifaceted approach to addressing the challenge of a stripped lug nut.
Step 6: Seek Professional Help if Necessary
In some instances, despite employing various removal techniques and utilizing specialized tools, a stripped lug nut may prove exceptionally challenging to remove. When faced with a stubborn or unyielding lug nut, it is crucial to recognize the limitations of DIY methods and consider seeking professional assistance to address the issue effectively.
Professional automotive technicians possess the expertise, experience, and specialized equipment necessary to tackle complex lug nut removal scenarios. Their in-depth knowledge of automotive systems and components enables them to assess the situation comprehensively, identifying the most suitable approach for removing the stripped lug nut without causing damage to the wheel or surrounding elements.
When considering professional assistance for lug nut removal, it is essential to seek reputable automotive service providers or certified mechanics with a proven track record of handling similar challenges. By entrusting the task to skilled professionals, vehicle owners can benefit from the following advantages:
-
Specialized Expertise: Automotive technicians are well-versed in the intricacies of lug nut removal and possess the technical know-how to navigate challenging scenarios effectively.
-
Advanced Tools and Equipment: Professional automotive facilities are equipped with advanced tools and specialized equipment designed specifically for lug nut extraction, ensuring a precise and efficient removal process.
-
Preventative Measures: Skilled technicians can assess the condition of the wheel assembly and implement preventative measures to safeguard against potential damage during the lug nut removal process.
-
Comprehensive Evaluation: Professional assistance includes a comprehensive evaluation of the wheel stud, surrounding components, and potential underlying issues that may have contributed to the stripped lug nut, allowing for thorough remediation.
-
Peace of Mind: By seeking professional help, vehicle owners can have peace of mind knowing that the issue is being addressed by qualified professionals, minimizing the risk of further complications.
It is important to communicate any prior attempts or methods used in the lug nut removal process to the automotive technician, providing valuable context that can inform their approach. Additionally, vehicle owners should inquire about the potential impact of the removal process on the wheel assembly and any associated costs or considerations.
By recognizing the value of professional expertise and intervention when necessary, vehicle owners can ensure the safe and effective resolution of stripped lug nut challenges, ultimately preserving the integrity of their vehicle's wheel assembly and promoting long-term reliability.
With the option of seeking professional help if necessary, vehicle owners can approach the task of addressing a stripped lug nut with a comprehensive and informed perspective, prioritizing the optimal condition and functionality of their vehicle's wheel assembly.
Conclusion
In conclusion, the process of removing a stripped lug nut demands a combination of patience, precision, and the right tools and techniques. By following the step-by-step approach outlined in this guide, vehicle owners and mechanics can effectively address this common automotive challenge while minimizing the risk of causing damage to the wheel assembly or surrounding components.
The initial step of gathering the necessary tools sets the stage for a well-prepared and organized approach to lug nut removal. Investing in a high-quality lug nut remover set, lubricant, heat source, protective gear, and impact wrench equips individuals with the essential resources to tackle the task effectively.
Applying lubricant serves as a crucial preparatory step, allowing the penetrating properties of the lubricant to gradually loosen the grip of the stripped lug nut. This method, when executed with patience and diligence, can significantly ease the subsequent removal process.
Utilizing a lug nut remover tool provides a targeted and controlled approach to extracting the stripped nut, leveraging the tool's specialized design to grip onto damaged nuts securely. This method minimizes the risk of further damage to the wheel or surrounding components while facilitating the nut's extraction.
The application of heat and the strategic use of a chisel and hammer represent additional techniques that can be employed to address particularly stubborn or corroded lug nuts. These methods harness the transformative properties of heat and the precision of chiseling to weaken the nut's grip, ultimately enhancing the overall removal process.
Furthermore, recognizing the limitations of DIY methods and considering professional assistance when necessary is essential. Skilled automotive technicians possess the expertise, specialized equipment, and preventative measures necessary to address complex lug nut removal scenarios effectively, providing vehicle owners with peace of mind and long-term reliability.
By embracing a comprehensive and informed approach to removing stripped lug nuts, individuals can navigate this challenge with confidence and expertise, ultimately preserving the integrity and functionality of their vehicle's wheel assembly.
In essence, mastering the art of removing stripped lug nuts is a valuable skill that empowers vehicle owners and mechanics to overcome this common automotive obstacle, ensuring the continued safety and performance of their vehicles. With the insights and techniques presented in this guide, individuals are well-equipped to address stripped lug nuts effectively, fostering a proactive approach to vehicle maintenance and care.