Home>Home and Garden>How To Clean Flashlight
Home and Garden
How To Clean Flashlight
Published: March 1, 2024
Learn the best methods for cleaning your flashlight to keep it shining bright. Discover simple home and garden tips for maintaining your flashlight.
(Many of the links in this article redirect to a specific reviewed product. Your purchase of these products through affiliate links helps to generate commission for Noodls.com, at no extra cost. Learn more)
Table of Contents
Introduction
Cleaning a flashlight may not be the first thing that comes to mind when considering household chores, but it is an essential task to ensure the optimal performance and longevity of this indispensable tool. Whether you use a flashlight for outdoor adventures, home repairs, or emergency situations, keeping it clean is crucial for maintaining its functionality.
Over time, flashlights can accumulate dirt, dust, and grime, which can hinder the brightness of the beam and impede the overall performance. Additionally, neglecting to clean a flashlight can lead to corrosion and damage, ultimately shortening its lifespan.
In this comprehensive guide, we will walk you through the step-by-step process of cleaning a flashlight, from gathering the necessary supplies to reassembling the components. By following these simple yet effective techniques, you can ensure that your flashlight remains in top condition, ready to illuminate your way whenever you need it.
So, let's roll up our sleeves and delve into the process of revitalizing your flashlight through a thorough cleaning regimen. Whether you have a traditional handheld flashlight, a tactical model, or a compact keychain light, the principles outlined in this guide can be applied to various types of flashlights, ensuring that they continue to shine brightly when darkness falls.
Step 1: Gather necessary supplies
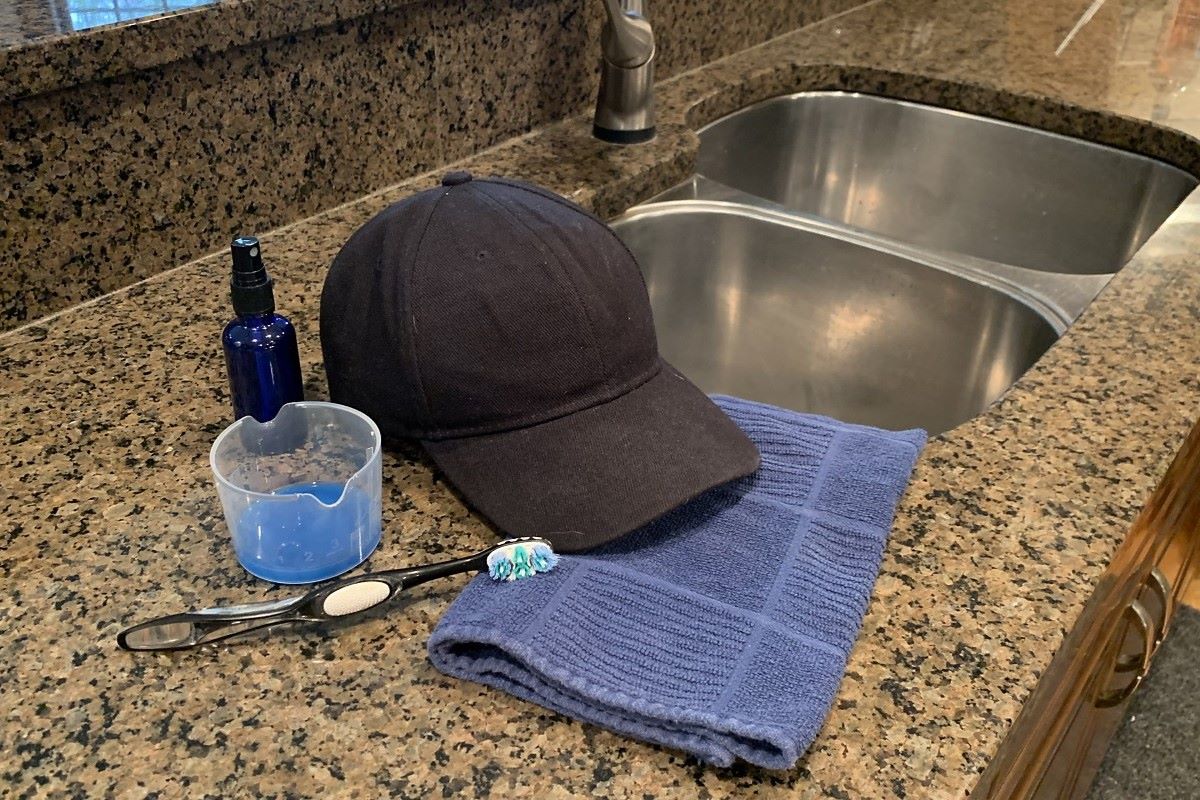
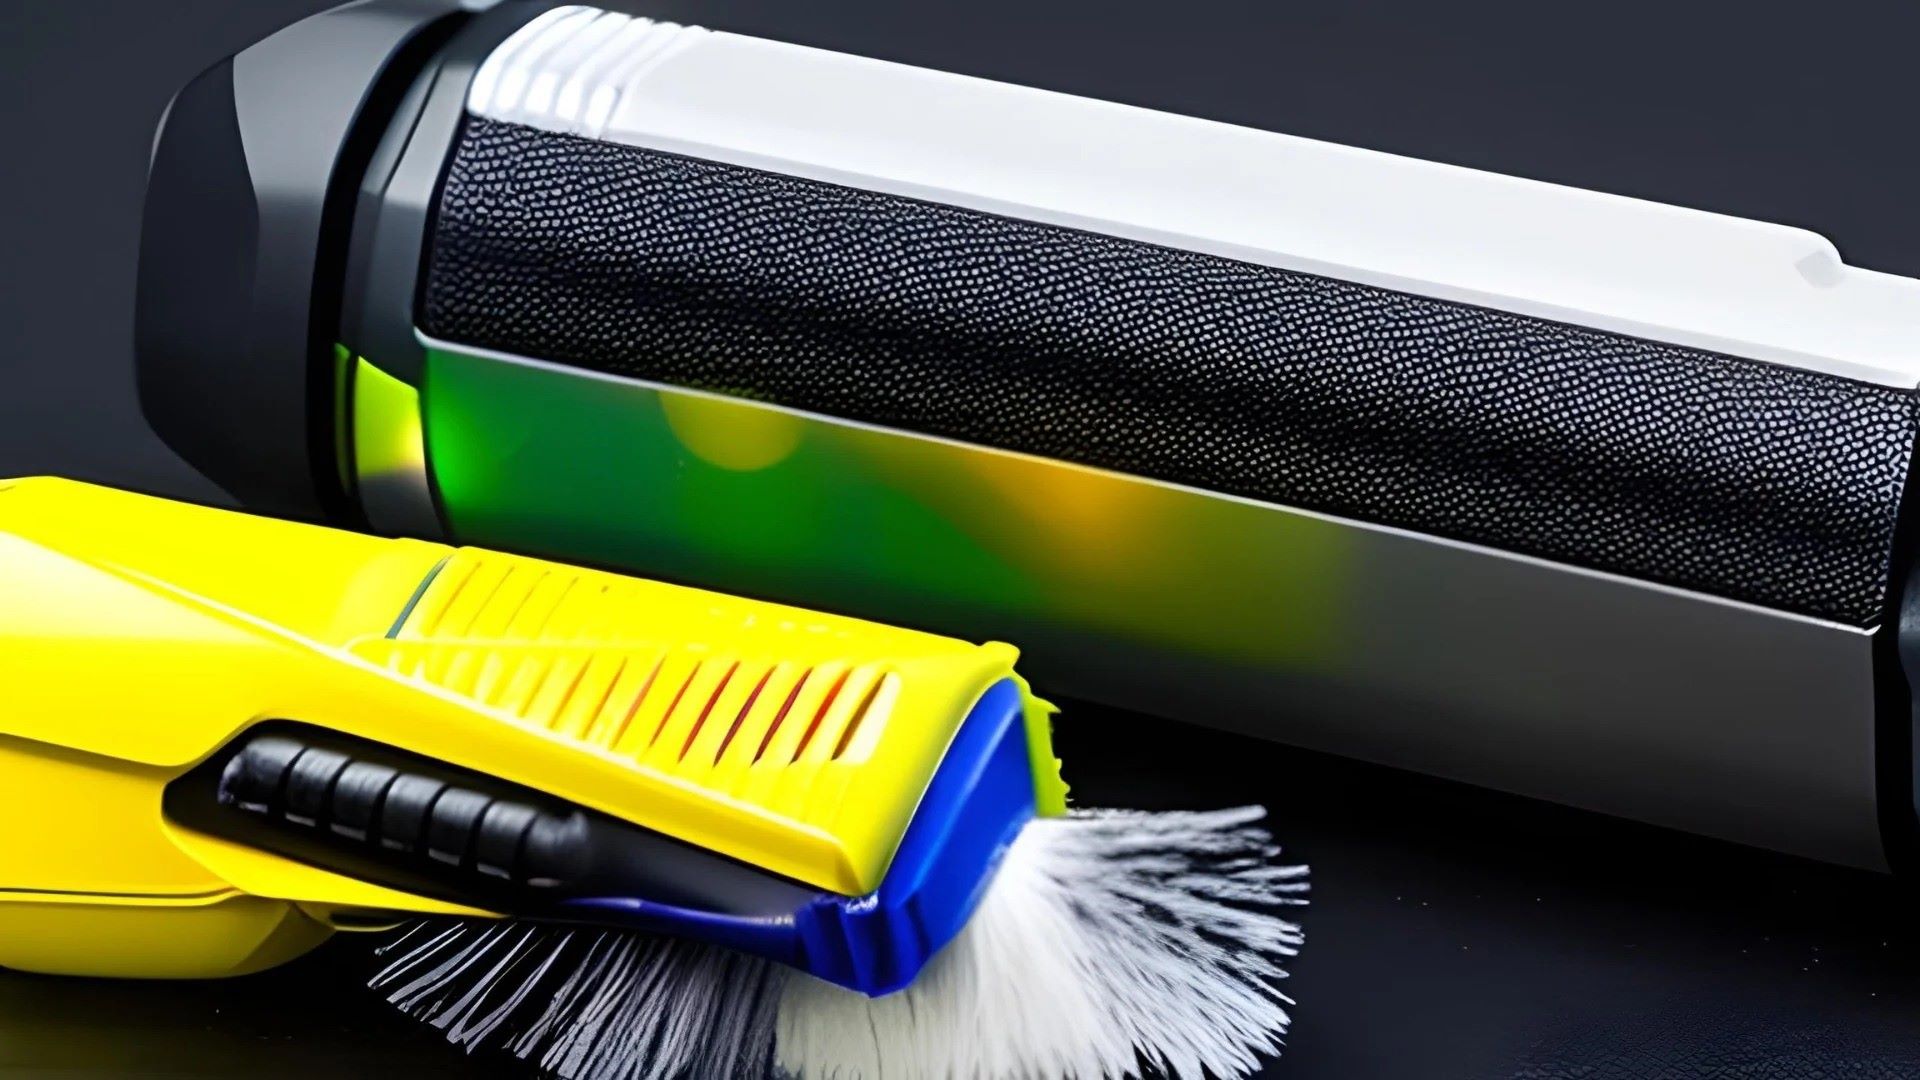
Before embarking on the cleaning process, it's essential to gather the necessary supplies to ensure a thorough and effective cleaning of your flashlight. Here's what you'll need:
-
Mild Soap or Detergent: Opt for a gentle, non-abrasive soap or detergent to clean the exterior of the flashlight without causing damage to the surface.
-
Soft Cloth or Microfiber Towel: Choose a soft, lint-free cloth or microfiber towel to wipe down the exterior of the flashlight and remove any dirt, grime, or residue.
-
Cotton Swabs or Soft-bristled Brush: These tools are ideal for reaching crevices and corners, allowing you to remove dirt and debris from hard-to-reach areas without causing damage to the flashlight.
-
Rubbing Alcohol: Use rubbing alcohol to clean the lens and remove any smudges, fingerprints, or stubborn stains that may affect the clarity of the light beam.
-
Water and Distilled White Vinegar: If the exterior of the flashlight is particularly dirty or greasy, a solution of water and distilled white vinegar can be used to gently clean the surface.
-
Q-tips or Cotton Pads: These can be used to apply cleaning solutions and reach small areas for detailed cleaning.
-
Screwdriver (if applicable): If your flashlight has removable parts or a battery compartment that requires cleaning, a screwdriver may be necessary to disassemble the components.
By ensuring that you have these supplies on hand, you'll be well-equipped to proceed with the subsequent steps of the cleaning process, effectively restoring your flashlight to its optimal condition. With these tools at your disposal, you can confidently tackle the task of cleaning your flashlight, ensuring that it remains a reliable source of illumination for your various needs.
Step 2: Remove batteries
Before delving into the cleaning process, it's crucial to remove the batteries from your flashlight. This step is essential to prevent any accidental activation of the light and to ensure the safety of the cleaning process.
-
Locate the Battery Compartment: Depending on the type of flashlight you have, the battery compartment may be located at the base, under the head, or within the body of the flashlight. Carefully inspect the exterior of the flashlight to identify the compartment's location.
-
Unscrew or Slide Open the Compartment: If your flashlight features a screw-on cap or a sliding mechanism to access the batteries, use the appropriate tool or method to open the compartment. In some models, a simple counterclockwise twist will release the cap, while others may require a sliding motion to access the batteries.
-
Remove the Batteries: Once the compartment is open, gently remove the batteries from their housing. Take care to note the orientation of the batteries, especially if they are of different types or sizes, as this will be crucial when reassembling the flashlight.
-
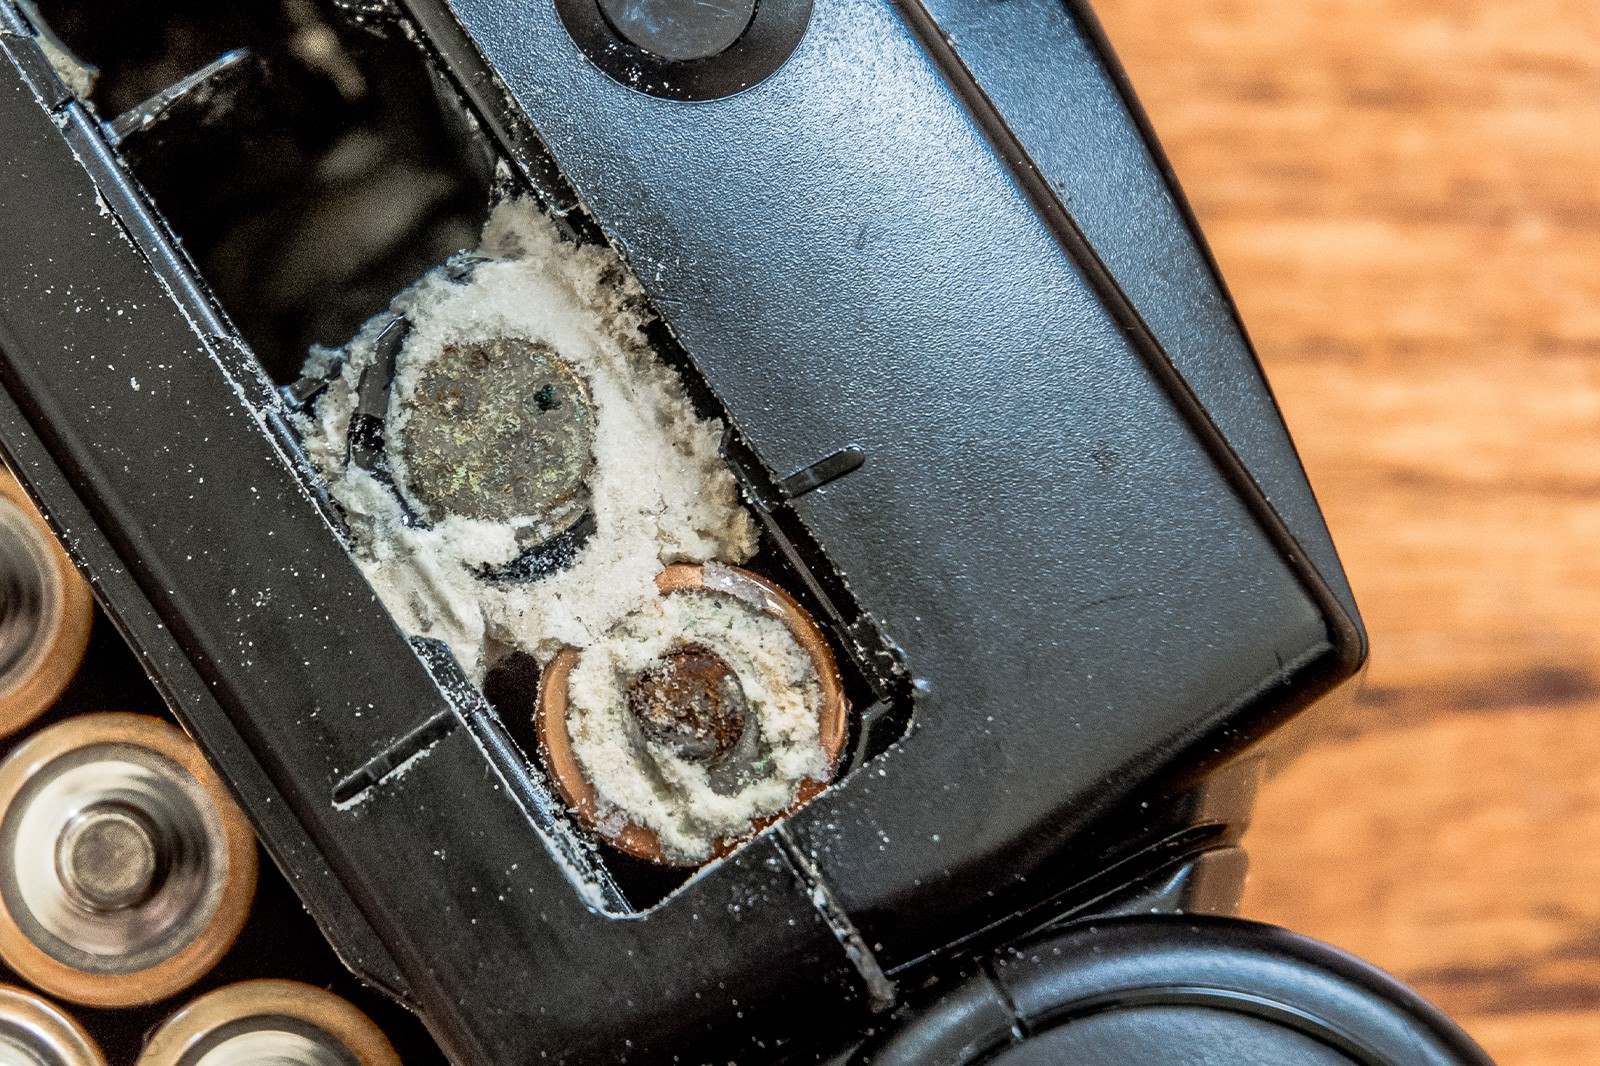
Inspect the Battery Compartment: While the batteries are removed, take a moment to inspect the interior of the battery compartment. Look for any signs of corrosion, such as white or greenish residue, which may have developed over time. If corrosion is present, it will need to be addressed before reinserting new batteries.
By removing the batteries at the outset of the cleaning process, you can proceed with the subsequent steps without the risk of accidental activation. Additionally, this step allows for a thorough inspection of the battery compartment, ensuring that any maintenance or cleaning required in this area can be addressed before reassembling the flashlight.
Step 3: Clean the exterior
Cleaning the exterior of your flashlight is a crucial step in maintaining its functionality and appearance. Over time, dirt, grime, and residue can accumulate on the surface, potentially hindering the performance of the flashlight. By following these detailed steps, you can effectively restore the exterior of your flashlight to its optimal condition.
-
Wipe Down the Surface: Begin by using a soft, lint-free cloth or microfiber towel to gently wipe down the exterior of the flashlight. This initial step helps remove loose dirt, dust, and surface grime, preparing the flashlight for a more thorough cleaning.
-
Prepare a Cleaning Solution: If the exterior of the flashlight exhibits stubborn dirt, grease, or residue, prepare a mild cleaning solution by mixing water with a small amount of gentle soap or detergent. Alternatively, a solution of water and distilled white vinegar can be used for tougher stains. Dampen a soft cloth or cotton pad with the cleaning solution, ensuring it is not overly saturated.
-
Gently Clean the Surface: With the dampened cloth or cotton pad, carefully wipe the exterior of the flashlight, paying attention to areas with visible dirt or grime. Use gentle, circular motions to lift and remove the residue without applying excessive pressure, which could potentially damage the surface.
-
Address Stubborn Stains: For particularly stubborn stains or sticky residue, a soft-bristled brush or cotton swab can be used to gently scrub the affected areas. Take care to avoid abrasive materials or harsh chemicals that could damage the finish of the flashlight.
-
Dry the Surface: Once the exterior has been thoroughly cleaned, use a dry, clean cloth to carefully dry the surface of the flashlight. Ensure that no moisture remains, especially in crevices or around buttons and switches.
-
Inspect for Residue: After the cleaning process, inspect the exterior of the flashlight to ensure that all residue has been effectively removed. Pay attention to details such as engraved markings, textured grips, and any intricate designs, ensuring that these areas are free from dirt and grime.
By following these detailed steps, you can effectively clean the exterior of your flashlight, restoring its appearance and ensuring that it remains in optimal condition. A clean exterior not only enhances the visual appeal of the flashlight but also contributes to its overall performance and longevity. With the exterior now revitalized, the next step involves addressing the lens to ensure a clear and unobstructed light beam.
Step 4: Clean the lens
Cleaning the lens of your flashlight is a critical step in maintaining its functionality and ensuring a clear, unobstructed light beam. Over time, the lens can accumulate dust, smudges, and other residues that diminish the clarity and brightness of the emitted light. By following these detailed steps, you can effectively clean the lens of your flashlight, restoring its optimal performance.
-
Inspect the Lens: Begin by carefully inspecting the lens of the flashlight. Look for any visible smudges, fingerprints, or dirt that may be obstructing the clarity of the lens. Additionally, check for any signs of damage or scratches that could affect the quality of the light beam.
-
Use Rubbing Alcohol: Dampen a soft, lint-free cloth or cotton pad with rubbing alcohol. Ensure that the cloth is not overly saturated, as excess liquid could seep into the internal components of the flashlight. The use of rubbing alcohol helps to dissolve and lift stubborn residues without leaving streaks or marks on the lens.
-
Gently Wipe the Lens: With the dampened cloth or cotton pad, gently wipe the lens in a circular motion, starting from the center and moving towards the outer edges. Take care to apply gentle pressure to avoid scratching the lens, especially if it is made of plastic or polycarbonate material. Repeat this process until the lens is free from smudges and residues.
-
Address Stubborn Stains: For persistent stains or marks on the lens, a cotton swab or microfiber brush can be used to target specific areas. Dip the cotton swab or brush in rubbing alcohol and carefully spot-clean the affected areas, ensuring that the lens is thoroughly cleaned without causing damage.
-
Dry the Lens: Once the lens has been cleaned, use a dry, clean cloth to carefully dry the surface. Ensure that no moisture or residue remains on the lens, as this could affect the clarity of the light beam when the flashlight is in use.
-
Inspect for Clarity: After cleaning the lens, hold the flashlight up to a light source and inspect the clarity of the lens. Look for any remaining smudges, streaks, or residues, ensuring that the lens is free from any obstructions that could affect the quality of the emitted light.
By following these detailed steps, you can effectively clean the lens of your flashlight, ensuring that it remains in optimal condition for reliable illumination. A clean lens not only enhances the brightness and clarity of the light beam but also contributes to the overall performance and functionality of the flashlight. With the lens now revitalized, the final step involves reassembling the components to restore the flashlight to its fully operational state.
Read more: How To Turn Off Flashlight On IPhone 12
Step 5: Reassemble the flashlight
After completing the meticulous cleaning process, reassembling the flashlight is the final step in restoring it to its fully operational state. Proper reassembly ensures that the components are securely in place, the batteries are correctly inserted, and the flashlight is ready for use whenever needed. Follow these detailed steps to effectively reassemble your flashlight:
-
Insert the Batteries: Begin by inserting the batteries back into the battery compartment, ensuring that they are placed in the correct orientation as noted during the initial removal. Take care to align the positive and negative terminals of the batteries with the corresponding markings or indicators within the compartment.
-
Secure the Battery Compartment: If the flashlight features a screw-on cap or a sliding mechanism to secure the battery compartment, carefully reattach or slide the cover back into place. Ensure that it is securely fastened to prevent any accidental dislodging of the batteries during use.
-
Reattach Removable Components: If any parts of the flashlight were removed during the cleaning process, such as a detachable head or tail cap, reattach these components securely. Use the appropriate method, whether it involves twisting, sliding, or snapping the parts back into place, ensuring a snug and secure fit.
-
Test the Functionality: Once the flashlight is reassembled, test its functionality to ensure that it operates as expected. Turn the flashlight on and off, cycle through any adjustable modes or settings, and check the beam intensity to verify that the cleaning process has not affected its performance.
-
Inspect for Loose Parts: After reassembly, inspect the flashlight for any loose parts, rattling components, or irregularities that may have arisen during the cleaning and reassembly process. Address any issues promptly to ensure that the flashlight is in optimal working condition.
By following these detailed steps, you can effectively reassemble your flashlight, ensuring that it is ready for use with restored functionality and cleanliness. A properly reassembled flashlight not only ensures reliable performance but also reflects the care and attention invested in maintaining this essential tool. With the flashlight now fully reassembled, it is poised to provide dependable illumination for your various needs, whether it's navigating the outdoors, handling household tasks, or addressing emergency situations.
Conclusion
In conclusion, the process of cleaning a flashlight is a simple yet essential task that can significantly impact its performance, longevity, and overall functionality. By following the step-by-step guide outlined in this comprehensive article, you can effectively revitalize your flashlight, ensuring that it remains a reliable source of illumination for various purposes.
The initial step of gathering the necessary supplies sets the stage for a thorough cleaning process, equipping you with the tools needed to address both the exterior and interior components of the flashlight. From mild soap and soft cloths to rubbing alcohol and cotton swabs, these supplies play a crucial role in restoring the cleanliness and functionality of the flashlight.
Removing the batteries before embarking on the cleaning process is a critical safety measure, preventing any accidental activation of the light and allowing for a thorough inspection of the battery compartment. This step ensures that the internal components of the flashlight are protected during the cleaning process and sets the stage for a comprehensive revitalization.
Cleaning the exterior and lens of the flashlight involves meticulous attention to detail, ensuring that dirt, grime, and residues are effectively removed without causing damage to the surface or lens. The use of gentle cleaning solutions, soft cloths, and careful techniques contributes to the restoration of the flashlight's appearance and the clarity of the emitted light.
Reassembling the flashlight marks the final step in the cleaning process, ensuring that the components are securely in place, the batteries are correctly inserted, and the flashlight is ready for reliable use. This step completes the comprehensive cleaning regimen, culminating in a fully operational and revitalized flashlight.
By investing the time and effort to clean your flashlight, you not only maintain its performance and longevity but also demonstrate a commitment to caring for your essential tools. Whether you rely on a flashlight for outdoor adventures, household tasks, or emergency situations, a clean and well-maintained flashlight is poised to serve you reliably whenever the need arises.
In essence, the process of cleaning a flashlight is a proactive measure that contributes to the preservation of this indispensable tool, ensuring that it continues to shine brightly and illuminate your way through various scenarios and challenges. With a revitalized flashlight at your disposal, you can approach each use with confidence, knowing that your reliable source of light is primed and ready to guide you through the darkness.