Home>Home and Garden>How To Clean Popcorn Ceiling

Home and Garden
How To Clean Popcorn Ceiling
Published: March 5, 2024
Learn the best techniques for cleaning popcorn ceilings in your home and garden. Discover easy tips for maintaining a fresh and tidy living space.
(Many of the links in this article redirect to a specific reviewed product. Your purchase of these products through affiliate links helps to generate commission for Noodls.com, at no extra cost. Learn more)
Table of Contents
Introduction
Cleaning a popcorn ceiling may seem like a daunting task, but with the right approach and materials, it can be a manageable and rewarding project. Over time, popcorn ceilings can accumulate dust, cobwebs, and other debris, leading to a dull and unappealing appearance. By taking the time to clean your popcorn ceiling, you can revitalize the entire room and create a fresher, more inviting atmosphere.
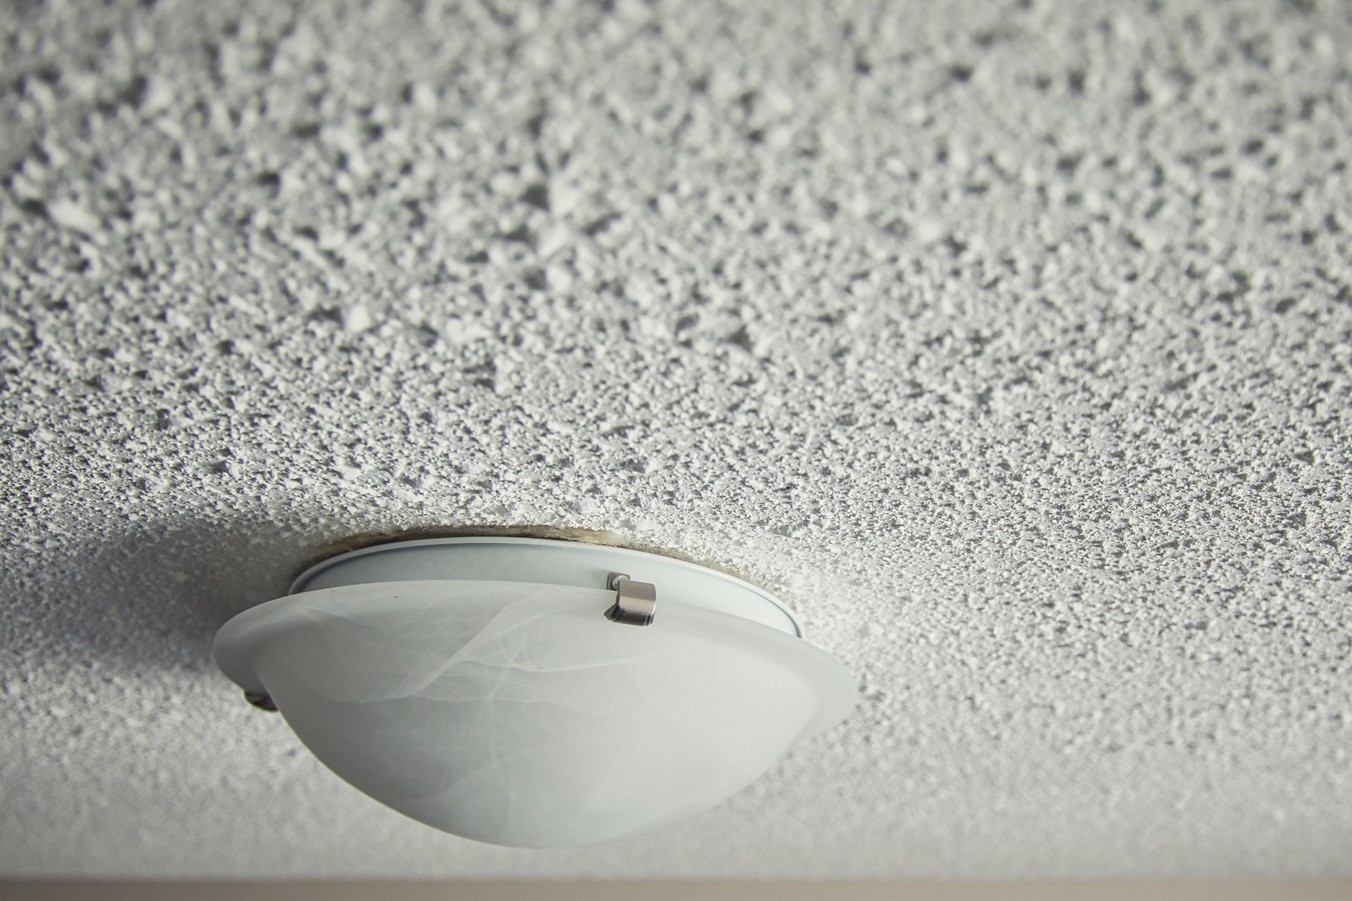
Popcorn ceilings, also known as textured or acoustic ceilings, were popular in the mid-20th century for their ability to hide imperfections and dampen sound. However, their irregular surface can make cleaning a bit more challenging than smooth ceilings. It's essential to approach the cleaning process with care to avoid damaging the texture or causing it to flake off.
In this guide, we will walk you through the step-by-step process of cleaning a popcorn ceiling, from gathering the necessary materials to applying the finishing touches. Whether you're preparing for a thorough spring cleaning or simply want to restore the luster of your ceiling, this comprehensive guide will equip you with the knowledge and confidence to tackle the task effectively.
By the end of this article, you will have a clear understanding of the materials needed, how to prepare the room for cleaning, the best methods for cleaning the popcorn ceiling, and the finishing touches to ensure a polished result. With these insights, you'll be well-prepared to embark on your popcorn ceiling cleaning journey and transform your living space into a brighter, more inviting environment. Let's dive in and discover the secrets to achieving a beautifully clean popcorn ceiling.
Read more: How To Measure A Ceiling Fan
Materials Needed
To effectively clean a popcorn ceiling, you will need a few essential materials to ensure a thorough and safe cleaning process. Here's a detailed list of the items you'll need to gather before getting started:
-
Step ladder or sturdy platform: Since popcorn ceilings are typically located at a considerable height, a step ladder or a sturdy platform is essential for reaching the ceiling safely and comfortably. Ensure that the ladder or platform is stable and secure before use.
-
Protective eyewear and mask: Cleaning a popcorn ceiling can release dust and debris into the air, so it's crucial to protect your eyes and respiratory system. Wear protective eyewear and a mask to shield yourself from potential irritants during the cleaning process.
-
Soft-bristled brush or vacuum with brush attachment: A soft-bristled brush or a vacuum with a brush attachment is ideal for gently removing surface dust and debris from the popcorn texture. Avoid using stiff brushes or abrasive materials that could damage the texture.
-
Clean microfiber cloths or sponge: Soft, clean microfiber cloths or a sponge are essential for wiping down the ceiling surface after removing loose debris. These materials are gentle enough to avoid damaging the texture while effectively capturing remaining dust and dirt.
-
Mild detergent or cleaning solution: Prepare a mild detergent solution or use a specialized cleaning solution designed for delicate surfaces. Avoid harsh chemicals or abrasive cleaners, as they can compromise the integrity of the popcorn texture.
-
Spray bottle: A spray bottle filled with the diluted cleaning solution will facilitate even application and prevent excessive moisture buildup on the ceiling.
-
Painter's tape: Use painter's tape to protect walls, trim, and other adjacent surfaces from accidental splashes or drips during the cleaning process.
-
Drop cloths or plastic sheeting: Cover the floor and furniture with drop cloths or plastic sheeting to prevent any cleaning solution or debris from settling on surfaces below the ceiling.
-
Soft-bristled paintbrush: A soft-bristled paintbrush can be used to touch up any areas of the popcorn texture that may have been lightly disturbed during the cleaning process.
By ensuring that you have these materials on hand, you'll be well-prepared to tackle the task of cleaning your popcorn ceiling effectively and safely. With the right tools and a systematic approach, you can restore the pristine appearance of your ceiling and breathe new life into your living space.
Preparing the Room
Before embarking on the process of cleaning your popcorn ceiling, it's crucial to prepare the room to ensure a smooth and efficient cleaning experience. Proper preparation not only safeguards your furnishings and surfaces but also minimizes the risk of accidental damage during the cleaning process. Here's a detailed guide on how to prepare the room for cleaning your popcorn ceiling:
-
Clear the Space: Begin by removing any furniture, decorations, or other items from the room. Clearing the space beneath the ceiling will prevent accidental splashes or spills from coming into contact with your belongings. If relocating furniture is not feasible, cover them with drop cloths or plastic sheeting to shield them from potential cleaning solution drips or debris.
-
Protect Flooring and Surfaces: Lay down drop cloths or plastic sheeting to cover the floor and any remaining furniture. This protective barrier will capture any debris or cleaning solution that may fall during the cleaning process, preventing it from settling on surfaces and making cleanup more manageable.
-
Secure Adjacent Surfaces: Use painter's tape to secure the edges of the drop cloths or plastic sheeting to the baseboards and walls. This will create a secure boundary and minimize the risk of the protective coverings shifting or exposing surfaces to potential damage.
-
Ventilation: Ensure that the room is well-ventilated by opening windows and doors to allow for adequate airflow. Proper ventilation will help dissipate any airborne dust or cleaning solution fumes, creating a more comfortable environment for the cleaning process.
-
Turn Off HVAC Systems: If possible, turn off any heating, ventilation, or air conditioning systems in the room to prevent the circulation of dust and debris during the cleaning process. This will help maintain a cleaner environment and reduce the likelihood of particles settling on surfaces.
-
Gather Cleaning Materials: Double-check that you have all the necessary cleaning materials and tools within reach. Having everything readily accessible will streamline the cleaning process and minimize interruptions as you work through each step.
By meticulously preparing the room before cleaning your popcorn ceiling, you can create a controlled and protected environment that sets the stage for a successful cleaning endeavor. Taking the time to prepare the space will not only safeguard your belongings and surfaces but also contribute to a more efficient and satisfying cleaning experience. With the room properly prepared, you're now ready to embark on the next phase of the popcorn ceiling cleaning process.
Cleaning the Popcorn Ceiling
With the room meticulously prepared, you're now poised to embark on the pivotal phase of cleaning your popcorn ceiling. This process requires a delicate touch and a systematic approach to ensure that the textured surface is effectively cleansed without compromising its integrity. Here's a comprehensive guide on how to clean your popcorn ceiling, step by step:
-
Begin with Surface Dust Removal: Using a soft-bristled brush or a vacuum with a brush attachment, gently remove loose dust and debris from the popcorn texture. Work methodically across the ceiling, employing light, sweeping motions to dislodge and capture surface particles without agitating the texture excessively.
-
Address Stubborn Stains and Spots: If you encounter stubborn stains or spots on the ceiling, lightly dab the affected areas with a clean microfiber cloth or sponge. Avoid applying excessive pressure, as this could disturb the texture. For particularly challenging stains, consider using a mild detergent solution applied sparingly to the cloth or sponge.
-
Apply the Cleaning Solution: Fill a spray bottle with the diluted cleaning solution, ensuring that it is not overly concentrated. Working in small sections, lightly mist the popcorn ceiling with the cleaning solution. Be mindful not to oversaturate the texture, as excessive moisture can compromise its integrity.
-
Gently Wipe Down the Ceiling: Using a clean microfiber cloth or sponge, gently wipe down the misted sections of the ceiling. Employ light, circular motions to capture any remaining dust and grime while being mindful of the delicate texture. As you progress, periodically inspect the cloth or sponge for accumulated debris, switching to a fresh one as needed.
-
Touch Up Any Disturbed Areas: Throughout the cleaning process, you may encounter lightly disturbed areas of the popcorn texture. Using a soft-bristled paintbrush, delicately touch up these areas by lightly blending the texture to restore its uniform appearance.
-
Allow the Ceiling to Dry: Once the cleaning process is complete, allow the ceiling to air dry thoroughly. Ensure that the room remains well-ventilated during this time to expedite the drying process and prevent the accumulation of moisture.
By following these meticulous steps, you can effectively cleanse your popcorn ceiling, revitalizing its appearance and restoring a fresh, clean ambiance to the room. With patience and attention to detail, you'll achieve a beautifully clean popcorn ceiling that enhances the overall aesthetic of your living space.
Finishing Touches
After completing the meticulous process of cleaning your popcorn ceiling, it's essential to attend to the finishing touches to ensure a polished and pristine result. These final steps will not only enhance the visual appeal of the ceiling but also contribute to a more cohesive and inviting atmosphere within the room. Here's a detailed guide on the finishing touches that will elevate the overall impact of your freshly cleaned popcorn ceiling:
-
Inspect for Residual Debris: Once the ceiling has dried completely, conduct a thorough inspection to ensure that no residual debris or streaks remain. Take a moment to scrutinize the entire surface, paying attention to any areas that may require additional attention or touch-ups.
-
Evaluate Lighting and Shadows: Assess the impact of lighting on the cleaned popcorn ceiling. Natural and artificial lighting can accentuate the texture and reveal any imperfections or missed spots. Walk around the room and observe the ceiling from different angles to identify any areas that may require further cleaning or adjustment.
-
Address Lingering Stains or Spots: If you notice lingering stains or spots after the ceiling has dried, carefully revisit these areas with a gentle touch. Using a clean microfiber cloth or sponge, lightly address the remaining blemishes, taking care not to disturb the surrounding texture.
-
Revisit Touch-Up Areas: Reassess any areas where the popcorn texture was lightly disturbed during the cleaning process. Employ a soft-bristled paintbrush to delicately blend and refine these sections, ensuring a seamless and uniform appearance across the entire ceiling.
-
Enhance Surrounding Décor: Consider how the refreshed ceiling complements the surrounding décor and furnishings. Take this opportunity to rearrange or enhance the room's aesthetic elements to harmonize with the revitalized ceiling, creating a cohesive and visually appealing environment.
-
Appreciate the Transformation: Take a moment to appreciate the transformation that the freshly cleaned popcorn ceiling has brought to the room. Notice the renewed brightness and cleanliness that contribute to a more inviting and uplifting atmosphere.
By attending to these finishing touches, you can elevate the impact of your popcorn ceiling cleaning endeavor, achieving a refined and rejuvenated result. With a keen eye for detail and a commitment to excellence, the finishing touches will culminate in a visually stunning and harmonious living space that reflects your dedication to maintaining a clean and inviting home environment.
Read more: How To Balance A Ceiling Fan
Conclusion
In conclusion, cleaning a popcorn ceiling is a task that demands patience, attention to detail, and the right set of tools and techniques. By following the step-by-step process outlined in this guide, you can effectively revitalize your living space and restore the luster of your popcorn ceiling. From meticulously preparing the room to delicately cleaning the textured surface and attending to the finishing touches, each phase of the cleaning process plays a crucial role in achieving a beautifully clean and inviting ceiling.
As you stand back and admire the transformation, take pride in the renewed brightness and cleanliness that the freshly cleaned popcorn ceiling brings to the room. The revitalized ceiling not only enhances the overall aesthetic but also contributes to a more inviting and uplifting atmosphere within your home. The effort invested in cleaning your popcorn ceiling is a testament to your commitment to maintaining a clean and welcoming living environment for yourself and your loved ones.
Furthermore, the systematic approach to cleaning a popcorn ceiling ensures that the integrity of the textured surface is preserved, preventing unnecessary damage or flaking. By employing gentle techniques and using appropriate cleaning materials, you can achieve a pristine result without compromising the unique character of the popcorn texture.
As you complete the cleaning process and attend to the finishing touches, take the opportunity to appreciate the impact of the refreshed ceiling on the room's ambiance. The harmonious interplay between the revitalized ceiling and the surrounding décor creates a cohesive and visually stunning environment that reflects your dedication to creating a comfortable and aesthetically pleasing living space.
In essence, the journey of cleaning a popcorn ceiling is not just about removing dust and debris; it's about revitalizing and transforming your living space into a brighter, more inviting sanctuary. With the insights and techniques gained from this guide, you are well-equipped to embark on your popcorn ceiling cleaning journey with confidence and achieve a beautifully clean and rejuvenated result that elevates the overall appeal of your home.

