Home>Home and Garden>How To Clean A Porcelain Sink
Home and Garden
How To Clean A Porcelain Sink
Published: March 3, 2024
Learn how to effectively clean a porcelain sink with simple home and garden solutions. Keep your sink looking pristine with these easy cleaning tips.
(Many of the links in this article redirect to a specific reviewed product. Your purchase of these products through affiliate links helps to generate commission for Noodls.com, at no extra cost. Learn more)
Table of Contents
Introduction
A porcelain sink is a beautiful and classic addition to any kitchen or bathroom. Its smooth, glossy surface exudes elegance and charm, but over time, it can become marred by stains, scratches, and grime. Proper maintenance and regular cleaning are essential to preserve the pristine appearance of a porcelain sink and extend its lifespan.
In this comprehensive guide, we will walk you through the step-by-step process of effectively cleaning a porcelain sink, restoring its luster, and keeping it looking as good as new. Whether you're dealing with stubborn stains, mineral deposits, or simply want to maintain the sink's pristine condition, this guide will equip you with the knowledge and techniques to achieve a sparkling clean porcelain sink.
By following the methods outlined in this article, you can bid farewell to unsightly blemishes and welcome back the gleaming beauty of your porcelain sink. With just a few simple materials and a bit of elbow grease, you can transform your sink from dull and dingy to radiant and inviting.
So, roll up your sleeves, gather your cleaning supplies, and let's dive into the process of rejuvenating your porcelain sink to its former glory. Whether it's a farmhouse-style kitchen sink or a vintage pedestal sink in the bathroom, the following steps will help you achieve a spotless and dazzling porcelain sink that will be the envy of all who lay eyes on it.
Read more: How To Get Hair Dye Off Of Sink
Materials Needed
To embark on the journey of restoring your porcelain sink to its pristine condition, you'll need a few essential materials that are readily available and effective in tackling various types of stains and blemishes. Here's a comprehensive list of the items you'll need to gather before you begin the cleaning process:
-
Baking Soda: This versatile and gentle abrasive is a staple for cleaning porcelain sinks. It effectively removes stains and grime without scratching the delicate surface.
-
White Vinegar: Known for its natural cleaning properties, white vinegar is excellent for dissolving mineral deposits and soap scum, leaving the sink sparkling clean.
-
Soft Sponge or Cloth: Opt for a non-abrasive sponge or cloth to avoid scratching the porcelain surface while effectively scrubbing away dirt and stains.
-
Soft-Bristled Brush: A soft-bristled brush is ideal for reaching into the corners and crevices of the sink, ensuring a thorough cleaning process.
-
Lemon: The natural acidity of lemon makes it a great ally in combating tough stains and imparting a fresh, citrusy scent to the sink.
-
Hydrogen Peroxide: This mild bleaching agent is effective in removing stubborn stains and disinfecting the sink.
-
Rubber Gloves: Protect your hands from harsh cleaning agents and hot water by using rubber gloves throughout the cleaning process.
-
Microfiber Cloth: Use a microfiber cloth for drying the sink after cleaning to prevent water spots and maintain its glossy finish.
-
Old Toothbrush: Repurpose an old toothbrush to reach tight spots and seams where grime tends to accumulate.
-
Mild Dish Soap: A gentle dish soap will be useful for preliminary cleaning and removing grease and food residue from the sink.
-
Optional: Commercial Porcelain Cleaner: If the sink requires intensive cleaning, a commercial porcelain cleaner can be used as a supplementary cleaning agent.
By assembling these materials, you'll be well-equipped to tackle various types of stains and maintain the pristine condition of your porcelain sink. With these items at your disposal, you're ready to embark on the journey of restoring your sink to its original radiance.
Step 1: Clearing the Sink
Before diving into the cleaning process, it's essential to clear the sink of any debris, dishes, or utensils. Start by removing any dishes, sponges, or other items from the sink, and transfer them to a safe location. This step ensures that the sink is completely empty and ready for the cleaning process.
Next, clear the drain of any food particles, soap residue, or other debris that may have accumulated. Use a sink strainer or your hands to remove any visible debris, ensuring that the drain is free from blockages and buildup. This simple yet crucial step prevents clogging and allows for a thorough cleaning of the entire sink surface.
Once the sink and drain are clear of any obstructions, run hot water to flush out any remaining debris and prepare the sink for the cleaning process. The hot water helps to loosen any stubborn grime and prepares the surface for the application of cleaning agents.
By clearing the sink of dishes, utensils, and debris, you create a clean canvas for the subsequent cleaning steps. This initial preparation sets the stage for a comprehensive and effective cleaning process, ensuring that every nook and cranny of the porcelain sink can be thoroughly cleaned and restored to its original luster.
With the sink cleared and the drain free of debris, you're now ready to move on to the next step in the process of rejuvenating your porcelain sink.
Step 2: Applying the Cleaner
With the sink cleared and the surface prepared, it's time to apply the chosen cleaner to begin the process of restoring the porcelain sink to its pristine condition. The choice of cleaner depends on the type of stains and blemishes present in the sink, as well as personal preferences for natural or commercial cleaning agents.
Baking Soda and Vinegar Paste
One of the most popular and effective natural cleaners for porcelain sinks is a paste made from baking soda and white vinegar. To create this powerful cleaning agent, start by sprinkling a generous amount of baking soda directly onto the surface of the sink. Next, pour white vinegar over the baking soda, causing a fizzing reaction that helps to lift stains and grime from the porcelain surface.
Read more: How To Remove Sink Stopper
Lemon and Hydrogen Peroxide Solution
For sinks with stubborn stains or discoloration, a mixture of lemon juice and hydrogen peroxide can work wonders. Squeeze fresh lemon juice onto the stained areas of the sink, followed by a gentle application of hydrogen peroxide. The natural acidity of the lemon combined with the mild bleaching properties of hydrogen peroxide effectively targets and lifts tough stains from the porcelain surface.
Commercial Porcelain Cleaner
In cases where the sink requires intensive cleaning or is plagued by persistent stains, a commercial porcelain cleaner can be used as a potent solution. Follow the manufacturer's instructions for the specific cleaner chosen, applying it to the sink surface and allowing it to sit for the recommended duration to penetrate and dissolve stubborn stains.
Application and Dwell Time
Regardless of the chosen cleaner, it's essential to ensure thorough coverage of the sink surface, paying special attention to areas with visible stains or discoloration. Once the cleaner is applied, allow it to dwell on the surface for the recommended time to effectively break down and lift the stains. During this dwell time, the cleaner works its magic, loosening grime and preparing the sink for the next crucial step in the cleaning process.
By applying the chosen cleaner and allowing it to work its magic, you're one step closer to achieving a sparkling clean porcelain sink. The careful application of the cleaner sets the stage for the subsequent scrubbing and rinsing steps, bringing you closer to the goal of restoring your sink to its original radiance.
Step 3: Scrubbing the Sink
After allowing the cleaner to work its magic on the porcelain sink, it's time to roll up your sleeves and engage in the scrubbing process. This step is crucial for dislodging stubborn stains, grime, and mineral deposits from the sink's surface, revealing its inherent luster and pristine beauty.
Armed with a soft sponge, cloth, or soft-bristled brush, begin gently scrubbing the entire surface of the sink. Focus on areas with visible stains or discoloration, applying gentle yet firm pressure to lift the loosened grime and reveal the smooth, glossy porcelain underneath. For tight spots and seams, utilize an old toothbrush to reach into crevices and ensure a thorough cleaning process.
As you scrub, pay attention to circular motions and gentle back-and-forth movements, ensuring that the entire surface is effectively cleaned without causing any damage. The goal is to remove all traces of stains, soap scum, and mineral deposits, unveiling a sink that gleams with renewed brilliance.
For particularly stubborn stains, consider creating a paste of baking soda and water, applying it to the affected areas, and allowing it to sit for a few minutes before gently scrubbing. The mild abrasive nature of baking soda aids in lifting tough stains without harming the delicate porcelain surface.
Throughout the scrubbing process, periodically rinse the sponge, cloth, or brush to remove loosened grime and prevent it from being redistributed onto the sink's surface. This ensures that the cleaning process remains effective and that the sink is thoroughly cleaned without leaving behind residue.
As you diligently scrub the sink, take a moment to appreciate the transformation taking place. With each gentle stroke, the sink begins to shed its dull appearance, gradually revealing the radiant and inviting surface that lies beneath. This process of rejuvenation not only restores the sink's aesthetic appeal but also revitalizes the entire space, infusing it with a sense of cleanliness and freshness.
Once you've thoroughly scrubbed the entire surface of the sink, take a step back and admire the remarkable difference. The once-dull and blemished porcelain has been revitalized, now exuding a captivating sheen and pristine allure. This transformation is a testament to the power of proper cleaning and maintenance, showcasing the enduring beauty of a well-cared-for porcelain sink.
With the scrubbing process complete, the sink is now ready for the final steps of rinsing and drying, bringing it one step closer to reclaiming its status as the focal point of your kitchen or bathroom.
Step 4: Rinsing and Drying
With the scrubbing process complete, it's time to proceed with the crucial steps of rinsing and drying the porcelain sink. These final stages are essential for removing any residual cleaner, grime, and water, ensuring that the sink's surface is left immaculately clean and free from streaks or water spots.
Begin by thoroughly rinsing the entire sink with warm water, using a gentle stream to wash away any remaining cleaner and loosened grime. Pay special attention to corners, seams, and crevices, ensuring that all traces of the cleaning agent are effectively removed. This rinsing process not only cleanses the sink but also prepares it for the final step of drying, allowing the porcelain surface to shine without any lingering residue.
Once the sink has been meticulously rinsed, use a clean microfiber cloth to carefully dry the entire surface. Wipe in circular motions, starting from the back and working your way toward the front, ensuring that every inch of the sink is thoroughly dried. This meticulous drying process prevents water spots and streaks, preserving the sink's glossy finish and leaving it gleaming with a radiant allure.
For areas that are difficult to reach with a cloth, such as tight corners and around the drain, utilize a dry, soft-bristled brush to ensure that all moisture is effectively removed. This attention to detail guarantees that the sink's surface is left impeccably dry, ready to showcase its renewed luster and pristine appearance.
As you diligently dry the sink, take a moment to appreciate the transformation that has taken place. The once-dull and blemished porcelain has been revitalized, now exuding a captivating sheen and pristine allure. This process of rejuvenation not only restores the sink's aesthetic appeal but also revitalizes the entire space, infusing it with a sense of cleanliness and freshness.
Upon completing the rinsing and drying process, step back and admire the remarkable difference. The porcelain sink, once marred by stains and grime, now stands as a testament to the power of proper cleaning and maintenance. Its gleaming surface beckons with an irresistible charm, reclaiming its status as the focal point of your kitchen or bathroom.
With the sink now thoroughly rinsed and dried, it stands as a shining testament to the transformative power of proper cleaning and maintenance. By following these steps, you have successfully rejuvenated your porcelain sink, restoring its inherent beauty and ensuring that it remains a source of pride and elegance in your home.
Maintenance Tips
Maintaining the pristine condition of your porcelain sink is essential for preserving its timeless beauty and ensuring its longevity. By incorporating regular cleaning and simple maintenance practices into your routine, you can safeguard the sink against stains, scratches, and dullness, allowing it to remain a captivating focal point in your kitchen or bathroom. Here are some valuable maintenance tips to keep your porcelain sink looking as good as new:
-
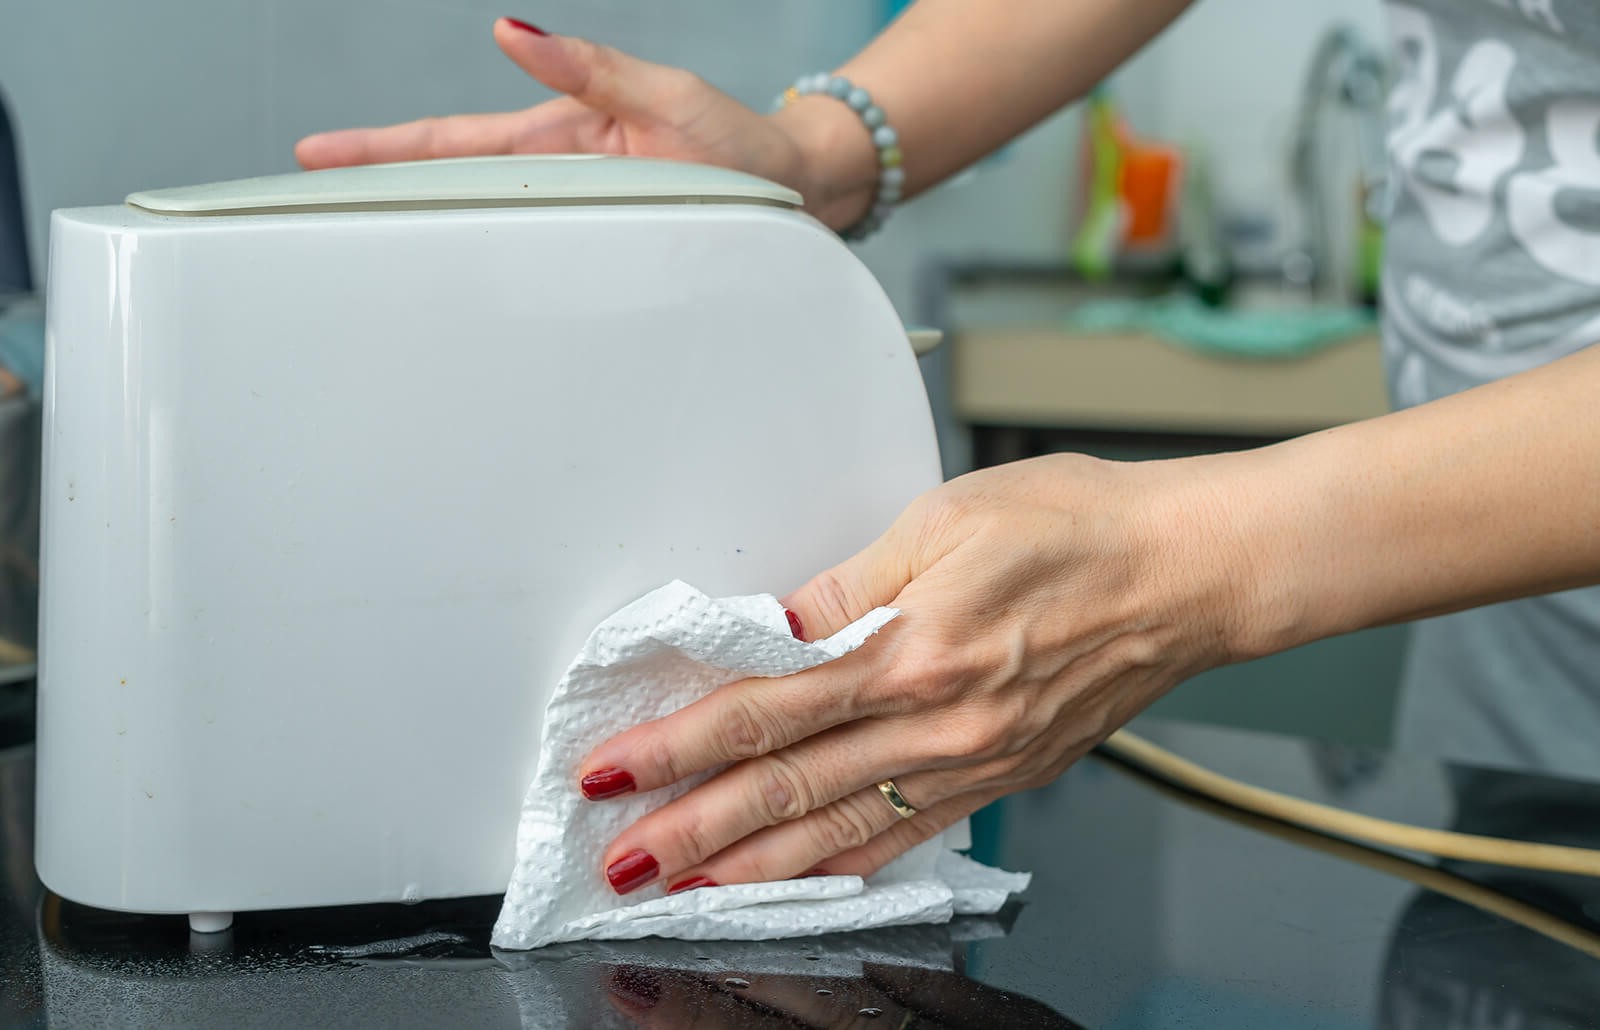
Daily Wipe-Down: After each use, take a moment to wipe down the sink with a soft cloth or sponge to remove any water spots, soap residue, or food particles. This simple daily practice prevents the accumulation of grime and maintains the sink's glossy finish.
-
Avoid Harsh Cleaners: When cleaning the sink, steer clear of harsh abrasive cleaners and scouring pads that can scratch the delicate porcelain surface. Opt for gentle cleaning agents such as baking soda, white vinegar, or mild dish soap to preserve the sink's luster.
-
Regular Deep Cleaning: Schedule regular deep cleaning sessions to tackle any stubborn stains or mineral deposits that may develop over time. By addressing these issues promptly, you can prevent them from becoming more challenging to remove.
-
Use Sink Protectors: Consider placing sink protectors or mats at the bottom of the sink to prevent scratches and minimize the impact of heavy cookware or utensils. These protective accessories act as a buffer, safeguarding the sink from potential damage.
-
Avoid Hot Pans and Sharp Objects: Refrain from placing hot pans or sharp objects directly onto the sink's surface, as these can cause thermal shock or scratches. Use trivets or protective pads to shield the sink from extreme temperatures and potential abrasions.
-
Regular Polishing: Periodically polish the sink with a non-abrasive porcelain cleaner or a mixture of water and white vinegar to maintain its glossy finish. This gentle polishing helps to remove water spots and restore the sink's radiant allure.
-
Inspect and Repair: Routinely inspect the sink for any signs of damage, such as chips or cracks, and address them promptly to prevent further deterioration. Small repairs can help preserve the sink's integrity and prevent more extensive issues.
By integrating these maintenance tips into your regular cleaning routine, you can ensure that your porcelain sink remains a stunning centerpiece in your home. With proper care and attention, your sink will continue to exude elegance and charm, captivating all who encounter its timeless allure.
Conclusion
In conclusion, the process of cleaning and rejuvenating a porcelain sink is not merely a chore; it is a transformative journey that restores the sink to its original radiance and ensures its enduring beauty. By following the step-by-step guide outlined in this article, you have embarked on a mission to reclaim the pristine allure of your porcelain sink, bidding farewell to stains, grime, and dullness.
As you reflect on the meticulous steps taken to clear, apply cleaner, scrub, rinse, and dry the sink, you have witnessed the remarkable transformation that has taken place. What was once a dull and blemished surface has been revitalized, now gleaming with an irresistible sheen and captivating allure. This process of rejuvenation not only restores the sink's aesthetic appeal but also revitalizes the entire space, infusing it with a sense of cleanliness and freshness.
The maintenance tips provided serve as a guide to preserving the sink's timeless beauty, ensuring that it remains a captivating focal point in your kitchen or bathroom. By incorporating these practices into your routine, you can safeguard the sink against stains, scratches, and dullness, allowing it to continue exuding elegance and charm for years to come.
As you stand back and admire the remarkable difference, you can take pride in the fact that your porcelain sink has been lovingly restored to its former glory. Its gleaming surface beckons with an irresistible charm, reclaiming its status as the focal point of your kitchen or bathroom. The enduring beauty of a well-cared-for porcelain sink is a testament to the transformative power of proper cleaning and maintenance.
In essence, the journey of cleaning a porcelain sink transcends the realm of household chores; it is a celebration of timeless elegance and the enduring allure of a well-maintained fixture. With each meticulous step, you have not only cleansed the sink but also revitalized a cherished element of your home, infusing it with a renewed sense of beauty and sophistication.
As you bid adieu to the cleaning process, you can revel in the captivating radiance of your porcelain sink, knowing that its timeless allure will continue to captivate all who encounter its pristine beauty.